

I felt the squelch before I saw the puddle. My favorite wool socks, completely ruined by a lukewarm mix of dirty water and lemon-scented detergent. I stood there in the dark, staring at my dishwasher, wishing it was just a loose hose or a simple clog. But as I pulled the bottom rack out and wiped away the residue, there it was: a jagged, hairline fracture in the plastic floor. It looked small, but in the world of appliance repair, that little crack is the equivalent of a sinking ship. Most people will tell you to just scrap the whole machine and start over. I almost did. But then I realized that with the right approach to diagnostics, you don’t always have to throw away a five-hundred-dollar investment over a piece of plastic. Today, I am going to walk you through how to determine if your tub is truly toast and the exact steps to take if you decide to fight back against the leak.
Your Kitchen Floor Doesn’t Have to Be a Swimming Pool
Seeing water where it shouldn’t be is terrifying. I spent three days thinking I needed a plumber when I actually just needed to learn how appliance diagnostics can save your warranty benefits. You see, the tub is the heart of the machine, and while plastic is durable, it is not invincible. Before you start shopping for a new unit, you need to make sure the leak isn’t actually coming from something cheaper. I once spent hours obsessing over a ‘crack’ that turned out to be a failing sump gasket that was simply spraying water upward. If you are lucky, you might just have a loose gasket or a drainage issue rather than a structural failure. But if the plastic itself has split, we need to talk about the reality of your options.
Is Repairing a Plastic Tub Actually Worth the Hassle?
This is the question I get asked most often. People are skeptical, and for good reason. According to data from the Association of Home Appliance Manufacturers (AHAM), the typical dishwasher is built to last about 9 to 10 years, and a tub replacement is labor-intensive. If your machine is out of warranty, the cost of a new tub and the time it takes to pull the entire machine apart often exceeds the cost of a new mid-range unit. However, if you have a premium model or you are savvy enough to claim a repair refund, it is absolutely worth the effort. Have you ever found a mystery puddle and just stared at it, hoping it would vanish? You aren’t alone.
The Day I Melted My Own Machine
Early in my DIY journey, I made a massive mistake that I don’t want you to repeat. I noticed my dishes weren’t drying, so I tinkered with the settings and ignored a slight burning plastic smell. It turns out, I should have been checking to verify my heating element wasn’t touching the plastic tub. That heat eventually warped and cracked the floor of my dishwasher. It was a rookie move. I didn’t realize that top signs of dishwasher trouble often start with these small, ignored warnings. Because I didn’t catch it early, I ended up in a fight with my provider, eventually learning why some warranty claims get denied for things that seem totally unrelated. If your tub is cracked, we are going to look at the ‘patch vs. replace’ debate and how to ensure your next move doesn’t void your coverage.
Find the Source Before Tearing Everything Apart
To catch a leak in a plastic tub, you have to act like a forensic investigator. Water is a master of disguise; it can travel along the underside of the frame and drip three feet away from the actual hole. Start by removing the kickplate—that bottom panel near the floor—and grabbing a high-powered flashlight. I once spent an entire afternoon chasing a drip I thought was a cracked tub, only to realize I simply needed to level your dishwasher to stop mystery leaks that were caused by water sloshing over the front lip. If the machine is tilted forward even a fraction of an inch, the tub isn’t the problem, the gravity is. 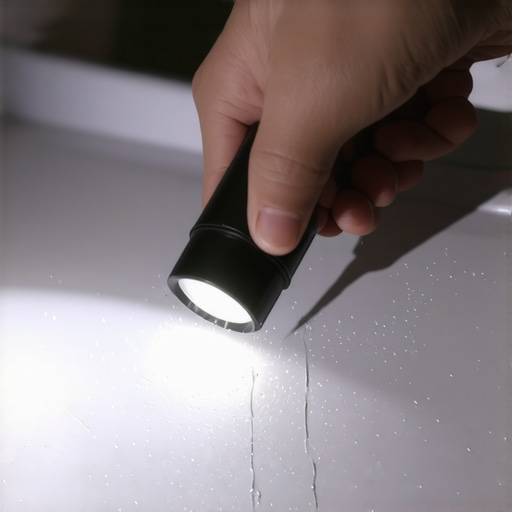
The Dry Rag and Flashlight Technique
Wipe every visible surface under the machine until it is bone dry. Lay down a few sheets of colored construction paper or paper towels. Run a short cycle and watch for the exact moment a drop hits the paper. If you see water weeping directly through the plastic floor, you’ve found your culprit. While you are under there with the lights out, it is also the perfect time to use the only multimeter settings you need for appliance repair to check the continuity of your heating element or drain pump. Often, a leak near a plastic housing is actually a sign that a component has overheated and compromised the surrounding material.
Why Your DIY Patch Might Fail Under Pressure
I once spent four hours meticulously applying marine-grade epoxy to a jagged crack near the heating element. I thought I was a genius until the first ‘Sanitize’ cycle hit. The plastic tub expanded as it heated up, but the cured epoxy stayed rigid. The result? The seal popped like a dry twig, and the leak came back twice as fast. This is the reality of troubleshooting dishwasher problems involving structural plastic. The constant cycle of freezing cold rinse water followed by 150-degree steam creates a ‘thermal seesaw’ that most glues can’t handle. If you choose to patch, you must use a food-safe, high-temperature silicone that remains flexible, but even then, it is usually a temporary fix to buy you time until a new machine arrives.
Don’t Let Your Repair Void the Coverage
Before you break out the sandpaper and sealant, check your paperwork. There is a massive difference between service plans and manufacturer warranties. Most standard warranties cover the tub for much longer than the electronics—sometimes up to 20 years or the lifetime of the product. If you slap a glob of JB Weld on that crack, a technician will walk into your kitchen, see the modification, and immediately deny your claim. They will cite the fact that third-party parts frequently void your service plan. If the crack is a manufacturing defect and not caused by you dropping a heavy cast-iron skillet on the floor, let the manufacturer foot the bill for the replacement. It might take longer, but it ensures the machine remains safe and pressurized.Most DIY guides tell you that a crack is the end of the road, but they miss the most critical nuance: environmental stress cracking. In my experience, the plastic doesn’t just ‘break’; it degrades due to a combination of improper detergent chemistry and thermal fatigue. While everyone else is busy measuring the length of the crack, I’m looking at the impact of hard water on eco-friendly detergent performance. If your water is too hard, minerals bind to the polymer, making it brittle enough to snap during a high-heat cycle. This is why a simple patch often fails; you aren’t just fixing a hole, you’re fighting a chemical change in the tub itself. Have you ever fallen into this trap? Let me know in the comments.
Stop Blaming the Plastic and Start Blaming the Water
It sounds counterintuitive, but your ‘unfixable’ leak might actually be a symptom of a much larger house-wide issue. A study by the Water Quality Association suggests that hard water can reduce the functional life of major appliances by up to 30%. If you replace the tub without addressing the scale, you’re just setting a timer for the next disaster. Before you commit to a major tear-down, check top signs of dishwasher trouble that point toward calcification. 
Can Your Smart Dishwasher Actually Predict a Tub Failure?
Many high-end units are smarter than we give them credit for. If you’ve noticed your machine takes longer to finish or ‘stalls’ at the one-minute mark, it might be trying to tell you something via the secret diagnostic mode hidden on your touch control panel. These internal logs often record ‘slow fill’ or ‘pressure loss’ errors that indicate a hairline fracture is bleeding off pressure long before the water hits your floor. One ‘oops’ factor to watch for: never use heavy-duty industrial degreasers on plastic tubs. They can leach the plasticizers out of the material, turning a flexible tub into a glass-brittle nightmare. Instead, stick to cleaning your dishwasher with nothing but steam and water or mild, approved cleaners. If you’ve already seen a numeric code, don’t ignore it; troubleshooting dishwasher problems early is the only way to avoid a full kitchen renovation. By mastering these deeper diagnostics, you move from being a ‘part changer’ to a true repair expert who understands how appliance diagnostics can save your warranty benefits.To really step up your game, you need to stop guessing and start measuring. When I walk into a kitchen to face a leaking tub, I don’t just carry a screwdriver and hope for the best. I rely heavily on the multimeter trick for checking your dishwasher motor and other electrical components that might be causing heat spikes. If your motor is drawing too many amps, it’s generating excess heat that can eventually warp the tub floor. I personally use a Klein Tools MM400 because it’s rugged and handles the humidity of a kitchen environment without losing calibration. Knowing your numbers is the difference between a guess and a definitive fix. 
Stop Guessing and Start Measuring with the Right Tools
Beyond the multimeter, you need a way to combat the silent killer of plastic: scale. I’ve seen thousands of tubs and the ones that crack are almost always coated in a white, chalky film. If you want to avoid structural failure, you need to be proactive about your water chemistry. This might mean knowing the clause in your service plan that voids coverage for hard water before the damage is done. In many cases, I recommend how to install a whole house water filter system without calling a plumber to protect every appliance in your home from the inside out.
How do I keep my dishwasher tub healthy for a decade?
Maintenance isn’t just about cleaning the filter; it’s about managing the environment inside the machine. According to technical documentation from GE Appliances (specifically Service Bulletin 31-9236), maintaining a water heater temperature between 120°F and 140°F is the ‘goldilocks zone’ for polymer longevity. Anything hotter can accelerate the degradation of the plastic tub, while anything cooler won’t effectively dissolve the fats and oils from your dishes. I also tell everyone to stop over-relying on heavy-duty pods. When you look at the truth about tablet vs powder detergent residue build-up, you’ll find that powders are often gentler on plastic housings because they allow for more precise dosing based on your water hardness.
Smart Sensors and the Death of the Mystery Puddle
Looking ahead, the way we handle these leaks is shifting from reactive to predictive. We are entering an era where your dishwasher will likely shut itself off and alert your phone before you ever see a drop of water. However, that technology relies on software as much as hardware. You should regularly check why your smart dishwasher needs a firmware update to save water and internal sensors. These updates often recalibrate the sensitivity of the leak pan, preventing a small fracture from becoming a flooded kitchen. If you’re still rocking a manual or semi-smart machine, don’t feel left out. You can still decide when to trust a warranty for dishwasher repairs based on the diagnostic data you gather yourself. My advanced tip for you today: before you buy any new parts, take five minutes to the secret diagnostic mode hidden on your touch control panel and see if the machine has been logging any ‘water level’ or ‘pressure sensor’ errors that you’ve missed. It might just save you from replacing a tub that isn’t actually broken.
The Brutal Truth About Why Most Tub Patches Snap
After years of tinkering, I’ve realized that a crack isn’t just a hole; it’s a symptom of a chemical war happening inside your machine. I once thought epoxy was the ultimate fix, but I didn’t account for the plastic’s need to breathe. If you aren’t looking at the impact of powder vs pods on your machines lifespan, you’re missing the forest for the trees. The detergent you choose changes the surface tension of the plastic itself. My biggest lightbulb moment came when I learned how to calibrate your dishwasher for soft water, which finally stopped the cycle of the tub becoming brittle and snapping under the weight of the dishes.
#IMAGE_PLACEHOLDER_1#
Must-Have Gear to Stop the Squelch
Don’t just throw parts at the problem. I always keep three things in my kitchen toolkit. First, a reliable multimeter is non-negotiable; I recommend learning the only multimeter settings you need for appliance repair so you can verify if a component is causing the heat spikes that warp the tub. Second, a simple water hardness test kit can save you hundreds by telling you exactly how much detergent to use. Finally, I trust the technical specs from manufacturers that point to the best temperature for your home water heater as the primary factor in polymer health. If you’re documenting the issue for a professional, remember how to document intermittent noises for a repair claim so you have proof of when the structural failure actually began.
Final Steps Toward a Dry Kitchen Floor
Taking on a cracked tub can feel like a losing battle, but every diagnostic step you take puts you ahead of the curve. Whether you decide to patch it temporarily or proceed with a full replacement, you are no longer at the mercy of a mystery puddle. By mastering troubleshooting dishwasher problems on your own, you’ve gained a skill set that saves money and reduces waste. Remember that understanding appliance diagnostics improving your warranty claims is your best defense against unexpected costs in the future. You’ve got this—now go get those socks dry!
Have you ever successfully patched a tub, or did it end in a watery disaster? Let me know your experiences in the comments below!