

I remember standing in my kitchen at 10 PM, watching a slow-motion flood escape from under the kickplate and creep toward my hardwood floors. My first instinct was to panic, grab every towel in the house, and start searching for an emergency plumber who wouldn’t charge me a month’s mortgage just to show up. It is a visceral kind of stress when your expensive appliance decides to turn your kitchen into a lake. But after a few deep breaths and a bit of tinkering, I realized the culprit wasn’t a catastrophic mechanical failure—it was just a tiny sensor that had lost its way. If you have ever seen your machine fill up and just… keep filling, you know that sinking feeling in your gut. Today, I am going to show you how a common drinking straw can be the most powerful diagnostic tool in your kitchen drawer.
Your Dishwasher Simply Does Not Know When to Quit
The heart of this problem is usually the pressure switch, a small but mighty component that tells the water inlet valve when the tub has reached the perfect level. When this switch fails, or the tube leading to it gets gunked up with old detergent and bits of food, the machine thinks it is bone dry even while water is splashing against the door seal. Early in my DIY journey, I made the expensive mistake of [swapping out a perfectly good water inlet valve](https://applianceoutletpro.com/how-to-swap-a-faulty-water-inlet-valve-in-15-minutes) because I assumed the valve was stuck open. It wasn’t. The valve was just doing what the faulty pressure switch told it to do. Learning how [understanding appliance diagnostics can improve your warranty claims](https://applianceoutletpro.com/understanding-appliance-diagnostics-improving-your-warranty-claims) changed everything for me, as it taught me to test the ‘brain’ before replacing the ‘muscles.’ Have you ever opened your dishwasher only to find a pool of standing water waiting for you, or worse, a floor covered in suds?
Is it actually possible to fix this with a drinking straw?
It sounds like a MacGyver myth, but the physics are solid. By using a straw to gently blow air into the pressure switch, you can simulate the water pressure that usually triggers the ‘off’ signal. This allows you to hear the tell-tale ‘click’ of the internal diaphragm without having to flood your kitchen again. According to Consumer Reports, nearly 30% of dishwashers develop issues within the first five years, and many of these are related to sensor malfunctions rather than motor failures (https://www.consumerreports.org/appliances/dishwashers/most-and-least-reliable-dishwasher-brands-a9018442844/). Before you assume you need a pro, you need to check if the switch is physically clicking. Often, [testing the float switch to fix an overfill error](https://applianceoutletpro.com/testing-the-float-switch-to-fix-an-overfill-error) is the first step, but if that float is moving freely and the water still won’t stop, the pressure switch is your next prime suspect.
Stop the Guesswork and Start Testing Like a Pro
To get started, you will need to get down on the floor—something my knees remind me of every time I do this. You are looking for the small plastic tube connected to a circular switch assembly, usually tucked away behind the bottom kickplate. This is where most people get intimidated, but I promise it is simpler than it looks. If you can see [top signs your dishwasher needs professional diagnostics](https://applianceoutletpro.com/top-signs-your-dishwasher-needs-professional-diagnostics), you are already ahead of the curve. The goal here is to isolate whether the switch is electrically dead or if the tube is simply blocked by the same [tablet vs powder detergent residue](https://applianceoutletpro.com/the-truth-about-tablet-vs-powder-detergent-residue-build-up) that causes so many other common headaches. Grab your straw and a screwdriver, because we are going to dive into the exact steps to save your floor and your sanity.
Find the nerve center under the kickplate
Before you can perform any magic with a drinking straw, you have to find the component that’s actually lying to your dishwasher’s brain. Start by unscrewing the bottom access panel. I recommend [the secret to cleaning behind your dishwasher kickplate](https://applianceoutletpro.com/the-secret-to-cleaning-behind-your-dishwasher-kickplate) as you do this, because you are likely to find a decade’s worth of pet hair and dust bunnies waiting for you. Once that panel is off, look for a small, circular plastic part with two or three wires attached to it. This is your pressure switch. It is connected to the bottom of the dishwasher tub by a narrow, flexible plastic tube. This tube is the ‘nerve cord’ that carries air pressure from the rising water level to the switch. If that tube is clogged or the switch is stuck, your machine will keep screaming for more water.
Prepare for the manual pressure test
Safety is non-negotiable here, so unplug the unit or flip the breaker before you start poking around. You want to gently pull the plastic tube off the nipple of the pressure switch—not the tub side. This is where your drinking straw comes into play. I once spent two hours trying to figure out [why your dishwasher fills with water but never begins washing](https://applianceoutletpro.com/why-your-dishwasher-fills-with-water-but-never-begins-washing), only to realize that a tiny bit of calcified detergent was blocking the air from reaching the sensor. 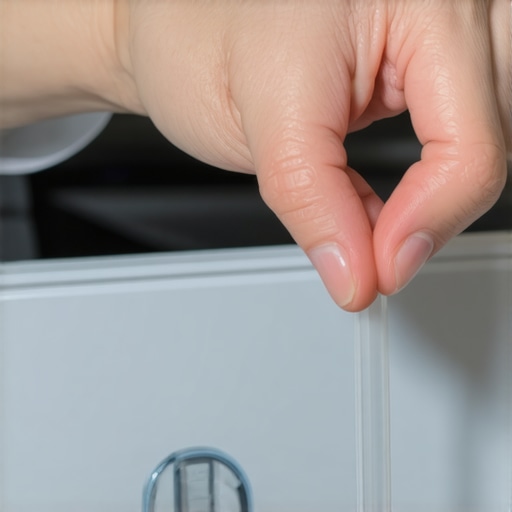
Listen for the click that saves you money
Take your straw and slide it over the nipple of the pressure switch. Now, blow gently. You aren’t trying to inflate a balloon; you are trying to simulate the pressure of a few inches of water. If the switch is healthy, you will hear a distinct metallic ‘click.’ That sound is the internal diaphragm moving and closing the electrical circuit to shut off the water. If you blow and hear nothing but the sound of your own breath, the switch is dead, and no amount of cleaning will save it. However, if it clicks, the switch is fine, and the problem lies in the tube itself. I remember a particularly frustrating Sunday where I was convinced I needed a new motor, but after blowing into the tube connected to the tub, I heard a satisfying ‘plop.’ A chunk of [tablet vs powder detergent residue](https://applianceoutletpro.com/the-truth-about-tablet-vs-powder-detergent-residue-build-up) had formed a perfect seal inside the line, preventing the air from moving.
Clear the line and reset the sensor
If the switch clicked but your dishwasher still overfills, you need to clear the airway. Take that same straw, or a small piece of flexible tubing, and blow back through the tube toward the dishwasher tub. You might hear bubbles or see a bit of debris clear out into the bottom of the machine. This is a crucial part of [troubleshooting dishwasher problems expert diagnostics repair tips](https://applianceoutletpro.com/troubleshooting-dishwasher-problems-expert-diagnostics-repair-tips) because a physical blockage is far more common than a mechanical failure.
Check the electrical heartbeat with a multimeter
If the ‘click’ is there but the water still flows like a river, you have to verify that the click is actually doing its job electrically. This is when you grab your tools and look for [the only multimeter settings you need for appliance repair](https://applianceoutletpro.com/the-only-multimeter-settings-you-need-for-appliance-repair). Set it to continuity and touch the probes to the terminals of the switch while you blow into the straw. If the ‘click’ happens but the multimeter doesn’t beep, the internal contacts are fried. This is a much cheaper fix than [the multimeter test that pinpoints a dead water valve](https://applianceoutletpro.com/the-multimeter-test-that-pinpoints-a-dead-water-valve), so always test the sensor before you go tearing into the plumbing.
Don’t let the manufacturer deny your claim over a bit of gunk
Most homeowners believe that the moment a leak starts, they should drop everything and call a technician to avoid ‘voiding’ their protection plan. In my experience, this is often the fastest way to get a bill for a ‘non-covered’ service visit. If the technician arrives and finds that a simple clog—like that detergent buildup we discussed—caused the overfill, many companies will classify it as a maintenance failure rather than a mechanical defect. Knowing how appliance diagnostics can save your warranty benefits is the key to navigating this. By using the straw method to confirm the switch is actually clicking, you aren’t ‘tampering’; you are performing the basic due diligence required to prove the part itself failed. Have you ever had a warranty claim denied because of something silly like a clogged filter? Let me know in the comments because it happens more than you’d think.
Can your smart dishwasher actually diagnose its own pressure failure?
While modern machines with LED screens are great, they are surprisingly bad at telling the difference between a dead sensor and a dirty one. An error code usually just points you to a ‘system,’ not a specific failure. According to the Association of Home Appliance Manufacturers (AHAM), diagnostic accuracy in smart appliances is still heavily dependent on physical sensor environment (https://www.aham.org/AHAM/Home_Appliance_Smart_Grid_and_Connectivity). This is the ‘oops’ factor many DIYers miss: they see a numeric code and immediately buy a new control board. Before you go that far, check why your dishwasher screen shows a numeric error code to see if it’s just a symptom of the pressure switch being lied to by a clogged tube.
The one mistake that will definitely break your sensor
Here is the nuance most ‘pro’ guides won’t tell you: you can actually blow too hard. If you use the straw trick and treat it like you’re trying to win a balloon-popping contest, you will rupture the delicate silicone diaphragm inside the pressure switch. Once that’s gone, the switch is truly dead. Use the same pressure you would use to sip a drink, nothing more. If you don’t hear that click with gentle pressure, the switch is likely carbon-scored or physically stuck. I’ve seen people lose their minds troubleshooting dishwasher problems for days when the only issue was they’d blown the sensor out themselves during a previous ‘fix.’ 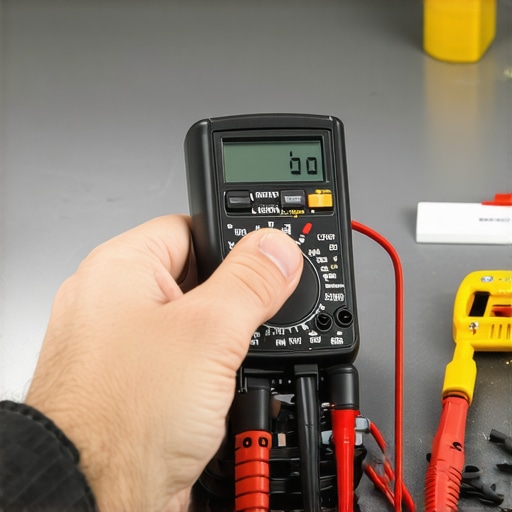
Why your repair claim might get rejected anyway
Even if the part is truly dead, many people fail at the documentation stage. If you decide to call in the pros, show them your findings. Tell them you verified the continuity with a multimeter. This establishes that you aren’t a ‘clueless’ caller and often forces the tech to be more thorough in their write-up. It is vital to understand when to trust a warranty for dishwasher repairs versus when to just spend the $20 on a generic replacement part. Some warranties have ‘hidden’ labor costs that exceed the price of the part itself. Always read why your dishwasher warranty might not cover labor before you sign the service ticket. By taking ten minutes with a drinking straw, you aren’t just fixing a machine; you are building a case for your own wallet.
Upgrade your toolbox without breaking the bank
I never walk into a kitchen repair without two things: my digital multimeter and my smartphone. People often overcomplicate the technical side, but the only multimeter settings you need for appliance repair are usually just continuity and AC voltage. I personally use a Fluke 117, but a basic $20 unit from the hardware store is more than enough to see if that pressure switch is actually sending a signal. My phone is my secret weapon; I use it to document intermittent noises for a repair claim because service technicians are far more likely to authorize a part replacement if they can see a 30-second clip of the failure happening in real-time. If you can show them a video of the water level rising while the inlet valve is supposed to be closed, you’ve basically done their job for them. Beyond the gadgets, you have to look at the grime. I’ve found that the hidden drain screen that most homeowners never clean is usually the root cause of why pressure tubes get backed up. According to technical specifications for the Whirlpool W10348269 pressure switch assembly, these sensors are calibrated to trigger at a incredibly low range of 0.2 to 0.5 PSI—a tiny amount of pressure that can be completely blocked by a slurry of old food and hair. #IMAGE_PLACE_HOLDER_D#
How can I prevent these pressure issues from coming back?
The easiest way to maintain your machine is to stop the gunk at the source. Once a month, I run a high-heat cycle with no dishes and a cup of white vinegar to dissolve the truth about tablet vs powder detergent residue build up that clogs the sensor lines. I also make it a habit to check the simple way to check if your sprayer is spinning because if the water isn’t distributing correctly, the pressure readings in the sump can fluctuate wildly, leading to false ‘dry’ signals.
What the next decade of kitchen repair looks like
Looking ahead, the industry is moving away from physical pressure tubes toward optical sensors and ultrasonic level detection. We are already seeing why your smart dishwasher needs a firmware update to save water, as manufacturers use software to compensate for sensor drift. While this makes the machines more efficient, it also makes the DIY path slightly narrower. My best advice for the long term? Don’t wait for a flood to learn your machine. Try the multimeter continuity test on your door switch or pressure sensor this weekend while the machine is working perfectly. Understanding the ‘healthy’ reading is the only way to quickly spot the ‘sick’ one when the water starts rising. If you want to be truly proactive, check troubleshooting dishwasher problems expert diagnostics repair tips to see which parts are most likely to fail in your specific model year.
What I Learned While Sopping Up a Kitchen Flood
After years of tinkering under kitchen counters, I have realized that the most expensive repairs usually start with the simplest assumptions. I once spent a small fortune on a technician just to have him show me that a tiny piece of bell pepper was blocking my sensor line. That was my ‘lightbulb moment’: never assume a part is dead until you have verified it is clean. Knowing how appliance diagnostics can save your warranty benefits is about more than just fixing a leak; it is about having the data to keep service companies honest. If you can tell a technician exactly where the continuity failed, they are far less likely to try and sell you a new motor you do not need. Also, remember that the ‘click’ of the pressure switch is the physical heartbeat of your machine—if you do not hear it with the straw test, the internal diaphragm is done.
The Tiny Toolkit That Saves My Sanity
You do not need a garage full of specialized gear to handle these issues. My ‘dishwasher first-aid kit’ fits in a sandwich bag. First, a high-quality digital multimeter is non-negotiable; understanding the only multimeter settings you need for appliance repair will give you more confidence than any YouTube tutorial. Second, a handful of flexible drinking straws—I prefer the ones with the ‘bendy’ neck to reach tight spots. Finally, I always keep a bottle of white vinegar on hand. I have found that cleaning the hidden drain screen that most homeowners never clean and running a vinegar cycle is the best preventive medicine for pressure tube clogs. These simple items have saved me from thousands of dollars in water damage over the years.
#IMAGE_PLACEHOLDER_E#
Stop Fearing the Flash Flood
There is a specific kind of empowerment that comes from fixing a complex appliance with a 5-cent straw. It demystifies the machine and puts you back in the driver’s seat of your own home maintenance. Don’t be afraid to get down on the floor and listen for that click. Mastering your dishwasher diagnostics is a skill that pays dividends every time you avoid a service call. If you are still unsure if a repair is worth the effort, it is helpful to know when to trust a warranty for dishwasher repairs versus when to just grab your screwdriver and handle it yourself. You have the tools, the knowledge, and now the diagnostic plan. Your floor—and your wallet—will thank you for it. Most troubleshooting dishwasher problems expert diagnostics repair tips start with the basics, so start there and work your way up. Have you ever tried a MacGyver-style hack like the straw trick, or did you call the pros right away? Let me know in the comments below!