

It was 8:45 PM on a Tuesday, and I had just finished loading a mountain of lasagna-encrusted plates. I pressed ‘Start,’ walked away to enjoy my first five minutes of peace, and—*snap*—the kitchen went pitch black. My dishwasher didn’t just stop; it took the microwave and the fridge down with it. That heavy, metallic sound of a circuit breaker flipping is enough to make any homeowner’s heart sink. You aren’t just dealing with dirty dishes anymore; you’re dealing with an electrical mystery that feels slightly dangerous. I’ve been there, staring at a dark kitchen with a flashlight in one hand and a soggy sponge in the other. It’s frustrating, but I promise you, we can get to the bottom of this without you having to wash everything by hand for the next month.
When Your Dishwasher Decides to Kill the Lights
When your machine starts throwing a tantrum and killing the power, your first instinct might be to call an expensive electrician. But before you do that, let’s talk about why this happens. Usually, it’s a sign that the machine is drawing more current than the circuit can handle, or there’s a short circuit where water is touching something it shouldn’t. I remember early in my DIY journey, I spent three hours troubleshooting dishwasher problems by replacing the heating element, only to realize the issue was a tiny drip from the pump hitting the motor terminals. Talk about a ‘facepalm’ moment. It taught me that proper appliance diagnostics is the difference between a quick fix and a wasted Saturday.
Is it even safe to fix this myself?
I get it—electricity is scary. Dealing with 120 volts and water in the same box feels like a recipe for disaster. But here’s the reality: most of these fixes are about identification, not rewiring your whole house. You can safely perform a continuity test on your door switch or use a multimeter to check the heating element without being an electrical engineer. According to the National Fire Protection Association (NFPA), electrical failures or malfunctions are a leading cause of home fires, which is why your breaker is doing its job by tripping—it’s protecting you. We are going to respect that safety mechanism while we find the leak or the short. Have you ever had your dishwasher turn your kitchen into a dark cave mid-cycle? Drop a comment below; I’d love to know I’m not the only one who’s been left in the dark.
Today, we are going to look at the three most common culprits: the heating element, the wash motor, and those pesky internal leaks. We’ll even touch on how to safely check your power cord connection so you can rule out the easy stuff first. Let’s get your kitchen back online.
Check the Heating Element for Scorched Spots
The heating element is essentially a giant toaster filament sitting in a pool of water. It’s responsible for getting the water hot enough to dissolve grease and for drying your dishes at the end of the cycle. Over time, the protective coating on this element can crack due to thermal expansion. When that happens, water makes direct contact with the live wire inside, causing an immediate short circuit. You should verify your heating element isn’t touching plastic tubs because if it warps, it can melt through the machine and cause even bigger problems. To test this properly, you’ll need to set your tool to the specific multimeter settings you need for appliance repair. An infinite reading or a ‘zero’ where there should be resistance tells you the part is toast. Replacing it is usually a matter of unscrewing two plastic nuts under the tub, but always make sure the power is totally off before reaching in there.
Is Your Motor Screaming for Help?
The circulation pump is the heart of the machine, and if it gets jammed, it starts drawing massive amounts of amperage. I remember a specific Saturday afternoon working on my aunt’s machine. It would start fine, fill with water, and then—*clunk*—the lights would flicker and the breaker would pop. I was convinced the control board was fried. After pulling the machine out, I found a single peach pit jammed deep inside the impeller. The motor was trying so hard to spin that it was basically demanding more power than the house could safely give it. It’s like trying to pedal a bicycle with a steel rod shoved through the spokes; something has to give. You can perform the multimeter trick for checking your dishwasher motor to see if the internal windings are shorted to the frame. If the motor smells like burnt ozone, it’s a clear sign that the insulation has melted and the component needs to be replaced.
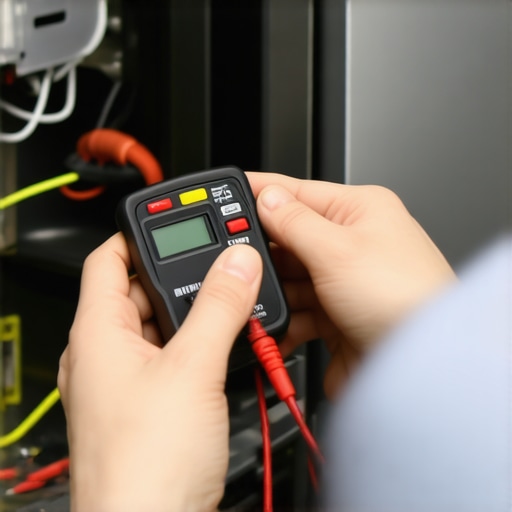
Stop the Drip Before it Hits the Wires
Water and electricity are the ultimate ‘frenemies’—they are constantly trying to meet, but the result is always a disaster. If your dishwasher trips the breaker specifically during the fill or wash cycle, you likely have a small leak that is dripping onto a live electrical component. You need to be proactive about identifying a failing sump gasket before the floor warps or the electronics get soaked. Take a flashlight and look at the bottom tray while the machine is running (carefully!). If you see water trailing down toward the wire harness, you’ve found your ghost. A common source is the water inlet; luckily, swapping a faulty water inlet valve is a fifteen-minute job that can save you from a thousand-dollar repair. It’s also vital to spot corrosion in your control board wiring early, as even dried mineral deposits can create a bridge for electricity to jump where it shouldn’t. Don’t forget to check your peripheral plumbing; I’ve seen many instances where a warranty claim got denied because of a garbage disposal blockage that forced water back into the dishwasher’s electrical housing.
I used to think that as long as I had that little plastic warranty card, I was invincible. If the dishwasher motor seized or the control board fried, it was someone else’s problem and someone else’s bill. But here is the cold, hard truth that most manufacturers won’t tell you: your warranty is not a ‘fix-it-for-free’ pass. In fact, many people find themselves deeper in debt after a warranty call than if they had just tackled the repair themselves. The most common mistake I see is homeowners assuming that ‘parts coverage’ means a free repair. Most standard warranties cover the component but leave you on the hook for the massive labor fees, which is exactly why your appliance warranty covers parts but not labor costs. You might get a free $30 solenoid, but you’ll pay $250 for the technician to park their van in your driveway.
The Secret Conflict Between DIY and Fine Print
Everyone tells you that the moment you pick up a screwdriver, your warranty is void. That is a myth I want to bust right now. Under the Magnuson-Moss Warranty Act, a manufacturer cannot legally void your entire warranty just because you performed your own maintenance or used a third-party part, unless they can prove your specific action caused the failure. However, there is a catch. If you accidentally snap a clip while testing your thermal fuse for continuity without a pro, they will use that as leverage to deny your claim. The real nuance isn’t about whether you can touch the machine; it’s about how appliance diagnostics can save your warranty benefits by allowing you to speak the technician’s language. If you can point to the exact failure, you stop them from overcharging you for ‘exploratory labor.’
Can you actually get a refund for a failed repair?
This is where things get advanced. Most people accept a ‘we couldn’t find the issue’ response and still pay the service fee. If a technician visits three times for the same issue and fails to fix it, you may be eligible for a ‘lemon’ replacement or a service refund. This is why you must learn how to document intermittent noises for a repair claim before the pro arrives. Without video or audio evidence, it’s your word against theirs. I once saw a homeowner lose their coverage simply because they couldn’t prove the machine was tripping the breaker under load. They didn’t realize that proper appliance diagnostics are the only currency that matters when negotiating with a manufacturer. You need to be the expert of your own kitchen.
Avoid the Hard Water and Garbage Disposal Traps
Here is an ‘oops’ factor that catches even the smartest DIYers: environmental exclusions. I’ve seen countless claims denied because of mineral buildup. Manufacturers view limescale as ‘lack of maintenance,’ not a factory defect. If you don’t know the clause in your service plan that voids coverage for hard water, you are essentially paying for a plan you can never use. Similarly, your dishwasher and sink are connected in ways you might not realize. It’s incredibly common for a warranty claim to get denied because of your garbage disposal being clogged, which forces back-pressure into the dishwasher pump. To a warranty inspector, that’s ‘installation error,’ not a machine failure. Have you ever had a repair claim denied for a reason that felt like total nonsense? Let me know in the comments—I want to hear the ‘fine print’ nightmares you’ve dealt with. Before you give up and buy a new unit, take a second to learn when to trust a warranty for dishwasher repairs and when to just grab your own multimeter and get to work.
My Go-To Toolbox for Kitchen Chaos
After getting burned by warranty fine print and ‘technician visit’ fees, I realized the only person I can truly trust to care for my appliances is me. My most prized possession isn’t a fancy set of wrenches; it’s my digital multimeter. I use it because it removes the guesswork from proper appliance diagnostics. When you’re checking for a short, you aren’t guessing—you’re looking at a definitive number. According to the Fluke 87V Industrial Multimeter Application Note, verifying the resistance of a motor’s windings is the only way to confirm if the internal insulation has failed. I personally look for gold-plated test probes because they prevent false readings caused by the oxidation that inevitably forms in damp kitchen environments. If you want to master this, you need to learn the only multimeter settings you need for appliance repair so you don’t blow a fuse in your tool while trying to save your dishwasher.
How do I keep my machine alive for ten years?
Maintenance isn’t a deep clean once a year; it’s a consistent rhythm. You have to actively hunt for the hidden drain screen that most homeowners never clean. Most people think the plastic mesh at the bottom of the tub is the only filter, but there is often a secondary, finer screen protecting the pump impeller. I also keep a flexible four-claw grabber tool in my junk drawer; it is the simple tool for removing hair from a drain pump without having to disassemble the entire sump assembly. It sounds gross, but pet hair and human hair are the silent killers of circulation motors, wrapping around the shaft until the friction trips the breaker.
The Era of Digital Wrenches and Data
Looking ahead, we are entering a phase where your dishwasher is essentially a computer that happens to spray water. I’m already seeing a massive trend toward AI-driven self-diagnostics. Soon, we won’t be hunting for drips with flashlights; internal sensors will detect moisture and cut the power before the breaker even has to react. However, this comes with a catch: more software locks. This is why keeping your machine updated is the new ‘oil change.’ Sometimes your smart dishwasher needs a firmware update to save water and keep those sensors calibrated correctly. If you start seeing cryptic numbers on the display, don’t panic—it’s often just a digital hiccup. I’ve written before about why your dishwasher screen shows a numeric error code, and usually, it’s the machine trying to help you, not hurt you. If you really want to level up your DIY game this weekend, I want you to pull out that bottom rack and find that secondary drain screen. It’s the single most neglected part of the machine. If you find it’s caked in slime, you’ve just saved your pump from an early grave. If the machine is still acting up despite a clean filter, it might be time to review the top signs your dishwasher needs professional diagnostics before you dig any deeper into the wiring.
The Hardest Lesson I Learned About Electrical Repair
If there is one thing that years of tinkering with wet electronics has taught me, it’s that the machine never lies, but the “expert” on the phone might. I once spent forty-five minutes arguing with a support representative about a tripped breaker, only to realize that having the data from my own multimeter changed the entire dynamic of the conversation. When you know how to improve your warranty claims through better data, you stop being a victim of the fine print. I’ve also learned that a “dead” machine is rarely actually dead; it’s usually just one $15 part or a clogged filter away from a second life. Most importantly, I realized that diagnostics can save your benefits by preventing you from making the one mistake that actually voids a service plan: guessing blindly.
Build Your DIY Survival Kit Without Breaking the Bank
You don’t need a professional workshop to handle these issues, but you do need a few high-quality essentials. First, never underestimate a high-lumen magnetic flashlight; you can’t fix what you can’t see under that kickplate. Second, keep a set of torx-head screwdrivers handy, as most modern manufacturers use them to discourage casual prying. I also highly recommend bookmarking the official expert diagnostics and repair tips page for those moments when the manual feels like it’s written in a different language. Finally, if the job feels too big, knowing the signs your dishwasher needs professional diagnostics is a tool in itself—it saves you from damaging the unit further and losing your chance to claim a repair refund later.
#IMAGE_PLACEHOLDER_E#
Stop Fearing the Machine and Start Fixing It
It is incredibly empowering to hear that motor hum back to life after you’ve identified a short or cleared a blockage. You don’t have to be a master electrician to perform a basic appliance repair; you just need patience and the willingness to look at the problem logically. Your dishwasher is a tool meant to serve you, not a mystery box designed to drain your bank account. Go grab your tools, double-check your safety steps, and get that kitchen back in order. You’ve got this.
Have you ever successfully challenged a warranty denial or found an “impossible” short in your machine? Let me know your story in the comments below—I read every single one!