

I stepped in it. Again. That cold, soggy sensation that every homeowner dreads at 6:00 AM. A tiny, localized puddle was mocking me from the edge of the dishwasher kickplate. I’d wiped it up three times this week, and every time I crawled under there with a flashlight, the damn thing looked bone dry. It’s the kind of mystery that makes you want to sell the house and move into a tent. You can’t fix what you can’t see, and let’s be honest, a pinhole leak is basically a ghost that only appears when you aren’t looking.
Stop Chasing Ghost Puddles Under Your Kitchen Cabinets
We’ve all been there, squinting at a damp subfloor while trying to trace the source of that mystery water leak. Most of us assume it’s the big stuff—a cracked hose or a faulty pump. But sometimes, the culprit is a microscopic pinhole in the stainless steel or plastic tub, caused by a stray piece of silverware or just years of vibration. Today, I’m going to show you a trick that sounds like it belongs in a bakery rather than a repair manual. We are going to use a handful of cornstarch to make that invisible spray reveal itself. It’s cheap, it’s fast, and it’ll save you from tearing out your hair.
Is a Cheap Pantry Staple Actually Better Than a Pro?
You might be thinking this sounds a bit too MacGyver to be effective. I mean, why wouldn’t you just call a plumber? Because a plumber is going to charge you $150 just to walk through the door, and they might miss a pinhole too if the machine isn’t actively cycling. According to the Insurance Institute for Business & Home Safety, even a slow drip can lead to thousands of dollars in structural rot if left unchecked for just a few months. Have you ever spent a whole weekend trying to level your dishwasher to stop mystery leaks only to find the floor is still wet? It is infuriaries, right? Drop a comment if you’ve ever felt like your dishwasher was gaslighting you.
The Day I Wasted a Hundred Bucks on a Gasket I Didn’t Need
I’ll be the first to admit I’ve let my ego get the better of me. Early on, I saw water dripping from the front corner and immediately ordered a new door seal. I was so sure. I spent an hour replacing that dishwasher door seal, feeling like a real handyman. The next morning? Puddle. It turned out the water was actually spraying from a tiny hole in the side wall, hitting the door, and running down. If I had just used the cornstarch method first, I would have seen the “trail” immediately. Sometimes, we get so caught up looking for top signs your dishwasher needs professional diagnostics that we overlook the simplest physical evidence right in front of our noses. [image_placeholder] Let’s get into the nitty-gritty of how to set this up so you don’t repeat my expensive mistakes.
The first rule of appliance repair is that you can’t fix what you can’t see. Before you start ripping out hoses, you need to get eyes on the underside of that machine. Grab a screwdriver and tackle the secret to cleaning behind your dishwasher kickplate before you do anything else. You’ll likely find a decade’s worth of dust bunnies and maybe a stray LEGO or two. Wipe everything down until it is bone dry. If the floor is already soaked, the cornstarch won’t tell you anything—it will just turn into a thick paste immediately. You want a clean, dry stage for our performance.
Dusting the Crime Scene with White Powder
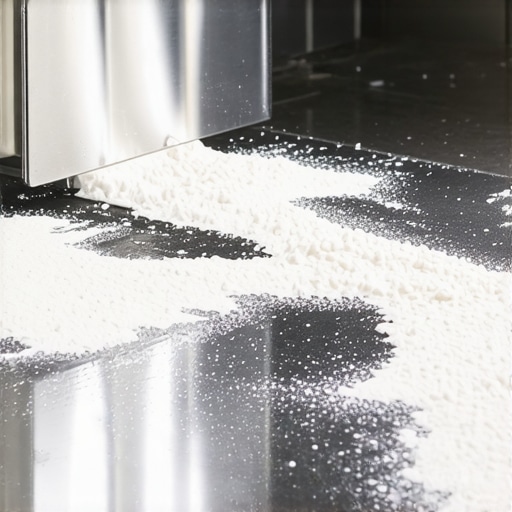
Think of this like a forensic investigator dusting for fingerprints. Take a handful of cornstarch and lightly puff it onto the subfloor and any visible components under the tub. You want a thin, even coating that looks like a light dusting of snow. If there is even a single drop of water escaping during the cycle, it is going to leave a dark, unmistakable trail in that white powder. I’ve seen people try to use paper towels for this, but a paper towel just gets wet and falls over; cornstarch creates a permanent topographical map of the leak’s path. This is especially helpful if you are trying to determine how to tell if your wash pump is seized or just clogged versus actually leaking from the main housing.
Don’t Run a Full Cycle Yet
There is no need to sit around for two hours waiting for the heated dry. Start a short rinse cycle instead. Most leaks happen the moment the water inlet valve opens or during the high-pressure spray phase when the wash arm is spinning. Keep your flashlight handy and stay on your knees. If you see the cornstarch start to bleed or wash away in a specific line, you have found your ghost. I once spent an entire afternoon thinking I had a major plumbing failure in my walls, only to realize—thanks to a two-dollar box of cornstarch—that I just needed to learn how to replace a snapped drain hose clamp yourself. It saved me a massive plumbing bill and a lot of unnecessary stress.
My Messy Encounter with a Hidden Motor Leak
I remember a particularly frustrating unit that only leaked during the final high-speed drain. It was driving the homeowner crazy because the floor only looked wet twenty minutes after the machine stopped. I puffed the powder all around the motor area and watched closely. For ten minutes, nothing happened. Then, as the pump kicked into high gear, a tiny jet of water shot out from a hairline crack in the plastic housing, cutting a perfect trench through my cornstarch. Without the powder, that mist was completely invisible against the black plastic. If your machine is newer, check when to trust a warranty for dishwasher repairs before you start poking around with tools, as some manufacturers are picky about DIY diagnostics. However, knowing exactly where the water is coming from makes you a lot harder to fool when the technician arrives. This technique is the cornerstone of troubleshooting dishwasher problems expert diagnostics repair tips because it removes the guesswork entirely.
Focus on the High-Risk Points of Failure
While you are down there, keep an eye on the water inlet valve and the heating element terminals. These are high-risk zones where vibration can loosen connections over time. If you see powder disappearing around the front door corners, you might actually be looking at the 5-part that fixes most dishwasher door leaks rather than a catastrophic tub issue. Sometimes the water travels along a wire or a drain hose, making it look like the leak is coming from the motor when it is actually a loose connection six inches away. The cornstarch always points back to the highest point of moisture, leading you straight to the source of your kitchen’s mystery puddle.
Most people treat a dishwasher error code like a divine revelation. You see a numeric code or a specific blinking pattern and immediately rush to order the corresponding sensor or pump. But here is the contrarian truth: error codes are frequently symptoms, not the cause. In my years of troubleshooting, I have found that a computer brain can only report what its sensors see, and sensors are easily fooled. For instance, a drain error might not be a dead pump at all; it could be a ‘suds-lock’ caused by using too much detergent or the wrong type entirely. I have seen homeowners waste hundreds of dollars on a ‘parts cannon’—firing new components at a machine without ever actually reading the hidden blinking lights on your dishwasher brain with a critical eye. According to data from the Association of Home Appliance Manufacturers (AHAM), a significant percentage of appliances replaced or serviced are actually suffering from ‘no fault found’ issues, meaning the problem was environmental or related to user maintenance rather than a part failure. If you don’t understand the ‘why’ behind the code, you are just guessing with your wallet.
How to avoid the expensive diagnostic trap
The ‘Oops’ factor in DIY repair is real. Before you go replacing a motor because the screen said so, you need to verify the failure electrically. Using the multimeter trick for checking your dishwasher motor is the only way to be 100% sure you aren’t throwing money away. If you skip this step, you might end up with a brand-new motor and the same old error because the actual issue was a tiny bit of corrosion in your control board wiring that you missed. 
The hidden trap in your manufacturer warranty
Many homeowners assume that a ‘one-year warranty’ means a completely free fix if something goes south. It usually doesn’t. You will often find that why your appliance warranty covers parts but not labor costs is the biggest hurdle in getting your kitchen back in order. You might get a fifty-dollar part for free, but you are still stuck with a two-hundred-dollar labor bill from the ‘authorized’ technician. Even worse, if you try to save money by using a non-OEM part during a previous DIY session, why third-party parts might kill your service contract becomes a very expensive reality. Always check the fine print that voids your appliance service plan before you crack open the housing. Have you ever fallen into this trap where a ‘free’ repair ended up costing you a fortune? Let me know in the comments.
Why does your dishwasher keep lying about what is broken?
It all comes down to how the machine measures success. A sensor can only report the physical state it is programmed to monitor. If your home has very soft water, it might create excessive foam that mimics a blockage. This leads to a why your warranty claim for a clogged pump might get denied scenario because the technician will find a perfectly functional pump that was just confused by bubbles. Mastering understanding appliance diagnostics and improving your warranty claims means looking past the digital screen and checking the physical state of the machine. It is about being smarter than the computer inside the door and looking for top signs your dishwasher needs professional diagnostics versus a simple cleaning.
After you have mastered the cornstarch trick and stopped chasing ghost puddles, you need to build what I call a ‘diagnostic mindset.’ If you want to stop being a victim of planned obsolescence, you have to realize that the most important tools for longevity aren’t the ones in your heavy chest in the garage. Most people think they need a degree in electrical engineering to touch a circuit board, but the reality is much simpler. I’ve realized that the difference between a successful repair and a pile of scrap metal usually comes down to three things: patience, a twenty-dollar tool, and a very specific set of notes.
The toolkit that actually pays for itself
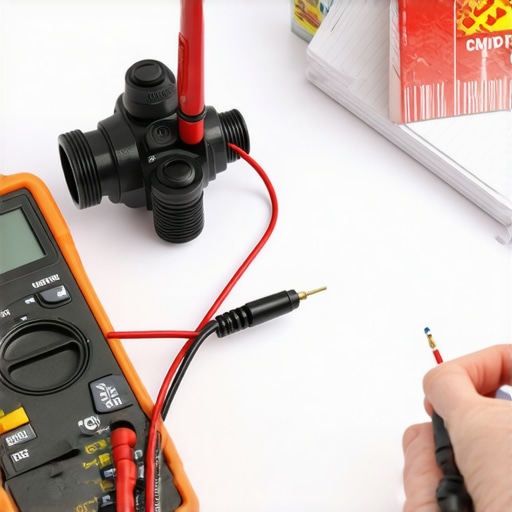
If you are serious about skipping the repairman, you need to stop using the ‘auto’ setting on your testing gear. I strictly use manual ranging when I am troubleshooting because it forces me to look at the decimal point—this is absolutely crucial when you are checking for a failing solenoid versus one that is completely dead. You can find more about this in my guide on the only multimeter settings you need for appliance repair. Beyond the electronics, the best diy tools for kitchen appliance maintenance aren’t always what you would expect. Sometimes, it is as low-tech as a bent paperclip or cleaning the spray arm nozzles with a simple toothpick. Those tiny holes get clogged with calcium or a stray piece of plastic wrap, and suddenly your expensive machine is just a fancy box that rinses dishes with dirty water.
How do I keep my dishwasher running for a decade?
Maintenance is not just about the big fixes; it is about the boring, repetitive stuff. I recommend a deep dive into your filter system every thirty days. If you let grease build up, it forces the motor to work harder, which generates heat and leads to premature failure. GE technical training manuals often state that nearly 25% of service calls for ‘no fill’ or ‘no drain’ issues are actually just debris blockages or a tripped float switch that the user could have reset in ten seconds. I also think the industry is shifting toward a software-first approach. We are already seeing machines that require why your smart dishwasher needs a firmware update to save water. In five years, your dishwasher might refuse to start not because of a mechanical leak, but because its internal logic detected a sensor drift that hasn’t even caused a puddle yet. Staying ahead means keeping your appliance’s firmware updated just as often as you clean the filter.
Documentation is your secret weapon against a denied claim
If you are still under a service plan, do not just tell the technician ‘it makes a weird sound.’ They will almost certainly write ‘could not replicate’ on the work order and leave. You need to learn how to document intermittent noises for a repair claim using your phone’s voice recorder or video. When you have proof, it is much harder for them to deny you. Knowing how appliance diagnostics can save your warranty benefits is the difference between a free motor and a $400 bill. I always recommend that homeowners perform how to test a dishwasher solenoid with a multimeter before the tech arrives. If you can point to the exact part that has failed, you set the tone that you aren’t someone who can be easily upsold on unnecessary repairs. Next time your machine acts up, don’t reach for the phone—reach for your multimeter and run a quick continuity test on the door switch first. You might just save yourself a week of waiting for a service van.
What Nobody Tells You About Fighting an Appliance Manufacturer
After years of fixing these machines, the biggest “lightbulb moment” I ever had wasn’t about a tool—it was about evidence. Manufacturers are often looking for any reason to deny a claim. If you can’t prove a leak is a manufacturing defect, they might try to blame your installation or even your choice of soap. Using the cornstarch trick gives you that physical proof. Also, remember that a “No Fault Found” diagnosis from a technician is a bill in your pocket, not theirs. By understanding appliance diagnostics and improving your warranty claims before the professional arrives, you change the dynamic from “clueless homeowner” to “informed advocate.” I’ve seen people save hundreds just by being able to point to a specific failure point that the tech might have otherwise overlooked.
The Only Gear You Need to Stop Paying Repairmen
You don’t need a van full of specialized gear to keep your kitchen dry. I swear by three specific low-cost items. First, a manual-ranging multimeter; it is the only way to be precise when the only multimeter settings you need for appliance repair are the difference between a “maybe” and a “definitely” on a failing solenoid. Second, a humble plastic straw. It sounds primitive, but how to test your float switch using a plastic straw is the fastest way to check for pressure sensor clogs without disassembly. Finally, a high-lumen LED flashlight. If you can’t see the shimmer of water reflecting off a surface, you can’t fix it. These tools pay for themselves the very first time you avoid a service call. [image_placeholder]
Take Control of Your Kitchen Again
Repairing your own appliances can feel intimidating at first, but every pro started exactly where you are: with a flashlight and a sense of curiosity. Don’t let the threat of why your appliance warranty covers parts but not labor costs scare you into doing nothing. You have the power to diagnose, document, and often fix the issue yourself using basic physical evidence. Knowing how appliance diagnostics can save your warranty benefits is your ultimate shield against unnecessary expenses. You’ve got this—now go find that ghost leak and stop it for good. Have you ever had a warranty claim denied for a “user error” that you knew wasn’t your fault? Let me know in the comments below!