

I remember the exact moment I hit my breaking point. I was pulling a tray of glasses out of my relatively new dishwasher, and instead of that crystal-clear sparkle from the commercials, they were covered in a gritty, white film. I felt like a total failure as a homeowner. I had just finished a minor kitchen refresh, and here I was, scrubbing ‘clean’ plates by hand because of those stubborn, chalky streaks that just wouldn’t budge. My neighbor, who’s seen me through more than one DIY disaster, just laughed and asked if I’d checked my salt lately. I honestly thought she was joking. Salt? In a machine full of metal and electronics? It sounded like a recipe for a rust-covered nightmare.
The Chalky Film That Almost Made Me Quit My Dishwasher
Living in an area with high mineral content means the water practically crunches when it comes out of the tap. For months, I blamed the manufacturer. I even went as far as calling in a technician for professional diagnostics because I was convinced the heating element or the pump had bit the dust. I was ready to trust a warranty claim for a full replacement. I made the classic mistake of doubling down on the detergent, thinking more soap would solve the problem. In reality, I was just making things worse. When detergent hits hard water, it can’t lather; it just binds to the minerals and leaves a sticky mess.
Does putting actual salt in a machine sound like a recipe for a rust bucket?
It’s a valid fear. We’re taught from a young age that salt and water lead to corrosion. However, your dishwasher isn’t just ‘seasoning’ the water. Most modern, high-efficiency units have a built-in water softener that relies on a specific type of salt to recharge. According to the Water Quality Association, hard water can reduce the efficiency of water-using appliances by as much as 30%, which is a massive hit to your wallet and your machine’s lifespan. Today, we’re going to solve the mystery of that little screw-cap on the floor of your machine and show you how the truth about salt reservoirs can change your life.
The Hidden Chemistry Happening Under Your Bottom Rack
The secret isn’t actually the salt itself cleaning the dishes; it’s the salt cleaning the machine’s internal softener. I spent years ignoring that little compartment, even when I saw the impact of hard water on eco-friendly detergent performance firsthand. If you’ve been struggling with how to remove hard water spots without chemicals, the answer is likely sitting right in your appliance’s settings. Once I learned how to calibrate your dishwasher for the specific hardness of my local water, the results were night and day. Have you ever opened your dishwasher and wondered why your ‘clean’ glasses look like they’ve been through a sandstorm? Let me know in the comments—I need to know I wasn’t the only one who almost threw a perfectly good machine to the curb over a five-dollar bag of salt.
Stop Guessing and Test Your Water Hardness First
Before you even touch a bag of salt, you need a baseline. Buying salt without knowing your water hardness is like buying glasses without an eye exam; you might end up over-softening, which leads to a different kind of heartbreak: permanent etching. I once saw a set of vintage wine glasses ruined because the owner overcompensated with salt. You can find why soft water might be pitting your expensive glassware to see what I mean. Grab a simple test strip from the hardware store, dip it in your tap water, and compare the color. This number is your golden ticket for the next step.
Why the Strip Test Beats a Local Water Report
While your city might publish a annual water quality report, the plumbing in your specific street or building can change the mineral content significantly by the time it reaches your kitchen. A strip test is the only way to get a real-time reading of what is actually hitting your plates.
Pop the Cap and Feed the Machine
Locating that little screw-cap is the first physical hurdle. It is usually tucked away at the very bottom, often under the lower rack. When I first did this, I was terrified the water inside would spill out and flood my kitchen. Pro tip: it is supposed to be full of water. 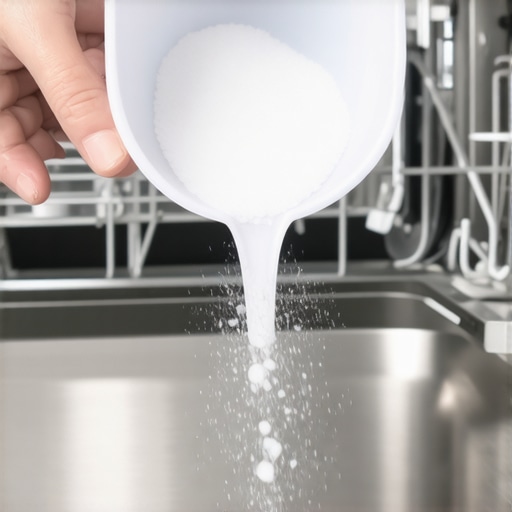 When you pour the salt in, the water will displace. Use a funnel—seriously. The one time I skipped it, I spent twenty minutes picking salt granules out of the filter mesh. Once it is full, tighten that cap like your life depends on it. A loose cap lets brine leak out, which can eventually lead to troubleshooting dishwasher problems that are much more expensive than a five-dollar bag of salt.
Don’t Forget to Tell the Brain About the Salt
Filling the tank is only half the battle. Your dishwasher is not psychic; you have to tell it how hard your water is so it knows how much brine to release during the cycle. This is where most people give up and call for professional diagnostics. Usually, it involves a sequence of button presses—like holding ‘Start’ and ‘Eco’ for five seconds until the lights flash. If you get this wrong, you are either wasting salt or still getting spots. If you are unsure of the exact sequence, look into how to calibrate your dishwasher for your specific model.
Keep the Pipes Flowing and the Arms Spinning
Even with perfectly soft water, physical blockages will still leave grit on your plates. I once found a tiny piece of plastic from a produce sticker jammed inside a spray arm. No amount of salt fixes that. I learned the proper way to clean spray arm nozzles using a paperclip and it is now part of my monthly routine. While you are down there, check the filter. If it is slimy, you are likely dealing with the impact of detergent overdose on energy efficiency. Too much soap creates a sludge that even the best softener can’t fight. If the machine still sounds like it is struggling after all this, you might need the multimeter trick for checking your dishwasher motor to ensure the hardware has not given up the ghost. Lastly, check your fine print. Many homeowners do not realize that ignoring hard water issues can cost them their warranty. There is often the clause in your service plan that voids coverage for hard water damage. Taking ten minutes to top off the salt reservoir is not just about clean dishes; it is about protecting a thousand-dollar investment.
We love to think of ourselves as weekend warriors, but there’s a nuance to troubleshooting dishwasher problems that most DIY blogs skip. The common belief is that if you can identify a part, you can solve the problem. However, I’ve found that why your dishwasher screen shows a numeric error code is often just a symptom of a deeper electrical or mechanical issue, not the root cause itself. If you replace a control board without addressing the moisture leak that caused the short, you are simply setting your money on fire. In fact, a study by the Consumer Reports National Research Center suggests that while consumer interest in repair is high, the complexity of modern sensors leads to a significant ‘re-failure’ rate when professional tools are ignored. This is why understanding appliance diagnostics is about more than just clearing a code; it is about preserving the integrity of the entire system.

The Documentation Trap That Voids Your Coverage
One of the biggest ‘Oops’ factors I see involves the rush to fix things without a paper trail. Many homeowners don’t realize that how appliance diagnostics can save your warranty benefits by providing an official record of the failure. If you open up the chassis and start swapping wires, you might inadvertently trigger the clause in your service plan that voids coverage for unauthorized tampering. It is a heartbreaking moment when a technician arrives for a major repair only to deny the claim because they found evidence of a previous, undocumented ‘hack’ attempt.
Can Your DIY Fix Legally Kill Your Warranty?
The short answer is: absolutely. While the Magnusson-Moss Warranty Act protects your right to use third-party services, it does not protect you if your DIY work causes further damage. For instance, knowing why third party parts frequently void your service plan is vital. If a cheap, off-brand pump leaks and ruins your kitchen floor, the manufacturer is off the hook for both the machine and the flooring. Even seemingly unrelated issues, like why your warranty claim got denied because of your garbage disposal connection, can be used as evidence of ‘improper installation’ to reject a high-dollar claim. Before you grab your screwdriver, ask yourself if the fifty-dollar saving is worth risking a thousand-dollar replacement. Have you ever fallen into this trap and regretted it? Let me know in the comments—I want to hear your horror stories.
The Small Toolbox That Saved My Kitchen Floor
I used to think that a standard screwdriver and a bit of ‘can-do’ attitude were enough to keep my kitchen running. I was wrong. After that salt debacle, I realized that true homeowner confidence comes from having a few specialized tools that take the guesswork out of the equation. If I could go back in time, I’d tell myself to buy a digital multimeter immediately. It’s the single most important device for understanding appliance diagnostics. Instead of wondering if a motor is dead, I can actually see the electrical resistance. If you’ve never used one, don’t panic; I’ve found that mastering the only multimeter settings you need for appliance repair takes about ten minutes and can save you hundreds in unnecessary part swaps.
How do I maintain my dishwasher’s performance over several years?
Consistency is your best friend. Every six months, I perform what I call a ‘health audit.’ This involves more than just cleaning the filter. I check for continuity in the heating circuit—especially the thermal fuse—to ensure I’m not going to wake up to a cold wash and greasy plates. Learning the ropes of testing your thermal fuse for continuity without a pro was a game-changer for me. According to the Association of Home Appliance Manufacturers (AHAM) in their DW-1-2020 standard, the consistency of soil removal is heavily dependent on maintained pump pressure and spray arm velocity. If those components aren’t getting the right electrical signals, your expensive pods are basically just expensive water. Keep a log of your tests; this data is pure gold when you are deciding when to trust a warranty for dishwasher repairs versus fixing it yourself.

Where the Smart Kitchen is Heading
We are entering an era where our machines are getting a lot more talkative. I’ve noticed that while my newer unit is efficient, the software can be finicky. I’ve often wondered why your smart dishwasher notifications are always delayed, and usually, it’s a sign of a local network hiccup or a sensor that needs a quick wipe. In the next few years, I predict we will see ‘self-healing’ appliances that can recalibrate their own salt intake or water pressure based on internal flow sensors. Until then, we are the ones who have to bridge the gap between the hardware and the software. If your screen starts flashing, don’t just unplug it. Look into why your dishwasher screen shows a numeric error code to understand the ‘why’ behind the ‘what.’ This proactive approach is the only way to scale your DIY skills as appliances become more complex. I challenge you: the next time your machine makes a weird ‘clunk,’ don’t just ignore it. Use the steps for how to document intermittent noises for a repair claim to build a case that even the toughest warranty adjuster can’t deny. It’s about being the smartest person in the room—or at least, the smartest person in your kitchen.
The Maintenance Mistakes That Cost Me a Year of Clean Plates
Reflecting on my journey from gritty glasses to crystal-clear results, I realized that water softening isn’t a one-time event; it’s a marathon. One of my biggest lightbulb moments was discovering the truth about salt reservoirs in modern high-end dishwashers and how they actually function. I used to think the salt cleaned the dishes directly, but realizing it’s about keeping the resin bed active changed how I prioritize maintenance. Another hard-won lesson: don’t wait for the ‘refill’ light to blink. By the time it does, you’ve likely already had a few cycles of hard water buildup. Lastly, I learned that how appliance diagnostics can save your warranty benefits is something every homeowner should document before they start their own repairs.
My Low-Tech Arsenal for a High-Tech Kitchen
You don’t need a professional-grade van to handle basic issues, but a few specific items are non-negotiable. First, get a high-quality digital multimeter; mastering the only multimeter settings you need for appliance repair is the difference between a calculated fix and a wild guess. Second, I swear by using a dedicated funnel for the salt reservoir—it prevents those stray grains from causing pitting in your stainless steel tub. Finally, keep a notebook inside your under-sink cabinet to track when you last topped off the salt and cleaned the filter. This simple log is my secret weapon for troubleshooting dishwasher problems before they become emergencies.
Take the Fear Out of the Bottom Rack
Repairing and maintaining your own machine shouldn’t be a source of stress. When you take control of things like water hardness and sensor calibration, you’re doing more than just cleaning plates; you’re extending the life of your home’s most hardworking assistant. Don’t be afraid to dive into the technical side of appliance repair. Whether you’re investigating why your new machine takes longer but uses less power or just topping off the brine, every small action protects your investment. Have you ever found something bizarre inside your dishwasher’s filter? Let me know your weirdest discovery in the comments below!