

I stood there, socks soaking wet in a lukewarm puddle, staring at my dishwasher like it had personally betrayed me. You know that sound? Not the happy sloshing of water, but that low, angry hum that says, ‘I’m trying, but I’m stuck.’ It’s the sound of a hundred bucks flying out of your wallet before a technician even knocks on your door. For years, I just guessed. I’d swap out parts like I was playing a high-stakes game of Tetris, hoping the next piece would magically fix the leak or the silence. One time, I actually replaced a perfectly good control board because I was too intimidated by my own toolbox. That was a $150 mistake I’m still annoyed about. But then I learned the multimeter trick. It’s the ‘secret handshake’ of the repair world that tells you exactly if your motor is toast or if it’s just a simple clog. Today, we’re going to stop the guessing game and get your kitchen back in order.
Why You Should Stop Guessing and Start Testing
If your machine isn’t draining or those dishes are coming out as dry and dirty as they went in, the motor is usually the prime suspect. But suspecting isn’t knowing. Before you even think about calling a pro or checking when to trust a warranty for dishwasher repairs, you need to see what’s actually happening under the hood. Most people think they need an electrical engineering degree to test a motor, but really, you just need to know the only multimeter settings you need for appliance repair. It’s about continuity and resistance, two fancy words for ‘is the electricity actually getting through?’ According to Consumer Reports, repair costs can often rival the price of a mid-range new unit, so knowing if the motor is the culprit is the difference between a $20 fix and a trip to the appliance store.
Is playing with a multimeter actually safe?
I get it. Messing with wires feels like you’re starring in an action movie where the red wire is always the wrong one. But here’s the truth: as long as the power is off and you know what to touch, it’s safer than trying to fix a drainage mistake with a plunger. The real danger is in the silence of a dead motor that’s still drawing power and getting hot. Have you ever spent an entire afternoon taking your dishwasher apart only to realize you didn’t have the right tool, or worse, that you were looking at the wrong part entirely?
Your Motor Doesn’t Have to Be a Mystery
The first step is listening. You can often identify a dying circulation motor by its pitch, but the multimeter is the only way to be 100% sure. We’re looking for ‘continuity.’ Think of it like a bridge: if the bridge is out, the cars (electricity) can’t cross, and the motor won’t spin. By checking the motor’s windings, we can see if that bridge is broken internally. This kind of expert diagnostics isn’t just about saving money today; it’s about how appliance diagnostics can save your warranty benefits. If you can prove to a manufacturer that a specific component failed, you’re much more likely to get that part covered without the ‘user error’ runaround. We’re going to walk through how to pull that motor and get those probes in the right spot so you can move on with your life.
Kill the Power First
Before you touch a single screw, you have to kill the power. This isn’t just a suggestion; it is the law of the DIY jungle. I once saw a neighbor try to bypass this by just ‘being careful,’ and he ended up with a scorched screwdriver and a very expensive lesson in conductivity. Unplug the unit or flip the breaker at the main panel. While you are at it, using a voltmeter to check your power cord connection safely is a smart move to ensure you aren’t fighting a phantom power issue before you tear the whole machine apart.
Access the Belly of the Beast
Most dishwasher motors live right at the bottom, tucked behind a thin metal or plastic panel called the kickplate. Knowing the secret to cleaning behind your dishwasher kickplate will help you get in there without snapping those flimsy plastic clips that hold the aesthetic together. Once that panel is off, you will see a maze of wires, hoses, and the sump assembly. Don’t panic. We are looking for the largest component—the circulation pump motor—which is usually a cylindrical part held in by a couple of rubber straps or screws.
Get the Right Numbers on Your Screen
Grab your multimeter. If you aren’t sure where to turn the dial, check the only multimeter settings you need for appliance repair. You want the Ohms setting, indicated by the ̩ symbol. This measures electrical resistance. If the motor is healthy, it should offer a specific ‘weight’ of resistance to the electricity passing through it. Too much or too little, and you’ve found your culprit.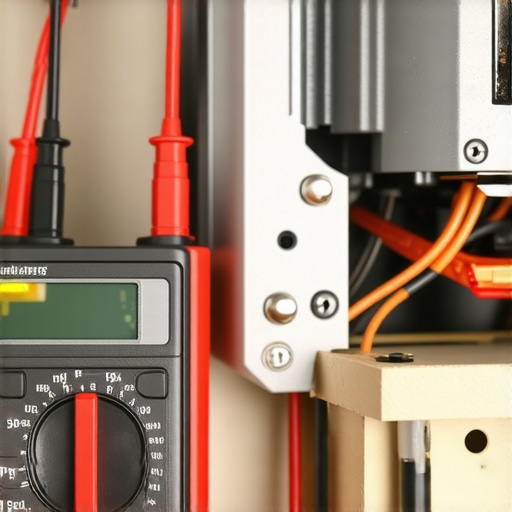
Probe the Windings Without the Stress
Locate the wire harness connected to the motor and gently pull it off to isolate the component. You want to touch your probes to the metal terminals inside the motor’s plug. I remember a humid Tuesday when I was hunched over a leaky machine, convinced the motor was fried because I got a ‘zero’ reading. I was about to order a replacement when I realized my probes were just dirty from years of kitchen grease and dust. I wiped the tips down, tried again, and the motor was actually fine—the problem was just a clogged filter. The lesson? Clean your contact points before you trust the numbers.
The Real Meaning Behind the Numbers
If your screen says ‘OL’ (Open Loop) or shows an infinite symbol, the internal copper windings have snapped. It’s like a bridge that has been washed away; no power can get across, and the motor is officially trash. However, if you get a reading of 0.00, the motor has ‘shorted out’ internally. You are typically looking for a range between 10 and 40 ohms for a standard motor. If you are already this deep, it is also worth testing your thermal fuse before buying a new control board, as a blown fuse can mimic the symptoms of a dead motor by cutting off all communication to the pump.
Document Your Findings for the Win
If the motor is indeed dead, do not just throw it in the bin. If your machine is relatively new, this data is your golden ticket for a claim. Understanding how appliance diagnostics can save your warranty benefits means you can present your specific Ohm readings to the manufacturer. It turns a vague ‘it won’t start’ complaint into a professional ‘the circulation motor has an open winding’ diagnostic. If you have been hearing weird sounds lately, make sure you also know how to document intermittent noises for a repair claim to build a bulletproof case for a free replacement part.We’ve all seen those shiny stickers boasting a ’10-Year Limited Warranty’ on the motor. It feels like a safety net, but in reality, it is often a well-designed trap for the uninformed. Most people believe that if the motor fails within a decade, they are getting a free repair. They couldn’t be more wrong. The nuance here is that why your appliance warranty covers parts but not labor costs is the fine print that kills your budget. In the world of high-end appliances, the part might cost $150, but the labor, travel fees, and diagnostic charges can easily top $300. At that point, the ‘free’ part is just a discount on a repair that costs half as much as a brand-new unit.
The Myth of the Bulletproof Service Plan
Everyone tells you to buy the extended service plan at the checkout counter, but there is a massive the real difference between service plans and manufacturer warranties that most homeowners miss. Manufacturer warranties are about defects; service plans are about peace of mind. However, even the best plan won’t save you if you have been using the wrong supplies. I have seen claims denied simply because the technician found evidence of third-party components. This is why why third-party parts frequently void your service plan; manufacturers want to ensure every screw and seal meets their specific tolerances. If you swap a motor with a ‘compatible’ version from a random online marketplace, you are essentially tearing up your contract. 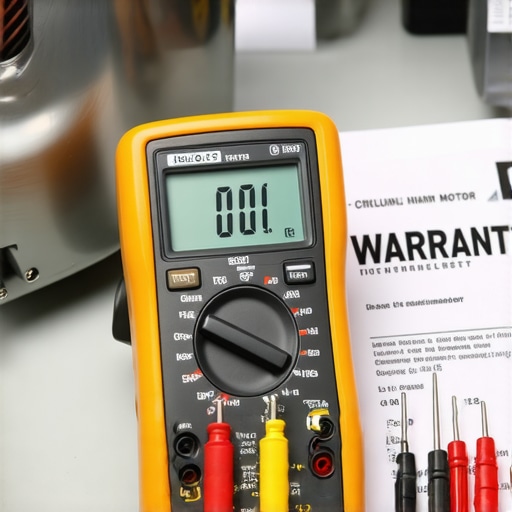
Does your choice of detergent actually damage the motor?
You might think the soap you use has nothing to do with the mechanical health of the pump, but that is a dangerous assumption. According to data from Yale Appliance, a significant percentage of service calls are linked to ‘environmental factors’ rather than mechanical failure. This includes things like detergent overdose. High-efficiency motors are designed for specific surface tensions. If you are dealing with the truth about tablet vs powder detergent residue build-up, you are essentially forcing your motor to work through a sludge-like environment, which wears down the bearings much faster than expected.
Watch Out for the Diagnostic Trap
The biggest mistake I see DIYers make is calling for a pro without doing their own homework first. If you don’t have your own data, you are at the mercy of the technician’s interpretation. By understanding appliance diagnostics improving your warranty claims, you can lead the conversation. If a tech sees you have already tested the motor for continuity and can show the Ohm readings, they are much less likely to suggest ‘shot-in-the-dark’ repairs like replacing the entire control board for no reason. This is especially true when you spot the top-signs your dishwasher needs professional diagnostics that go beyond a simple multimeter test. Don’t let a service company turn your kitchen into a testing lab for their newest trainee. Have you ever fallen into this trap where a ‘covered’ repair ended up costing you hundreds in labor? Let me know in the comments.
The Toolkit That Actually Saves Your Sanity
I don’t just carry a multimeter because I like looking like a technician; I carry it because it saves me from buying parts I don’t need. When I first started my DIY journey, I used a cheap $10 unit from a bin at the hardware store, but it was wildly unreliable. Now, I swear by my Klein Tools MM400. It’s rugged enough to handle the humidity of a kitchen floor and accurate enough to tell the difference between a failing motor and a simple wiring glitch. If you’re ready to move beyond basic cleaning, you need to learn how to test a dishwasher solenoid with a multimeter. This component is the gatekeeper of your water flow, and a five-minute test can prevent a massive flood or a ‘no-fill’ headache. I’ve seen homeowners replace entire pumps only to realize the $15 solenoid was the actual culprit.
How do I maintain my machine’s efficiency over time?
Keeping a dishwasher running for a decade isn’t just about clearing the filter every few months. You need to inspect the structural components that drive the water pressure. I have seen countless people replace expensive motors when the real issue was a loose or misaligned spray arm. Regularly checking the correct way to tighten a loose upper spray arm mount ensures that the water actually hits your plates with the force the manufacturer intended. Furthermore, hard water is the silent killer of modern appliances. It doesn’t just leave spots on your glassware; it creates calcium scale on the heating element and internal seals. This is why I always emphasize the impact of hard water on eco-friendly detergent performance. If your detergent isn’t activating correctly because of mineral interference, your motor has to work twice as hard to clear the grease, leading to premature bearing failure.#IMAGE_PLACE_HOLDER_D#
Predicting the High-Tech Future of Kitchen Repairs
According to the AHAM (Association of Home Appliance Manufacturers) 2023 Consumer Guide, modern descaling routines can extend the lifespan of internal heating components by up to 30%. I suspect we are quickly moving toward a world where your dishwasher will send a push notification to your phone when it detects rising electrical resistance in the circulation pump. We are already seeing evidence of this with why your smart appliance is using more data than expected—it is often sending health pings back to the manufacturer. Within five years, the ‘secret diagnostic mode’ will likely be a standard feature in every consumer-facing app. For now, however, your own diagnostic skills are the only thing standing between a cheap fix and a thousand-dollar replacement. If you want to truly level up your repair game, try the how to replace a snapped door cable using a fishing line hack. It’s the ultimate field-tested trick that keeps your door from slamming into the floor while you wait for the official replacement part to arrive. By understanding appliance diagnostics improving your warranty claims, you are taking back control from service companies that rely on your lack of knowledge.
The Hardest Lesson I Learned About Appliance Electronics
The biggest takeaway from my years of troubleshooting is that your machine doesn’t hate you—it just speaks a different language. Often, we rush to replace a motor when reading the hidden blinking lights on your dishwasher brain could have told us it was just a simple sensor error. Another hard truth? Never underestimate the power of documentation. I’ve seen homeowners lose hundreds because why your warranty claim got denied because of your garbage disposal connection wasn’t up to code. My lightbulb moment happened when I realized that most ‘dead’ motors are just jammed with debris. Before you rip out the pump, make sure a stray bone or glass shard isn’t the real culprit. It’s usually the $5 fix you ignore while looking for the $200 problem.
Gear That Makes You the Master of Your Machine
You don’t need a van full of parts to be effective, but you do need a few trusted allies in your cabinet. First, the Klein MM400 multimeter is non-negotiable for me; it’s the only reason I can diagnose with 100% certainty. Second, I always keep a specific toolkit handy for the proper way to clean spray arm nozzles using a paperclip, which solves nearly half of the ‘poor cleaning’ complaints I see. Finally, I highly recommend the official RepairClinic parts database. Having those visual exploded-view diagrams makes the multimeter testing feel much less like a guessing game and more like a targeted mission.
Stop Being a Hostage to Your Own Kitchen
There is a specific kind of pride that comes with hearing your dishwasher hum back to life after you’ve personally diagnosed the issue. You aren’t just saving money; you’re gaining the confidence to maintain your home without waiting on a technician’s schedule or paying inflated labor fees. Whether you are navigating how to claim a repair refund from your appliance manufacturer or just swapping a simple solenoid, remember that you are in control. Your dishwasher is a tool, not a mystery box. So, go grab that multimeter and see what your machine is trying to tell you. Have you ever successfully diagnosed a major appliance issue only to find out it was a tiny, cheap part? Let me know your biggest “win” in the comments below!