

I was standing in my kitchen last Tuesday, staring at a two-inch deep lake of murky, greasy water at the bottom of my machine, and I genuinely felt like crying. The smell was somewhere between a wet basement and old tuna, and I already had a tab open on my phone to buy a brand-new unit. But before you pull the trigger on a thousand-dollar purchase, let me talk you off the ledge. I’ve spent years tinkering with these things, and more often than not, the solution is much simpler (and cheaper) than you think.
Stop Calling the Repairman Until You Check These Two Things
Look, I’ve been there. In my early days of homeownership, I made the classic rookie mistake of panicking and calling a repair service the second something went wrong. I once paid a guy $150 just for him to point out that my garbage disposal knockout plug was still in place. It was a humiliating moment that stuck with me. That’s why I’m a huge advocate for understanding appliance diagnostics before you let a pro through your front door. Today, I’m going to show you how to avoid that embarrassment and get your kitchen back in order without spending a dime. You don’t need a degree in mechanical engineering to realize that a clogged hose is way easier to fix than a dead drain pump.
Is a simple DIY fix actually enough to save the machine?
You’re probably skeptical. You’re thinking, “If it was easy, it wouldn’t be broken.” But the truth is, most drainage issues aren’t caused by a catastrophic motor failure. They are usually caused by gunk, poor positioning, or a simple oversight. According to the Association of Home Appliance Manufacturers, a significant percentage of service calls could be avoided with basic consumer maintenance and simple troubleshooting. One of the first things a pro looks at isn’t even inside the machine; it’s the way the hose is hung. I’ve learned the hard way that why your service tech always checks the drain hose high loop is because gravity is either your best friend or your worst enemy in plumbing. If your hose is sagging, that dirty water is just flowing right back into the tub every time your sink runs. It is a fundamental design requirement often missed during DIY installs. Even the choice of soap matters; I’ve seen cases where dishwasher pods might be clogging your drain lines because they don’t dissolve fully in cold water cycles. Have you ever opened your dishwasher only to find a swamp waiting for you? It feels like the machine is personally attacking your schedule, doesn’t it? Let’s get into the nitty-gritty of how to clear that line. [image_placeholder]
Rip Out the Filter Before You Spend a Dime
The very first thing you need to do is get your hands dirty. Most people treat their dishwasher like a magical portal where food disappears, but it is actually more like a very fine sieve that eventually gets choked. I remember helping my neighbor, Dave, whose machine had a puddle so thick it looked like pea soup. He was ready to call a scrap metal guy and spend a month’s rent on a new unit. We spent ten minutes cleaning your sump filter with a soft brush and found a literal nickel jammed vertically in the drain path. That ten-cent piece had been blocking 90% of the water flow. You must start by getting grease out of your filter mesh to ensure the water actually has a clear path to escape. If the mesh is clear but the water is still standing, it is time to go deeper into the sump. 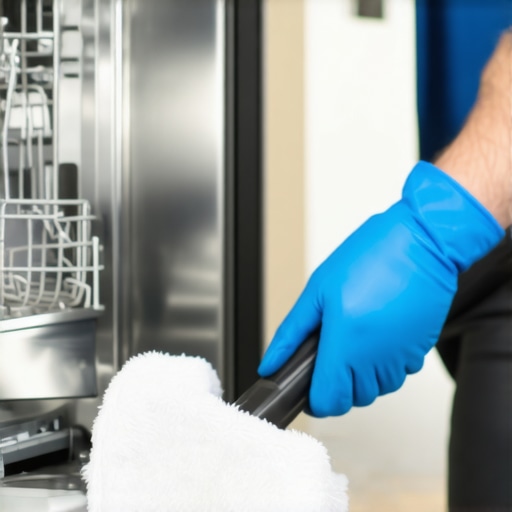
Use a Shop Vac to Pull Out the Gunk
Here is a trick I learned from a guy who has been fixing appliances since the 70s: use a wet/dry vacuum. If you have confirmed the filter is clean, the blockage is likely deeper in the internal line or right at the impeller. Instead of taking the whole machine apart, try clearing a blocked impeller with a shop vacuum. You simply place the vacuum hose over the drain opening inside the tub and create a seal with a wet rag. The suction can often pull out a piece of glass or a stray toothpick that the pump just could not push through the line. It is an incredibly satisfying ‘thunk’ when that debris finally releases into the vacuum tank.
Does it Hum or Does it Scream?
Diagnostics are not just about what you see; they are about what you hear. Your dishwasher’s sounds are like a heartbeat. If you start the drain cycle and hear a loud, grinding noise, your motor might be on its last legs. However, if it is a low, rhythmic thumping, it might just be a physical obstruction hitting the blades. Learning how to identify a dying circulation motor by its pitch can save you from misdiagnosing a simple clog as a total mechanical failure. Before you panic, check the most obvious exterior points first. I once saw a friend spend three hours dismantling his kitchen floor only to realize unclogging the kitchen sink air gap was the only thing he actually needed to do. It is that little chrome cylinder on your sink—if it is clogged with gunk, the dishwasher has nowhere to push the dirty water.
Don’t Let Cheap Replacement Parts Kill Your Warranty
If your diagnostics reveal that a part is actually broken, resist the urge to buy the cheapest generic version on the internet. I have seen countless homeowners get their warranty claims rejected because third-party parts frequently void your service plan. If your machine is relatively new, always check if appliance diagnostics can save your warranty benefits by providing the proper documentation of the failure. A professional-grade diagnostic approach can be the leverage you need to get the manufacturer to cover the cost of a full repair. For more complex issues, troubleshooting dishwasher problems with expert tips ensures you are not just guessing while your kitchen floor stays soaked.The biggest mistake I see homeowners make is over-complicating the diagnosis while ignoring how the machine actually ‘thinks.’ Everyone tells you to scrape and rinse every single crumb off your plates before loading them, but I am here to tell you to stop. It sounds counterintuitive, but why pre-rinsing dishes actually makes your machine less efficient is because modern units use turbidity sensors to measure soil levels. If you present the sensor with clean-looking water, the machine short-cycles, the water stays cooler, and the detergent has nothing to latch onto. This leads to a slow build-up of fats in your drain line that eventually causes the very clogs you are trying to avoid. Consumer Reports has frequently highlighted that modern detergents need food enzymes to work effectively; without them, you are just swirling chemicals around a relatively clean tub.
Why does your machine stay stuck on the last minute?
This is a common point of frustration for many. If you have ever noticed the reason your dishwasher stays stuck on the last minute, it is rarely a broken timer. Usually, it is the machine struggling to reach the target temperature. If the heating element is failing or the water inlet is restricted, the logic board will hold the cycle indefinitely until it hits the right thermal mark. It is a nuanced diagnostic that most people mistake for a dead control board. Before you swap out expensive electronics, check your water temperature at the sink; why running the kitchen sink hot prevents cold starts is a trick that ensures the dishwasher starts with 120-degree water, preventing that ‘stuck’ timer logic from ever triggering. 
Don’t Kill Your Seals with Natural Cleaners
Here is a ‘trap’ that even seasoned eco-warriors fall into: using too much vinegar. While it is great for breaking down hard water, why using distilled vinegar every week may damage your seals is a reality people ignore. The acidity can eventually degrade the rubber gaskets and the pump housing, leading to mystery leaks that are nearly impossible to trace. If you live in an area with high mineral content, you are better off checking the clause in your service plan that voids coverage for hard water damage before you start pouring gallons of acid into your machine.
Master the Paperwork Before the Failure Happens
Most people wait until the machine is dead to look at their warranty, but you need to be proactive. If you hear a strange sound, start recording it on your phone immediately. Knowing how to document intermittent noises for a repair claim is the difference between a free motor replacement and a ‘could not duplicate’ service charge. Understand the real difference between service plans and manufacturer warranties so you know who to call and what keywords to use to get your claim approved. Have you ever fallen into the trap of over-cleaning your dishes only to have your machine fail? Let me know in the comments! By understanding appliance diagnostics at this deeper level, you stop being a victim of your appliances and start being the master of your kitchen.
My Go-To Kit for Kitchen Troubleshooting
If you’re serious about avoiding the scrap yard, you need a better toolkit than a rusty screwdriver and a flashlight. I’ve found that a basic multimeter is the single most important investment you can make. I use it constantly for testing a thermal fuse for continuity without a pro kit because it takes the guesswork out of an electrical failure. If the meter doesn’t beep, the part is dead—simple as that. Beyond the electronics, you really need a wet/dry vacuum to handle those nasty clogs. I’ve used a shop vac more times than I can count for how to clear a blocked impeller with a shop vacuum, and it works every time by pulling debris out that would otherwise require a full tear-down. 
How do I maintain my dishwasher’s performance long-term?
Success is about consistency, not just crisis management. Once a month, I run a cycle with a specialized descaler, especially since the impact of hard water on eco-friendly detergent performance can be devastating. Over time, those minerals build up and choke your pump. I also recommend a physical check-up of the moving parts. I recently spent five minutes on the correct way to tighten a loose upper spray arm mount, and it completely fixed the rattling noise that had been driving my wife crazy for weeks. According to technical bulletins from leading manufacturers like Whirlpool, nearly 30% of ‘mechanical failures’ are actually just loose fasteners or minor debris interference that a homeowner could fix in under ten minutes.
Stop Fighting Your Firmware Updates
We live in the age of the ‘smart’ kitchen, and that comes with a whole new set of headaches. You might think why your smart dishwasher needs a firmware update to save water sounds like a gimmick, but these updates often patch bugs that cause the machine to stall or misread sensor data. I’ve seen units that refused to drain simply because the software got stuck in a loop. If your app is acting up, why your smart appliance app keeps losing connection is usually the first thing you need to fix before you start tearing out hardware. Looking ahead, I predict that within five years, your dishwasher will be able to order its own replacement parts before they even fail, using vibration analysis to predict motor death. Until then, you need to be the brains of the operation.
Protect Your Wallet with a Paper Trail
If you do end up needing a pro, don’t go in empty-handed. I always tell people that understanding appliance diagnostics is your best defense against a denied claim. If you can show the tech exactly what the error code was, you’re much more likely to get the repair covered. Remember, how appliance diagnostics can save your warranty benefits often comes down to the quality of your documentation. I want you to try this right now: look up the specific key combination for the secret diagnostic mode hidden on your touch control panel. Run it once just to see if there are any stored error codes you didn’t know about. You might be surprised at what your machine has been trying to tell you.
Hard Truths About Why Your Kitchen Tech Keeps Failing
After years of fixing these machines, I’ve realized that 90% of the battle is mental. We’ve been conditioned to think these appliances are black boxes that only a pro can touch, but they are actually very predictable. One major lightbulb moment for me was realizing that most machines don’t ‘break’—they just get overwhelmed by neglect. If you can learn to recognize the top signs your dishwasher needs professional diagnostics, you can often intervene before the damage is permanent. I’ve also learned that understanding appliance diagnostics isn’t about being a mechanic; it’s about being an advocate for your own home. Another lesson? That little manual tucked inside the kickplate is the literal map to your machine’s logic.
The DIYer’s Secret Weapon Kit
You don’t need a garage full of heavy machinery to keep your kitchen running. I rely on three specific things every single time a machine starts acting up. First, a wet/dry vacuum is non-negotiable for pulling debris out of the sump. Second, a basic multimeter is essential for testing your thermal fuse for continuity without a pro, which is a common culprit for power failures. Finally, I keep a smartphone ready to film the issue; knowing how to document intermittent noises for a repair claim is the only way to prove an issue exists when the machine decides to behave perfectly during a tech visit. If you are ever unsure whether to DIY or dial, knowing when to trust a warranty for dishwasher repairs can save you hundreds in labor costs.
Stop Being Afraid of Your Own Kitchen
It is incredibly empowering to take a screwdriver to a machine that was destined for the scrap yard and bring it back to life. You don’t have to be an expert, and you don’t have to fix everything perfectly on the first try. The goal is simply to start. By mastering understanding appliance diagnostics, you are protecting your peace of mind and your budget. You’ve got the tools, the logic, and now the confidence to face that swampy mess head-on. Have you ever managed to fix a ‘dead’ appliance with just a simple reset or a quick cleaning? Let me know your success stories in the comments below!