

I still remember the first time I saw a mini-geyser erupting from my kitchen counter. I was ten minutes away from serving a three-course meal when my dishwasher decided to start its drain cycle. Instead of water disappearing down the pipes, it came bubbling out of that little chrome cylinder next to the faucet, carrying bits of yesterday’s lasagna with it. I panicked. I grabbed a toothpick and started poking at the holes, thinking I could just clear the blockage manually. It was a disaster. I ended up pushing a solid plug of grease and food particles even deeper into the hose, turning a minor annoyance into a full-blown flood. It is one of those moments where you realize why your warranty claim got denied because of your garbage disposal or simple maintenance oversights—often, manufacturers consider this a user error rather than a mechanical failure. Today, I am going to show you the easiest, mess-free way to clear that line so you never have to deal with a soggy countertop again.
The Secret to a Clear Drain Doesn’t Require a Plumber
Most people think they need a professional snake or harsh chemicals to fix a slow-draining air gap. In reality, you probably have everything you need in your recycling bin. Early in my DIY journey, I made the mistake of ignoring the warning signs—that faint whistling sound and the slow drip onto the sink rim. I thought it would just clear itself. It did not. In fact, ignoring these small drainage issues can lead to top signs your dishwasher needs professional diagnostics later on because the drain pump has to work twice as hard to fight the backpressure. If you have ever felt that sinking feeling when the water starts rising, you are not alone. Have you ever stood over your sink, watching a puddle form and wondering if you are about to lose your Saturday to a massive repair bill?
Is a DIY fix actually better than calling a pro?
I get the skepticism. We have been told for years that plumbing is best left to the experts. But here is the kicker: a report by the National Association of Home Builders suggests that a significant percentage of appliance service calls are for simple clogs and maintenance issues that are entirely preventable. This specific fix involves a simple blow-out technique using a plastic bottle or a wet-dry vac. By learning how to clear a blocked impeller with a shop vacuum or using that same suction logic on your air gap, you can save yourself a $150 service fee. We are going to dive into the process of using a simple tube to create the necessary pressure to dislodge the gunk without damaging your drain hose clamps. Let’s get that water flowing where it belongs.
Strip the Chrome and Check the Cap
First, pull that chrome cylinder straight up. Beneath it, you will find a plastic cap, usually held on by two tabs. I remember the first time I did this; I was terrified I’d snap the plastic. I actually did end up breaking a tab once, which is why I now keep a few spare drain hose clamps and plastic fittings on hand. Once that cap is off, you’ll see two ports. The smaller one comes from the dishwasher, and the larger one goes down to the garbage disposal. Most clogs happen right here because of why dishwasher pods might be clogging your drain lines with undissolved casing or grease buildup that hardens in the cold air of the gap.
Force the Clog Out with Pressure
If you don’t have a shop vac, grab a small length of flexible tubing or even a sports water bottle with a narrow nozzle. The goal is to create a seal over the smaller hole. I once tried to clear a stubborn lasagna-induced blockage by just blowing into the tube. I didn’t realize the disposal side was also backed up, and I got a face full of swamp water. Now, I always make sure the garbage disposal is empty and clear first. By forcing a quick burst of air or water through that line, you can often push the debris into the disposal. This simple act of troubleshooting dishwasher problems with expert diagnostics saves you from the inevitable user error talk from a technician.
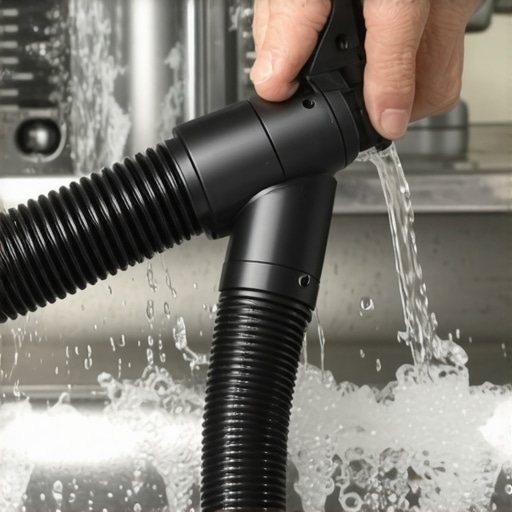
Switching to a Shop Vac for Heavy Lifting
If the blow-out method fails, it is time for suction. This is essentially how to clear a blocked impeller with a shop vacuum but applied to your sink deck. Place the vacuum hose over the entire air gap assembly. Use a wet rag to wrap around the base of the hose to create an airtight seal. When you flip that switch, the vacuum will pull all the standing water and debris out of the line. I’ve seen everything from lemon seeds to shards of plastic come flying out. If the water still won’t move, you might be dealing with the difference between a clogged hose and a dead drain pump. If the pump is the culprit, you’ll often notice a change in the machine’s sound, much like how to identify a dying circulation motor by its pitch.
Verify Your Warranty Status Before Proceeding
Before you start taking larger hoses apart under the sink, check your paperwork. Sometimes, understanding appliance diagnostics can help you realize that a deep-seated clog might be covered if it is caused by a faulty internal check valve. However, most service plans have a clause in your service plan that voids coverage for hard water or simple maintenance neglect. Performing this air gap clean-out twice a year keeps your machine running efficiently and ensures you aren’t paying for a service call that ends with a technician simply handing you a wet-dry vac.
Everyone tells you to rinse your plates until they are sparkling before they hit the rack. In my experience, that is exactly what kills your machine’s performance. I used to be a serial pre-rinser, thinking I was helping the dishwasher, until I realized the modern sensors were actually getting confused. These machines are designed to detect soil levels; if there is no gunk, the machine runs a ‘light’ cycle that doesn’t reach the temperatures needed to sanitize or clear out the drain lines properly. According to the Association of Home Appliance Manufacturers (AHAM), pre-rinsing can waste more than 6,000 gallons of water per year per household without improving cleanliness. In fact, why pre-rinsing dishes actually makes your machine less efficient is a lesson many learn only after their glasses start looking cloudy and their drain lines begin to smell.
Stop scrubbing your plates before you load them
The logic is simple: the detergent needs something to latch onto. If the enzymes in your pods don’t find food particles, they can actually start attacking the finish on your glassware or leave a gritty residue. This leads to understanding appliance diagnostics at a deeper level—it’s not just about finding a broken part, but recognizing how your habits affect the machine’s life. I’ve seen countless DIYers try to fix ‘poor cleaning’ by doubling up on vinegar, but why using distilled vinegar every week may damage your seals is the hidden nuance most influencers won’t tell you. Over time, that acidity can eat away at the rubber gaskets, leading to leaks that no air gap cleaning can fix.
The labor cost loophole in your service plan
Here is a trap I see homeowners fall into every single week: the assumption that a ‘Full Warranty’ means zero out-of-pocket costs. I once spent four hours helping a friend diagnose a drainage issue, only for them to find out that while the manufacturer would send a new $200 pump for free, they wouldn’t pay the $180 labor fee for a tech to install it. The real difference between service plans and manufacturer warranties often boils down to this distinction. Knowing why your appliance warranty covers parts but not labor costs can save you from a major financial headache. If you can learn how appliance diagnostics can save your warranty benefits by documenting the issue properly yourself, you have much better leverage when talking to customer service. Have you ever fallen into this trap? Let me know in the comments.
Can a secret button sequence save you from a repair bill?
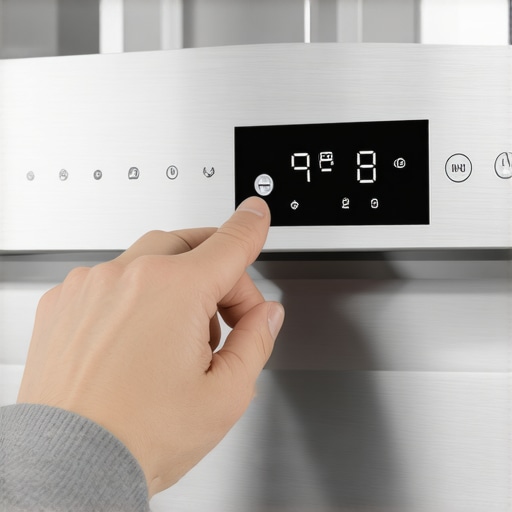
Before you call a pro because your dishwasher won’t drain or start, you need to check for stored error codes. Most modern units have a ‘hidden’ tech mode. For many brands, pressing a specific sequence of buttons—like ‘Normal’ and ‘Heated Dry’ three times in a row—will trigger a self-test. The secret diagnostic mode hidden on your touch control panel can tell you exactly what is wrong before the technician even knocks on your door. This is the difference between a beginner and an expert; the pro doesn’t guess, they listen to what the machine’s onboard computer is already screaming. If you can pull a code that points to a simple clog, you can go right back to that air gap or drain pump with total confidence.
Once you’ve mastered the air gap and cleared the drain lines, you start to realize that professional-grade maintenance is more about the tools you use than the muscles you have. I used to think a screwdriver and a prayer were enough, but a single $20 investment changed everything for me. Now, I never start a repair without my digital multimeter. Instead of blindly replacing parts, I’ve learned the art of using a voltmeter to check your power cord connection safely before assuming the control board is fried. This diagnostic-first approach is exactly what the experts at the Master Samurai Tech appliance repair school preach: you must prove a component is dead before you bury it. By testing a thermal fuse for continuity without a pro kit, you can often find that a $5 part was the only thing standing between you and a functioning machine.
Stop guessing and start testing with a multimeter
The beauty of a multimeter is that it removes the ego from the repair. I’ve seen homeowners insist their heating element was broken, only to find out there was no power reaching it due to a loose wire. If you are dealing with a machine that won’t start, testing your thermal fuse before buying a new control board is the smartest move you can make. It’s also a safety essential. I always verify that the unit is truly de-energized before I stick my hands near the motor. If you suspect your heater is failing, you should also take a moment for how to verify your heating element isn’t touching plastic tubs, which is a common cause of that ‘burning plastic’ smell that terrifies every homeowner.
How do I keep my dishwasher running like new for a decade?
Long-term health for your dishwasher comes down to chemistry and consistency. Over time, calcium and magnesium in your water supply build up a white, chalky film that chokes your spray arms. I’ve found that how to remove cloudiness from glasses using citric acid is the most effective way to strip that scale without using harsh industrial cleaners. I make it a habit to run a high-heat cycle with a cup of citric acid once a month. This doesn’t just make the tub shiny; it keeps the internal seals supple and prevents the pump from straining against mineral grit. However, be careful not to overdo the cleaning agents, as the impact of detergent overdose on energy efficiency can actually lead to more suds and eventual leaks.
Thermal imaging reveals what your eyes cannot see
If you want to go full ‘tech-geek’ like I did, consider a small thermal camera attachment for your phone. I started using a thermal camera to find heat leaks in your dishwasher door and was shocked to see exactly where my steam was escaping. A tiny gap in the gasket that looks perfect to the naked eye will glow bright red on a thermal scan. This tool allows you to how to document intermittent noises for a repair claim or heat loss issues with photographic proof that a warranty provider cannot argue with. It turns ‘I think it’s leaking’ into ‘Here is the exact thermal signature of the failure.’

Looking ahead, I predict we are entering an era where ‘predictive maintenance’ will move from industrial factories into our kitchens. We are already seeing high-end units with vibration sensors that can detect a failing bearing months before it starts to squeak. Soon, your machine won’t just show an error code; it will send a message to your phone saying, ‘Your drain pump is 85% clogged, clear it now to avoid a flood.’ This shift will make how appliance diagnostics can save your warranty benefits even more critical, as you’ll have a digital paper trail of the machine’s health from day one. For now, take my advice: go into your kitchen tonight, enter that secret diagnostic mode hidden on your touch control panel, and see if there are any ‘ghost codes’ waiting for you. You might just catch a major problem while it’s still a minor fix.
Hard-Won Truths from My Years in the Kitchen Trenches
Looking back at that flooded kitchen ten years ago, I realized that most of my stress came from a lack of knowledge, not a lack of tools. One of the biggest shifts in my mindset was learning that how appliance diagnostics can save your warranty benefits isn’t just a tagline; it’s a financial strategy. I also learned the hard way that why dishwasher pods might be clogging your drain lines often comes down to water temperature and cycle choice rather than the brand of the pod itself. Finally, remember that your dishwasher’s sensors are its eyes; don’t blind them with excessive pre-rinsing or the machine will never run at its full potential.
My Go-To Gear for Stress-Free Repairs
If you want to stop guessing and start fixing, there are three items I never live without. First is a reliable digital multimeter—testing your thermal fuse before buying a new control board is only possible if you can accurately read continuity. Second, a small shop vacuum is the only way to truly clear a deep clog without making a mess. Lastly, keep a bag of food-grade citric acid in the pantry; how to remove cloudiness from glasses using citric acid is a trick that saves your spray arms from mineral buildup that a standard detergent simply cannot touch.#IMAGE_PLACEHOLDER_E#
Take Control of Your Kitchen’s Most Hardworking Machine
You don’t need to be a certified technician to keep your home running smoothly. By taking twenty minutes to clear your air gap or checking a diagnostic code, you are reclaiming your time and your budget from unnecessary service fees. Mastering troubleshooting dishwasher problems with expert diagnostics gives you the confidence to handle the next geyser—or better yet, prevent it from happening in the first place. You have the knowledge; now go ahead and flip that breaker back on and run a test cycle. Have you ever found a weird object inside your dishwasher’s air gap? Let me know in the comments below!