

I stood there in my socks, feeling that unmistakable, cold squish of kitchen tile that definitely shouldn’t be wet. My three-year-old dishwasher looked perfectly fine. The door was shut tight. The seal looked plump and black. But there it was—a slow, rhythmic drip-drip-drip that seemed to come from absolutely nowhere. I did what most folks do: I panicked. I assumed the pump had exploded or the tub had cracked into two pieces. I even started looking up top signs your dishwasher needs professional diagnostics because I was sure I was in over my head. But the truth was far more subtle, and honestly, a bit more annoying. It was a micro-gap in the gasket, a tiny defiance of physics that the naked eye just can’t catch until the floorboards start to warp and the smell of damp wood fills the air. Today, I’m going to show you how to spot what your eyes are missing and save your kitchen from a slow-motion flood.
That Puddle Wasn’t There Yesterday
If you’re seeing water on the floor but the gasket looks “fine,” you aren’t crazy. I learned this the hard way after I replaced a frayed door seal for under twenty dollars only to realize the new one had the same invisible issue because I hadn’t seated it correctly. These gaps often happen because of something called “compression set”—where the rubber loses its memory and stops pushing back against the door. According to the experts at the Association of Home Appliance Manufacturers, even a gap the width of a human hair can leak significant amounts of water under the high pressure of a modern wash cycle. We’re going to hunt down these microscopic traitors today so you don’t end up with a ruined kitchen and a massive headache.
Is a tiny leak really worth all this trouble?
You might think a few drops are no big deal, but let me tell you, your subfloor disagrees. I ignored a “phantom drip” for a month once, and by the time I pulled the machine out, I had mold growing on the drywall. Plus, if you ignore these minor maintenance issues, you might find that your warranty claim was denied due to lack of maintenance. It’s a bitter pill to swallow when a fifteen-dollar part costs you a fifteen-hundred-dollar repair bill because of neglect. Have you ever noticed a mysterious damp spot in front of your machine that seems to disappear by the time the cycle ends? Drop a comment below if you’ve been chasing a ghost leak like I was!
Why Your Gasket Is Lying to Your Face
The problem is that rubber is deceptive. It can look shiny and new while having a structural failure deep inside the material. I’ve seen gaskets that looked factory-fresh but had actually slipped just a millimeter out of their track at the very bottom corner. Learning the correct way to reseat a slipped tub gasket is often the difference between a dry kitchen and a renovation nightmare. Steam escapes through these invisible cracks, condenses on the underside of your countertop, and then drips back down, making it look like the leak is coming from the floor when it’s actually coming from the top. We need to look closer, and I mean really close, to find the true culprit.
Start the Hunt with a High-Powered Flashlight
The easiest way to find a micro-gap isn’t with your eyes, but with shadows. I call it the ‘Shadow Trace.’ When the machine is off and dry, grab the brightest LED flashlight you own and head into the kitchen with the lights off. Shine the light from inside the tub outward toward the door seams. If you see even a pinprick of light escaping through the seal, you’ve found your leak. I used this trick last summer when I was convinced my pump was shot, only to realize a tiny bit of build-up had pushed the gasket out by a hair. It’s a simple part of troubleshooting dishwasher problems expert diagnostics repair tips that professionals use to save time. 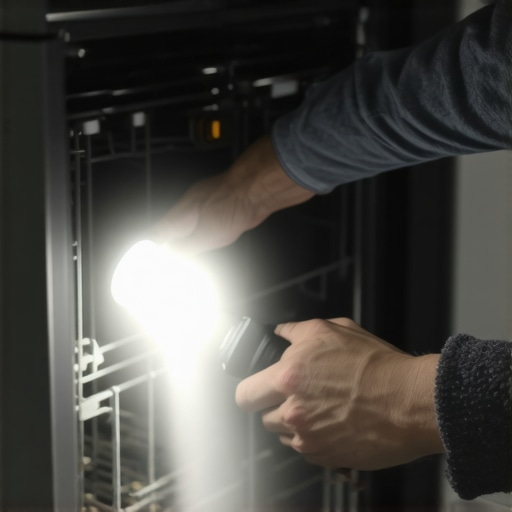
Is it the seal or a rogue spray arm?
Before you rip the gasket out, check the spray arms. I once spent three hours chasing a ‘gasket leak’ that was actually a split seam on the plastic spray arm. The crack was so small it only opened up under pressure, firing a needle-thin jet of water directly at the door seal. No gasket is designed to hold back a direct, high-pressure blast. You can use the flashlight trick for finding micro-cracks in your spray arm to rule this out before spending money on a new seal.
Why the Paper Strip Test Beats Your Naked Eye
If the light test is inconclusive, go old school with the paper strip method. Take a heavy piece of paper—like a business card or a strip of a cereal box—and place it across the gasket, then close the door. Try to pull the paper out. You should feel significant resistance, like the door is trying to hold onto it. If the paper slides out easily, that section of the gasket has lost its ‘crush.’ This lack of compression is often why identifying a failing sump gasket before the floor warps is so critical; if the door isn’t tight, the water finds the path of least resistance, which is usually your subfloor. I did this on my neighbor’s machine and found that the entire top-left corner had zero tension, even though it looked perfect to the eye.
Don’t Let Harsh Chemicals Eat Your Gasket
Maintenance is a double-edged sword. We all want a clean machine, but I’ve seen homeowners melt their seals by being too aggressive. Many people think they are being helpful by scrubbing the rubber with heavy-duty cleaners, but why you should never use degreaser on your door gasket becomes obvious once the rubber starts to get gummy or brittle. Similarly, why using distilled vinegar every week may damage your seals is a hot topic; the acetic acid can eventually break down the EPDM rubber used in many modern machines. If you must clean it, stick to warm, soapy water and a soft microfiber cloth. A gentle touch ensures the material stays supple enough to maintain that crucial water-tight bond.Wait, there’s a trap here that catches even the most seasoned DIY-ers. You’ve checked the seal, you’ve done the flashlight test, and you’re still getting errors. Everyone tells you to keep swapping parts until something works, but in my experience, throwing parts at a problem is the fastest way to drain your bank account without fixing a thing. Most people treat diagnostics as a ‘nice to have,’ but understanding appliance diagnostics improving your warranty claims is actually your strongest legal shield. If you can’t prove the failure wasn’t caused by your own ‘creative’ repair work, the manufacturer is going to walk away from the bill.
Does Your Smart Dishwasher Actually Need a Software Update?
It sounds ridiculous, but we aren’t just dealing with pumps and pulleys anymore. I’ve seen machines ‘leak’ simply because a sensor was out of calibration, causing the tub to overfill. This is where how smart diagnostic apps are changing home appliance repair comes into play. According to a 2023 report from the Service Council, over 20% of modern appliance service calls are now resolved via software recalibration or firmware updates rather than physical part replacement. If you aren’t looking at the secret diagnostic mode hidden on your touch control panel, you’re only seeing half the picture.
Stop Blaming the Machine When Your Disposal Is the Culprit
One of the biggest ‘Oops’ moments I see involves the kitchen sink. You wouldn’t believe how often why your warranty claim got denied because of your garbage disposal becomes the headline of a repair story. If you just installed a new disposal and your dishwasher suddenly stops draining or starts leaking from the air gap, you probably forgot to knock out the plastic plug in the disposal’s inlet. The machine isn’t broken; it’s just being strangled by your plumbing. It’s an embarrassing mistake, but one that costs hundreds in unnecessary service fees if you don’t catch it yourself.
Protect Your Wallet with Data-Driven Claims
Finally, let’s talk about the ‘invisible’ killer: power quality. Most homeowners ignore the electrical side until the control board fries. Knowing how to prove your appliance failure was caused by a power surge can be the difference between a free replacement and a $400 bill for a new board. Don’t just look for water; look for the data and the electricity. In the world of modern appliances, the physical leak is often just a symptom of a deeper digital or environmental issue. Have you ever fallen into this trap where a simple setup error looked like a major mechanical failure? Let me know in the comments!I’m a bit of a nerd when it comes to gear, but one tool has saved me more money than any other: my entry-level thermal camera. While the flashlight trick is great for finding physical gaps, using a thermal camera to find heat leaks in your dishwasher door lets you see exactly where steam is escaping in real-time. If you see a bright yellow plume rising toward your countertop on the screen, that’s your cabinet finish being slowly cooked. According to technical briefs from FLIR Systems, detecting these thermal bridges is the most effective way to identify seal failure before physical moisture causes rot. It’s an advanced diagnostic move that helps you catch issues long before you see a puddle. 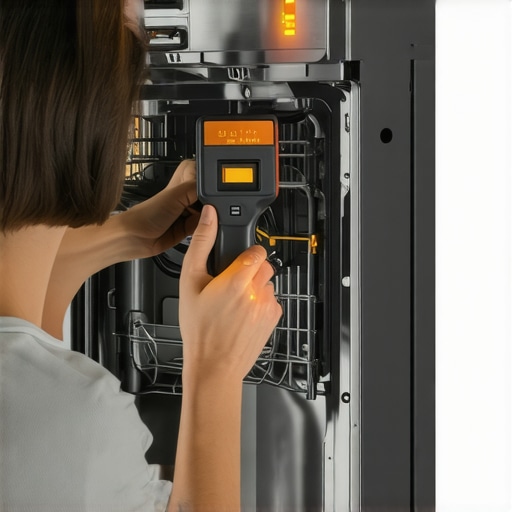
Why I Run the Hot Water Every Single Time
One of the simplest habits I’ve adopted is something most people skip: why running the kitchen sink hot prevents cold starts. Most modern dishwashers don’t have high-wattage heaters like the old ones did. If the first two gallons entering the machine are cold from the pipes, your detergent won’t dissolve, and your sensors will freak out. It’s a basic part of troubleshooting dishwasher problems expert diagnostics repair tips that costs zero dollars but adds years to your machine’s life. If you want to avoid that gritty film on your plates, start the tap first.
The Hard Water Clause That Kills Your Warranty
I recently sat down and actually read the fine print in a standard protection plan, and what I found was terrifying. Many owners don’t realize there is often the clause in your service plan that voids coverage for hard water damage. If your pump fails because of calcium buildup and you haven’t been using a softener or descaler, they can—and will—deny the claim. This is why how appliance diagnostics can save your warranty benefits is such a critical topic; you need to prove you’ve done the work. Before you sign up for a renewal, check the terms, because why your service plan renewal may cost more than the repair often comes down to these hidden exclusions.
How do I keep my machine running like new for years?
Long-term success is all about the ‘invisible’ maintenance. I set a calendar reminder every six months to check the drain line. If you don’t, you’ll eventually see the red flag your service tech looks for in your drain line—a thick, black sludge that slows down the motor. In the future, I expect we won’t even have to check these things manually. We are already seeing why your smart meter might be pausing your dishwasher cycle as utilities and appliances start talking to each other to save energy. Eventually, AI-driven diagnostics will probably tell you exactly when your gasket is 5% away from failing. For now, we have to be the smart ones. Try running your hot water tap before your next load—it’s the easiest way to see an immediate improvement in your wash quality.
What I Finally Learned After Three Flooded Kitchens
I used to think that as long as the dishes came out clean, everything was fine. But the biggest lesson I’ve picked up is that silence is often a warning. If you stop hearing the rhythmic spray of the arms or notice a slight delay in the cycle, don’t wait for a puddle. One major lightbulb moment for me was realizing how often external factors like plumbing issues—specifically clearing the air gap to stop sink water from backing up—are the real culprits behind ‘machine’ failures. I also learned that documenting every little thing is your best defense; knowing how to prove your appliance failure was caused by a power surge saved me from a $500 board replacement last year. #IMAGE_PLACEHOLDER_E# It isn’t just about turning a wrench; it’s about knowing the story your machine is trying to tell you through its sensors and sounds.
Tools That Saved My Sanity
You don’t need a professional van full of gear to keep your kitchen dry. I swear by my budget thermal camera; using a thermal camera to find heat leaks in your dishwasher door is the only way to see steam escaping before it ruins your cabinetry. I also recommend downloading the manufacturer’s specific diagnostic app. These tools, combined with troubleshooting dishwasher problems expert diagnostics repair tips from community forums, turn you from a panicked homeowner into a capable troubleshooter. Finally, keep a high-quality multimeter nearby. Testing for continuity or ground faults can prevent you from buying parts you don’t actually need.
Take Control of Your Kitchen Before the Drip Starts
Repairing your own appliances can feel intimidating, but the peace of mind that comes with a dry floor is worth the effort. Remember that your proactive maintenance isn’t just about fixing a leak; it’s about protecting your financial investment. Since your warranty claim was denied due to lack of maintenance is a common reality for many, doing the small things like cleaning the gasket and checking the drain line keeps your coverage intact. Understanding how appliance diagnostics can save your warranty benefits is your secret weapon in negotiations with service providers. Before you commit to a long-term contract, always evaluate why your service plan renewal may cost more than the repair itself. You have the tools, the tricks, and the data to keep your dishwasher running perfectly for years to come. Have you ever caught a tiny leak before it became a major disaster? Let me know in the comments below!