

I stood in my kitchen last Tuesday, staring at a “clean” dinner plate that looked like it had been sandblasted. You know that feeling? You pay for the premium pods, you scrape every scrap of lasagna into the bin, and yet your glasses come out looking like they’ve been through a dust storm. For the longest time, I assumed my machine was just dying. I was two minutes away from checking my warranty status and bracing for a huge repair bill. But then, I did something I should have done months ago: I pulled out the bottom rack and really looked at the spray arms. They were choked. Tiny holes once meant for high-pressure water were now plugged with calcium and old grease. Today, I’m going to show you how to reclaim that sparkle using nothing but a couple of lemons. No industrial cleaners, no toxic fumes—just a simple, backyard solution that works better than the blue stuff you buy at the store. Have you ever noticed your dishes getting cloudier no matter which detergent you use?
Stop Blaming Your Detergent for Gritty Glasses
It’s easy to think the soap is the problem. In reality, the reason your glasses come out gritty is often just poor water flow. When those spray arm nozzles get blocked, the water pressure drops. Instead of a powerful blast, you get a sad little dribble that can’t wash away the detergent or the food. I learned this the hard way when I tried to “deep clean” my machine with a harsh acid I found in the garage. I didn’t just clean it; I made the plastic so brittle I nearly had to replace the entire spray arm assembly. It was an expensive lesson in over-engineering a simple problem.
Does Lemon Juice Actually Cut Through Hard Water?
You might be skeptical. Can a fruit really do what a chemical lab can’t? Absolutely. According to the University of Illinois Extension, citric acid is a natural chelating agent, which is just a fancy way of saying it grabs onto minerals like calcium and magnesium and pulls them off your appliance parts. It’s the same logic behind de-scaling your machine using lemon juice instead of buying those pricey tablets. We’re going to combine this natural power with the toothpick method for unclogging nozzles to get your dishwasher back to factory-fresh performance. Let’s get our hands a little sticky and save some money.
Clear the Path to Your Spray Arms
To get started, you need to expose the hardware. Pull the bottom rack completely out of the tub and set it on the counter. If the rack feels like it’s catching on something, you might need to check if you need to reseat a slipped tub gasket that is protruding into the path. Once the rack is gone, you’ll see the primary spray arm. Most modern machines use a simple plastic nut to hold it in place. Spin it counter-clockwise with your fingers. If it feels loose or wobbly before you even touch it, you might be looking at the five-minute fix for a loose spray arm nut rather than a major mechanical failure. Lift the arm out and bring it to the sink.
The Time I Found a Popcorn Kernel in My Machine
A few months back, I was convinced my pump was failing because of a rhythmic ‘thumping’ sound. I spent an hour researching how to identify a failing drain pump by sound, fearing the worst. When I finally pulled the spray arm, I found a single, unpopped popcorn kernel wedged perfectly inside the center nozzle. It acted like a whistle, disrupting the water pressure and causing the arm to stutter against the housing. It’s a perfect example of why professional diagnostics often start with the simplest physical obstructions.
Let Lemon Juice Do the Heavy Lifting
Instead of scrubbing with abrasive pads that can scratch the plastic, we’re going to use chemistry. Fill your sink with warm water and the juice of two large lemons. Citric acid works by breaking the ionic bonds of the scale. Submerge the spray arms and let them soak for at least twenty minutes. This is much safer than using harsh chemicals that can degrade your components over time. In fact, the lemon peel trick for clearing hard water scale is often the first thing savvy repair techs suggest before they ever recommend a part replacement. 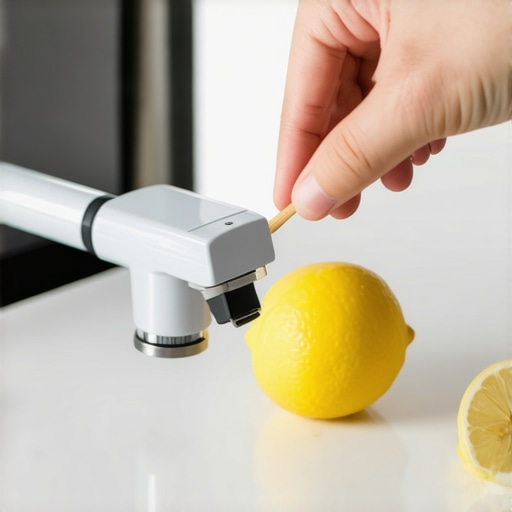
Precision Cleaning with the Toothpick Technique
After the soak, the calcium will be soft, like wet chalk. This is where you use a standard wooden toothpick. Gently poke the tip into every single hole on the spray arm. Don’t use a metal needle or a paperclip, as these can widen the holes and ruin the factory-calibrated spray pattern. If you find significant debris that won’t come out, you may need to learn how to clean the hidden spray arm nozzles by flushing the arm backward under a high-pressure faucet. This ensures that any loosened grit is pushed back out through the large center intake rather than being forced deeper into the tips.
Double Check Your Work with the Paper Plate Test
Once you’ve cleared the holes and reinstalled the arms, you need to know if the water is actually reaching your dishes. This is crucial because the real reason your glasses come out cloudy is often just poor coverage. Place four paper plates face-up on the top and bottom racks and run a short rinse cycle. If the plates are soaked, you’ve restored the pressure. If they are dry in some spots, you might still have a blockage further down the line. Using the paper plate test for spray arm coverage is the easiest way to confirm your DIY fix worked before you load a full batch of expensive glassware.
If the paper plate test reveals that you’re still seeing dry spots or gritty residue, it’s time to move beyond simple blockages and look at the physics of how your machine actually thinks. Most people are clean freaks who believe that pre-scrubbing dishes makes the dishwasher’s job easier. In reality, why pre-rinsing dishes actually makes your machine less efficient is due to the way modern turbidity sensors function. These sensors measure the murkiness of the water to determine how long the cycle should run. If you put in pristine plates, the sensor tells the computer to cut the cycle short and lower the temperature, leaving you with half-dissolved detergent and a gritty film on your glasses. Furthermore, you risk how to prevent suds locks in high-efficiency machines by giving the detergent nothing to latch onto but air, causing the pump to cavitate.
Vinegar: The Invisible Gasket Killer
We’ve all seen the life hacks suggesting a bowl of vinegar on the top rack once a week. While vinegar is a decent descaler for showerheads, it is highly acidic and can be brutal on the rubber components inside your dishwasher. I’ve seen countless DIYers discover why using distilled vinegar every week may damage your seals after the acid causes the ethylene propylene diene monomer (EPDM) rubber gaskets to swell and eventually crack. This is the ultimate trap—trying to save five dollars on a natural cleaner only to end up with a hundred-dollar leak on your kitchen floor. Use lemons for the arms, but stick to manufacturer-approved cleaners for the internal plumbing.
Can Hard Water Build-up Legally Kill Your Warranty Protection?
This is the nuance that catches most homeowners off guard during a service call. You might think that any failure within the first year is the manufacturer’s problem, but there is a major loophole regarding environmental damage. According to the Association of Home Appliance Manufacturers (AHAM), routine maintenance—including managing mineral buildup—is the legal responsibility of the owner. If a technician finds that your circulation pump failed because it was choked with calcium, the manufacturer may argue that why your warranty claim was denied due to lack of maintenance is entirely justified. This is why understanding appliance diagnostics improving your warranty claims is so critical; you need to show that the failure was mechanical, not caused by your local water chemistry. Finally, don’t ignore the digital side of the machine. In our rush to fix things with wrenches, we often overlook that why your appliance firmware update just bricked the control board is a real possibility in the age of smart homes. Sometimes the clog isn’t in the pipe, but in a corrupted software cache. Have you ever fallen into this trap? Let me know in the comments.
If you really want to get serious about diagnostics, stop guessing and start measuring. I never open the kickplate without my digital multimeter. It’s the only way to perform testing your heating element for ground faults with a meter safely. If your water isn’t reaching the right temperature, you’re likely looking at a blown fuse, and the specific way to test a thermal fuse for continuity requires that electrical precision. I also swear by a high-lumen waterproof borescope. It’s a game-changer for spotting the red flag your service tech looks for in your drain line without having to pull the entire unit out and risk a back injury.
How do I maintain my dishwasher’s performance over several years?
The secret isn’t a one-time deep clean; it’s a rhythm. You have to account for the real cost of skipping your monthly descaling cycle. Over time, those minerals don’t just clog the spray arms; they eat away at the pump seals and create friction in the motor. I also make it a habit to check the high loop on my drain hose every six months. If the hose sags, you get nasty backwash from the sink, which is often the difference between a clogged hose and a dead drain pump. Monthly maintenance is the best way to ensure you never have to worry about why your warranty claim was denied due to lack of maintenance. 
Smart Tech is Changing How We Fix Leaks
Looking ahead, I believe we are moving toward a “digital twin” era for kitchen appliances. Soon, your machine won’t just beep; it will send a detailed error log to your smartphone. We’re already seeing how smart diagnostic apps are changing home appliance repair by letting us “see” through the sensors before we even pick up a screwdriver. However, this tech is a double-edged sword. You need to stay on top of your firmware updates for new smart dishwashers or you might find your machine “bricked” by a bad Wi-Fi handshake or a corrupted software cache.
Access the Secret Menu Like a Pro
Expert technical documentation from the Association of Home Appliance Manufacturers (AHAM) confirms that most modern units have built-in self-test modes. Learning the secret tech menu that calibrates your water sensors is like getting the keys to the kingdom. It allows you to force the drain pump to run or the heater to engage, which is vital for troubleshooting dishwasher problems without waiting for a two-hour cycle to finish. If your machine is acting up, I strongly encourage you to test your door latch sensor with a business card today—it’s a ten-second check that can save you from a major diagnostic bill.
The Costly Lessons I Learned by Playing Guessing Games
Looking back at that sandblasted plate, I realize I wasted months being frustrated when a ten-minute fix was right in front of me. Here are the three things that changed how I approach appliance maintenance forever. First, I stopped “helping” the machine. I found out that why pre-rinsing dishes actually makes your machine less efficient comes down to sensor logic—if you do the work, the machine stops trying. Second, I quit the vinegar habit. It sounds natural, but why using distilled vinegar every week may damage your seals is a lesson you don’t want to learn when your kitchen floor is soaking wet. Finally, I realized that maintenance isn’t optional for your wallet. I now know why your warranty claim was denied due to lack of maintenance is a common pitfall; if you don’t keep it clean, the manufacturer won’t keep it covered.
My Field-Tested Toolkit for Every Repair
You don’t need a professional van to handle basic appliance repair. I keep a few specific things in my utility drawer that save me time and money. I always have a digital multimeter on hand, specifically for testing your heating element for ground faults with a meter when dishes come out cold and damp. I also keep a simple stack of business cards nearby—not for networking, but because you can test your door latch with a business card to ensure the seal is tight and the sensors are engaged. Lastly, I rely on the Association of Home Appliance Manufacturers guidelines to know when to trust a warranty for dishwasher repairs versus when to DIY. #IMAGE_PLACE_HOLDER_E#
Take Back Control of Your Kitchen
You don’t have to settle for gritty glasses or a machine that sounds like a lawnmower. By spending just thirty minutes a month on the spray arms and filters, you are extending the life of your appliance by years. Whether you are performing troubleshooting dishwasher problems for the first time or you’re a seasoned DIYer, the goal is always the same: efficiency and peace of mind. Your machine is a tool designed to serve you, not stress you out. Have you tried the paper plate test to check your water coverage yet? Let me know how your spray arms look in the comments below!