

I’ll never forget the Tuesday morning I found my “clean” dishes still covered in last night’s spaghetti sauce. I opened the door, and there it was: the detergent pod, dry as a bone, staring back at me from inside its little plastic prison. I’d spent forty-five minutes loading that machine perfectly, only for the soap to take a nap while the water did all the work. It’s one of those minor household betrayals that makes you want to kick the kickplate. For years, I assumed it was just a “tired” spring or maybe a sign that I needed professional diagnostics for my failing appliance. But after a few embarrassing calls to my repair-savvy uncle, I realized I was making a rookie mistake. Today, I’m going to pull back the curtain on why that cup stays shut and how you can fix it in about thirty seconds. [image_placeholder_1]
The Stealthy Blockage You’re Probably Ignoring
We often think of appliance failure as a catastrophic mechanical breakdown. In reality, most of my early struggles were caused by my own “Tetris” skills with the bottom rack. I once spent a hundred dollars on a service call only for the tech to show me that a slightly-too-tall dinner plate was leaning just an inch too far forward. It didn’t stop the rack from sliding in, but it acted like a deadbolt against the dispenser door. This is exactly why learning how to stop your detergent door from getting blocked is the first thing I check now. If you’ve been seeing a lot of residue, it might not even be a hardware issue; it could be that your low-water dishwasher requires special rinsing habits or that you’re using the wrong soap. Interestingly, a study by the Association of Home Appliance Manufacturers (AHAM) suggests that nearly 25% of appliance failures reported by consumers are actually related to simple maintenance or loading errors rather than component breakage. Sometimes, it’s just a bit of gunk. I used to ignore the crusty white buildup around the latch until the door finally fused shut. Now, I know that the screwdriver move that fixes a sticky soap dispenser can save a lot of heartache. Before you assume you need to use a warranty for dishwasher repairs, let’s look at the mechanical “why” behind the stickiness.
Is a malfunctioning soap cup really a dealbreaker?
You might be tempted to just toss the pod into the bottom of the tub and call it a day. I tried that for a week. Don’t do it. Most modern machines run a pre-wash cycle that drains after ten minutes. If your detergent is just sitting in the bottom, it gets pumped right down the drain before the main wash even starts. You’re basically washing your dishes with nothing but hot water. If you’re worried about costs, remember that how appliance diagnostics can save your warranty benefits starts with knowing if the part is actually dead. Have you ever opened your dishwasher to find a dry pod, or is it just my kitchen that has a vendetta against me?
Wipe Away the Invisible Glue on Your Soap Cup
I once spent twenty minutes frantically trying to pry a dispenser door open with a butter knife, convinced that the internal spring had snapped. It was a messy, frustrating morning that ended with a scratched plastic casing and zero progress. What I eventually discovered was much simpler: a tiny spill of maple syrup from a breakfast ramekin had dried into a literal weld on the dispenser seal. Before you assume you have a mechanical failure, you have to address the buildup. The gasket—that little rubber ring around the soap cup—is the most common culprit for a failed release.
Give the Gasket a Five-Second Scrub
Take a damp microfiber cloth and run it firmly along the edges of the detergent door and the seat where it rests. Over time, powdered detergent and minerals from hard water create a crust that acts like a speed bump for the latch. If you notice the seal is warped or brittle, the simple move to fix a leaking detergent dispenser door usually involves a thorough de-scaling or a quick replacement of that rubber strip. A clean surface ensures the door pops open the second the solenoid triggers it. 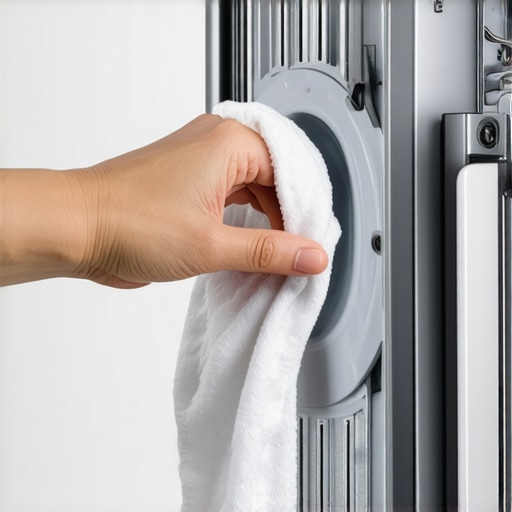
Test Your Latch Using a Spare Business Card
If the door still won’t budge after a cleaning, the mechanism itself might be tired. You can check the tension without taking anything apart. Close the door and try to slide a thin business card between the latch and the housing. If the card slides in with zero resistance, the latch isn’t grabbing. Conversely, if it’s stuck tight, the spring is likely jammed with residue. Knowing how to test a door latch with a business card is a classic technician trick that tells you immediately if you’re looking at a cleaning job or a hardware replacement.
Stop the Physical Blockage Once and for All
The most sophisticated repair in the world won’t help if your loading habits are working against you. I used to be a ‘stuffer’—someone who believed if the dishwasher door closed, everything inside was fine. I learned the hard way when a tall cutting board blocked the detergent door for three cycles in a row.
Create a Dead Zone for Over-Sized Plates
Look at where your detergent dispenser sits when the main door is closed. This area should be your ‘no-fly zone.’ Avoid placing oversized dinner plates, cookie sheets, or tall spatulas in the bottom rack directly in front of that door. This is the core of how to stop your detergent door from getting blocked. If a plate is even half an inch too far forward, it creates a physical wall that prevents the dispenser from swinging wide.
Switch Your Soap if the Pod Fails to Drop
If you find a damp, gummy pod stuck inside the cup, the moisture is your enemy. Touching pods with wet hands transfers just enough water to make the plastic skin sticky. This ‘glue effect’ keeps the pod anchored to the cup even after the door opens. If this keeps happening, why your high-efficiency machine hates cheap pods becomes obvious—they often have thicker, sticker casings that don’t dissolve well in low-water cycles. If the cup is consistently wet or the pod is failing, switching to a high-quality liquid detergent can bypass the mechanical friction entirely. When these manual tweaks don’t work, it’s time to look at troubleshooting dishwasher problems expert diagnostics repair tips to see if the wax motor or solenoid is the underlying issue.
Stop Washing Your Dishes Before You Wash Them
For years, I believed that my dishwasher was just a ‘sanitizer’ and that the real heavy lifting happened at the kitchen sink with a scrub brush. I thought I was making things easier for the machine, but I was actually sabotaging its brain. Modern appliances are equipped with turbidity sensors that measure how ‘cloudy’ the water is during the first few minutes. If you pre-rinse every plate to a shine, the sensor reports that the load is already clean. Consequently, the machine skips the high-heat phases and cuts the cycle short. This is exactly why pre-rinsing dishes actually makes your machine less efficient and can even lead to that annoying detergent residue because the water didn’t get hot enough to dissolve the pod. According to the EPA’s Energy Star program, skipping the pre-rinse not only saves up to 20 gallons of water per load but actually allows the enzymes in the detergent to do their job by latching onto food particles rather than just swirling around an empty tub.
The Rubber-Eating Reality of Common Home Remedies
We’ve all seen the viral ‘hacks’ suggesting you toss a bowl of vinegar in every cycle to keep things fresh. I used to be a disciple of the vinegar method until a senior tech pointed out the microscopic pitting on my door gasket. While vinegar is great for descaling, it is still an acid. Over time, why using distilled vinegar every week may damage your seals becomes a very expensive lesson in chemistry. The acid can slowly degrade the ethylene propylene diene monomer (EPDM) rubber used in many modern pumps and seals. If you’re dealing with hard water, stick to a dedicated citric-acid-based cleaner or learn the secret to de-scaling your machine using lemon juice for a milder, safer alternative. 
Why does the most efficient cycle take four hours?
It feels counterintuitive, but the ‘Eco’ or ‘Efficiency’ mode on your machine takes longer specifically because it’s saving energy. Heating water is the most energy-intensive part of the process. By extending the cycle time, the machine can use lower water temperatures and rely on prolonged ‘soaking’ rather than high-heat blasting. Understanding why the eco mode cycle takes longer than a standard wash can help you plan your chores better without assuming your machine is broken just because it’s still humming at midnight. If you notice your ‘smart’ dishwasher is acting erratically, it might not be a mechanical failure at all, but a need for a reset. I’ve seen many homeowners nearly call for a pro when the one-minute move to reset your control board would have solved the ghost-in-the-machine glitches immediately.
Don’t Let Fine Print Void Your Protection
The biggest trap I see people fall into isn’t a repair mistake—it’s a paperwork mistake. Many people assume that if a part fails, the warranty automatically covers it. However, if the technician finds that the failure was caused by a lack of maintenance, such as a completely clogged sump filter or a calcified inlet valve, your claim might be denied. Knowing how appliance diagnostics can save your warranty benefits is about proving you’ve done your part as an owner. Have you ever had a warranty claim denied for something seemingly minor? Let me know in the comments below; I’d love to hear your stories or help you navigate the appeal. If you’re currently stuck, understanding appliance diagnostics improving your warranty claims is the best place to start your research before making that next call.If you really want to graduate from a hopeful DIYer to a home tech hero, you need to stop guessing and start measuring. I spent way too long sniffing for burnt plastic or tapping on parts with a screwdriver before I finally bought a digital multimeter. This one tool changed everything. Instead of replacing the entire control board because the machine wouldn’t start, I learned the specific way to test a thermal fuse for continuity. It turns out, it was a five-dollar fuse, not a three-hundred-dollar board. According to the technical documentation in the Whirlpool Service Manual for Point-of-Use Appliances, a simple ohm test can verify the health of your heating element in under sixty seconds, potentially saving you from a misdiagnosis that could complicate your claim when you trust a warranty for dishwasher repairs.
Upgrade your toolbox with a digital multimeter
Having the right data is better than having the best luck. When your machine refuses to heat, you can verify if the element is grounded by testing your heating element for ground faults with a meter. This isn’t just about saving money; it’s about safety. I’ve seen boards scorched because owners ignored how to spot a failing control board capacitor by sight. #IMAGE_PLACE_HOLDER_D#
Your smartphone is the new service manual
We are moving into an era where how smart diagnostic apps are changing home appliance repair is making the old-school paper manuals obsolete. Most new units now allow you to hold your phone up to the control panel to transmit a signal that tells the factory exactly what is wrong. In the near future, I predict we won’t even have to initiate the scan; our machines will use predictive AI to monitor motor vibrations and order their own replacement parts before the pump even fails. If you are struggling with a high-tech unit, remember that why firmware updates are essential for new smart dishwashers often involves fixing software bugs that look like mechanical hardware failures.
How do I keep my machine from dying early?
The secret to longevity is a strict maintenance schedule that focuses on the invisible parts. I now treat my dishwasher like a car. Every thirty days, I run a heavy cycle with a descaling agent because the real cost of skipping your monthly descaling cycle isn’t just white spots on glasses—it is a seized pump. I also make it a point to check for the red flag your service tech looks for in your drain line, which is usually a slow-building sludge that forces the motor to work twice as hard. If you want to keep your kitchen running smoothly, my top advice is to perform a system reset at least once a quarter. Try the one-minute move to reset your control board today, even if your machine seems fine; it clears out communication errors between the sensors and the main logic board that could lead to bigger headaches later.
What I Finally Realized After Three Years of Gunked Up Sprayers
Looking back, my biggest lightbulb moment wasn’t figuring out a circuit board; it was realizing that a dishwasher is a delicate ecosystem, not just a metal box. I spent months blaming my soap when I was actually dealing with why your dishwasher leaves a gritty film on your glasses due to hard water I hadn’t addressed. Here is the wisdom I gained through trial and error: First, the “set it and forget it” mindset is a trap. If you don’t clean your filters, your soap won’t stand a chance. Second, temperature is everything. If your water isn’t hitting at least 120°F, you might as well be washing dishes in a cold puddle. Finally, trust the process. When I stopped pre-washing, I noticed my detergent actually performed better because it had enzymes that needed food to “bite” onto. It turns out, being too clean is actually a disadvantage.
[image_placeholder_final]
The Only Gear You Actually Need for a Pristine Kitchen
You don’t need a professional van full of expensive parts to keep things running. I swear by a few specific things that transformed my maintenance routine. First, a simple digital multimeter is non-negotiable for troubleshooting dishwasher problems expert diagnostics repair tips without calling a pro for every beep. Second, a high-quality soft-bristle brush is my secret weapon for cleaning your sump filter with a soft brush to stop foul odors without damaging the delicate mesh screen. Third, I always keep a bottle of citric acid on hand to avoid the real reason your glasses come out cloudy after a cycle. These tools turn frustrating guesswork into a precise science.
Take Charge of Your Own Appliance Longevity
Don’t let a stuck soap door or a strange motor hum make you feel like you’ve failed at homeownership. Most of the time, the solution is literally at your fingertips. By spending just five minutes a month on basic checks, you are doing more for your machine than any repair tech could after a total breakdown. You have the power to extend the life of your kitchen staples and keep your monthly expenses low. Remember, the goal isn’t just clean plates; it’s a home that works for you, not the other way around. Always be sure you know the top signs your dishwasher needs professional diagnostics so you can call for backup when a job truly exceeds your DIY toolkit. Have you ever found a completely dry detergent pod staring back at you at the end of a cycle? Let me know your most frustrating “clean dish” fail in the comments below!