

I’ll never forget the morning I realized my dishwasher was actively sabotaging my favorite kitchenware. I was pulling out my favorite white pasta bowl, and there it was—a jagged, orange-brown streak that looked like dried blood but smelled like a scrap yard. I scrubbed, I soaked, but that rust stain was stubborn. When I looked down into the machine, I saw the culprit: a single, lonely rack tine had lost its protective tip, exposing the raw metal beneath to a constant barrage of hot water and aggressive detergents. It felt like a total betrayal. I’d spent so much time troubleshooting dishwasher problems related to drainage and motors, but I never thought a tiny bit of exposed wire would be the thing that ruined my morning. The problem is that once the rust starts, it doesn’t just stay on the rack. It travels. It ends up on your plates, your silverware, and eventually, it can even cause issues with the internal pump if flakes start breaking off. Today, I’m going to show you how to stop that orange plague in its tracks using a simple bottle of liquid rubber. We’re moving past the ‘quick fixes’ that don’t work and getting into the one method that actually survives a high-heat cycle.
Why a Little Rust is a Big Deal for Your Dishes
If you’re like me, you probably thought about just ignoring it. Or, maybe you made the same rookie mistake I did early on: trying to wrap the rusted tine in electrical tape. Let me tell you right now, that is a recipe for a sticky, melty disaster that you’ll be scraping off your heating element for weeks. Trust me, I’ve been there, and it’s not how you want to spend a Saturday afternoon. The reality is that rust is more than just an eyesore. According to the Association of Home Appliance Manufacturers (AHAM), even minor surface oxidation can lead to ‘pitting,’ which creates a breeding ground for bacteria in the porous metal. Most people think their appliance warranty covers cosmetic issues like this, but you’ll usually find that rust on racks is considered ‘wear and tear,’ leaving you with a $100+ bill for a replacement rack. Learning how to prevent rust from forming is the first step, but once it’s there, you need a sealant that can handle the heat.
Will Liquid Rubber Actually Stay Put?
This is the question everyone asks, and I was skeptical too. You’re putting a chemical coating into a machine that reaches 150 degrees Fahrenheit and sprays high-pressure water for hours. It sounds like it would just peel right off, doesn’t it? However, when you use a specialized PVC-based liquid rubber, it actually chemically bonds to the remaining vinyl. It’s not just a ‘cap’; it becomes a permanent part of the rack structure. I’ve found that the secret isn’t just the goop you buy—it’s the prep work. Have you ever noticed your dishes coming out with strange spots only to realize your rack is literally disintegrating? It’s a common frustration, and I’d love to hear if you’ve tried any other ‘hacks’ that failed miserably. Drop a comment or reach out to me if you’ve ever dealt with the ‘duct tape disaster’ like I did! Before we get our hands dirty, keep in mind that even the best professional diagnostics won’t usually flag a rusty tine—it’s up to us to spot it during a routine clean. Let’s look at how to prep that metal so the rubber actually sticks.
Scrub Away the Rot Before You Seal
You can’t just paint over rust and expect it to vanish. If you try to coat a flaky tine without prepping it, you’re just building a house on a foundation of sand. I learned this the hard way when I tried a ‘quick fix’ and saw the orange bubbles reappearing within a week. Grab a piece of fine-grit sandpaper or a small wire brush. You need to get down to the shiny, healthy metal. If the tine is severely compromised, you might even need to snip off the very tip to find solid ground. This is much like troubleshooting dishwasher problems involving the motor; if you don’t address the core mechanical failure, the symptoms just keep coming back.
Clean the Surface or the Sealant Will Fail
Once you’ve sanded the area, it will be covered in fine metallic dust. If you leave that dust there, the liquid rubber will bond to the debris instead of the rack. Use a cotton swab dipped in high-percentage rubbing alcohol to wipe down every inch of the exposed wire. Avoid using oily cleaners or even some dish soaps, as they can leave a film that prevents a chemical bond. While you’re down there, it’s a great time to use the flashlight trick for finding micro-cracks in other parts of the machine, like the spray arms. Rust often hides in the shadows of the bottom rack where water pools.
Apply the Coating Like a Pro
This is where things get messy if you aren’t careful. Most liquid rubber kits come with a tiny applicator brush. My first attempt was a total disaster; I loaded up the brush with too much goop, and it dripped all over the bottom of the tub. I spent thirty minutes scrubbing the floor of the machine instead of fixing the rack. The trick is to apply thin, even layers. Think of it like nail polish. You want to encapsulate the metal entirely, overlapping onto the existing vinyl coating by at least a quarter of an inch. 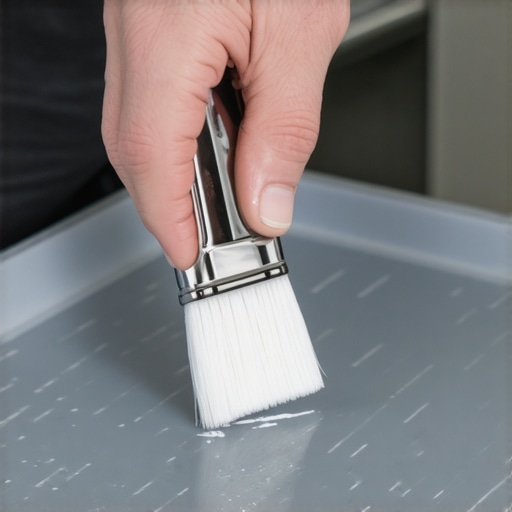
Don’t Rush the Curing Process
Here is the part where most people fail: patience. Your dishwasher is an environment of extremes. Between the high-pressure jets and the fact that your energy bill spikes when using high-heat modes, that rubber needs to be fully vulcanized before it faces a cycle. I recommend waiting at least 24 hours, though 48 is better if you live in a humid climate. If you run a load too early, the steam will cause the rubber to pull away from the metal, and you’ll be right back where you started. While you wait, you can perform other maintenance tasks, like the real cost of skipping your monthly descaling cycle, which ensures the rest of your machine stays as healthy as your newly repaired racks.
Watch for the Orange Warning Signs
Even after a successful repair, keep an eye on your plates. If you see even a faint streak of orange, it means a different part of the rack is starting to go. Since how to prevent rust from forming is mostly about maintaining the integrity of the vinyl, you should treat every tiny nick as an emergency. By catching these spots early, you avoid the heavy lifting of a full-scale restoration later on.While we’re talking about spotting trouble, I have to address the biggest myth in the appliance world: the idea that your dishwasher’s onboard computer is always right. Most DIYers think an error code is a perfect roadmap to the problem. In my years of tinkering, I’ve found that understanding appliance diagnostics improving your warranty claims is actually about knowing when the machine is lying to you. For instance, a ‘drain error’ code might just be a sensor tripped by a suds lock in a high-efficiency machine, not a dead pump. If you just start replacing parts based on the code, you’re throwing money into a pit. A study by the Professional Service Association (PSA) suggests that nearly 30% of part replacements are unnecessary because the root cause was environmental—like hard water or detergent choice—rather than mechanical failure. This is the ‘Oops’ factor most people ignore: clearing the error code with the one-minute move to reset your control board feels like a win, but if there’s a slow leak elsewhere, you’re just masking a disaster. Have you ever fallen into this trap? Let me know in the comments if a ‘reset’ ever came back to haunt you!
Your Error Code is Probably Lying to You
Many people assume that a high-tech machine means high-accuracy diagnostics. But think about this: a sensor only reports the data it is programmed to see. It can’t tell the difference between a failing motor and a piece of plastic stuck in the impeller. If you rely too heavily on the screen, you might miss the clicking sound of a failing drain pump that signals a real mechanical issue. In my experience, manual testing—like testing your float switch with a simple magnet—provides more clarity than a flashing LED ever will.
Can You Really Trust the Smart Diagnostic App on Your Phone?
It’s tempting to think that how smart diagnostic apps are changing home appliance repair means you’ll never need a tech again. But here’s the nuance: those apps primarily monitor electrical continuity. They can’t see physical wear, such as micro-cracks in your spray arm. These apps are great for a baseline, but they often miss the subtle mechanical ‘tells’ that an experienced ear catches immediately. Relying solely on the app is a fast track to a denied claim because you might misdiagnose the issue yourself before a professional can verify it. 
The Paper Trail That Saves Your Warranty
The real kicker is how this affects your coverage. Many owners don’t realize that the truth about non-manufacturer repair parts and your warranty can be a total dealbreaker. If you use a generic liquid rubber that isn’t rated for the heat, or install a third-party rack, you might find that your warranty terms change after the first year in ways that exclude ‘user-modified’ components. Even worse, there is often a hidden loophole that gets your denied claim reversed, but you have to know how to navigate the system. Always document your maintenance—it’s the only way to tell if your service plan actually covers motor failure when the manufacturer tries to blame your DIY efforts for an unrelated mechanical breakdown. Don’t let a technicality turn a $20 repair into a $1,000 replacement.I keep a specific toolkit in my kitchen junk drawer because I hate dragging a heavy toolbox out for a ‘five-minute’ job. If you’re serious about moving beyond basic patches, you need a digital multimeter. I personally use a rugged model that can survive a drop onto tile because I’ve fumbled it more than once while squeezed under a sink. You’ll use it for testing your inlet valve with a simple voltmeter or the specific way to test a thermal fuse for continuity. Without one, you’re just guessing, and guessing is how you end up buying parts you don’t need. I also swear by a telescoping inspection mirror—it lets you see the red flag your service tech looks for in your drain line without having to pull the whole machine out of the cabinetry. 
How Do I Keep My Dishwasher Out of the Junkyard for a Decade?
Consistency beats intensity every time. Most people wait for a flood before they look at their appliance, but I treat mine like a car. Every six months, I am testing my heating element for ground faults with a meter even if the water feels hot. Why? Because a partial ground fault can slowly bake your control board before it finally trips a breaker. This proactive approach is essential for how appliance diagnostics can save your warranty benefits. If you can show a service tech that you’ve maintained the machine, they are much more likely to fight for you when a major component fails. According to technical bulletins from the Appliance Service Training Institute (ASTI), the most common cause of premature control board failure isn’t a power surge, but rather the cumulative heat stress from poor ventilation around the machine’s base.
The Future of DIY Repair is Getting Smarter (and Harder)
We’re entering an era where hardware and software are inseparable. I predict that within five years, we won’t even be looking for rust or leaks manually; the machines will use ultrasonic sensors to detect micro-vibrations in the pump before it fails. While that sounds great, it also means manufacturers will try to lock us out. That’s why learning the secret tech menu that calibrates your water sensors is the most important skill you can learn today. It’s the last frontier of ‘manual’ control in a digital world. If you want to really level up, stop using the ‘Normal’ cycle and start reducing energy costs by timing your dishwasher cycles correctly based on your local utility’s off-peak hours. Go ahead and pull your dishwasher’s kickplate off tonight. Use a simple business card to test your door latch for proper alignment—it takes sixty seconds and could save you from a mid-cycle leak tomorrow.
The Hard Truth About Those Tiny Rust Spots
After years of tinkering, I’ve realized that a rusty rack tine is rarely just a ‘cosmetic’ issue; it’s a canary in the coal mine for your machine’s environment. If you’re seeing frequent oxidation, your water might be too aggressive, or your detergent is stripping the protective vinyl. I learned the hard way that knowing how appliance diagnostics can save your warranty benefits starts with these physical observations. Rust flakes can migrate into the filter system, eventually leading to the top signs your dishwasher needs professional diagnostics, like a grinding pump or a failed seal. My biggest lightbulb moment? Realizing that the ‘liquid rubber’ fix is only permanent if you tackle the ambient humidity in the machine by occasionally cracking the door after a cycle to let steam escape naturally.
My Go-To Toolbox for Appliance Longevity
You don’t need a professional workshop to keep your machine running for a decade. Beyond the liquid rubber for your racks, I recommend keeping a few specific items in your ‘junk drawer’ for when troubleshooting dishwasher problems becomes necessary. First, a simple digital multimeter is essential; testing your inlet valve with a simple voltmeter is the only way to know if a filling issue is electrical or mechanical. Second, always keep a small logbook. Documenting your maintenance—including when you applied that rubber coating—can be the hidden loophole that gets your denied claim reversed if a manufacturer tries to claim you neglected the unit. I trust these physical tools because, unlike a smart app, they don’t rely on sensors that can be tripped by simple debris.
Save Your Machine One Tine at a Time
Taking the time to seal a single rusted wire might feel like a small victory, but it’s the foundation of a proactive maintenance mindset. When you stop looking at your appliances as black boxes and start seeing them as systems you can control, you save thousands of dollars over the lifetime of your home. Don’t be afraid to get your hands dirty with troubleshooting dishwasher problems yourself. It’s often the simplest fixes, like a thin coat of rubber or a quick sensor calibration, that keep your kitchen running smoothly. Have you ever found a mysterious orange stain on your favorite white pasta bowl only to realize your rack was the culprit? Let me know your dishwasher horror stories or your favorite DIY wins in the comments below!
#IMAGE_PLACE_HOLDER_E#