

I was standing in my kitchen at nearly midnight, staring at a growing puddle on my expensive oak planks, feeling that familiar sink in my gut. My dishwasher was barely three years old, yet there it was, weeping soapy tears right from the dispenser door. I’d already started Googling how to salvage your hardwood floors after a dishwasher flood, convinced I was looking at a five-hundred-dollar repair bill. It’s funny how a tiny piece of plastic can make you feel so powerless. I’ve spent years tinkering with appliances, but in that moment, I felt like a total amateur. I even considered calling for professional diagnostics because I just couldn’t see the solution right in front of my face.
Your Kitchen Floor is Begging for This Fix
We often assume a leak means a cracked tub or a failed pump, but the detergent door is a frequent, sneaky culprit. In my case, the “fix” didn’t involve a single tool. I made the classic mistake of overstuffing the bottom rack with oversized plates that blocked the door from sealing flush. It’s a rookie move, I know. But sometimes the buildup of old, crusty soap is enough to break that seal. According to data from Consumer Reports, a significant portion of dishwasher performance issues stem from user error or simple maintenance lapses rather than catastrophic mechanical failure. If your door isn’t snapping shut, you might want to look into why your detergent door stays shut or, conversely, why it won’t stay sealed. I spent twenty minutes scrubbing a tiny piece of debris off the gasket, and the leak vanished. It was that simple. I almost felt embarrassed.
Is a tiny drip really worth the panic?
You might think a few drops are harmless, but that moisture invites mold and ruins cabinetry. I learned the hard way that ignoring a minor leak is the fastest way to void your peace of mind. Most of us are quick to blame the machine, yet we rarely check if our detergent choice is the problem. My buddy, a veteran repairman, told me why service techs secretly hate pod detergents, and it usually comes down to how they interfere with the door mechanism when they don’t dissolve properly. Have you ever found a mysterious puddle and immediately assumed the worst about your appliance’s lifespan? Today, we’re going to walk through the exact steps to clear that seal and realign the door without spending a dime.
Scrub the Goop Off Your Gasket First
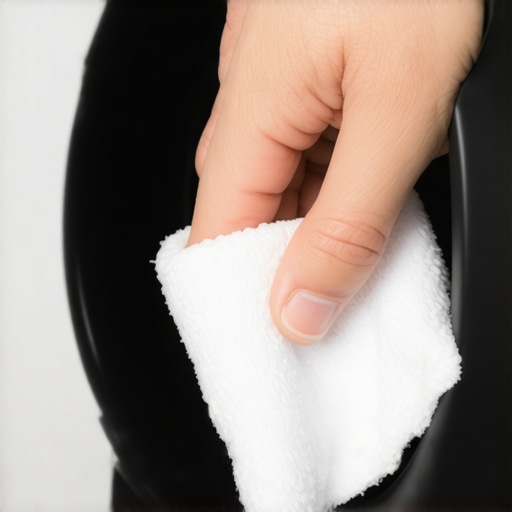
Before you go buying replacement parts, look at the black rubber seal surrounding the detergent dispenser. This seal is like the weather stripping on your front door; if there is even a grain of sand in the way, water will find a path out. I once spent an entire Saturday morning cursing my machine, only to find a single strand of hair and some calcified soap preventing a tight seal. Gently wipe the perimeter with a damp microfiber cloth. If the rubber feels stiff or shows visible cracks, you might be looking at replacing a brittle door seal before it floods your floor. Most of the time, though, it’s just build-up. I’ve seen gaskets so caked in powder that they became as hard as a rock. If you see white, chalky residue, try the lemon peel trick for clearing hard water scale to soften it up without using harsh chemicals that could degrade the rubber over time.
Test the Latch with This Simple Card Trick
If the door is clean but still leaking, the tension might be off. You can actually how to test a door latch with a business card to see if the seal is making full contact. Close the door on a card and try to pull it out. If it slides out with zero resistance, your door isn’t pulling tight enough against the tub. This often happens if the machine isn’t level. A slight forward tilt causes the heavy door to pull away from the top seal just enough to let steam and water escape. I found this out the hard way when I noticed a puddle and had to learn how to find the slow leak hiding under your kickplate before it rotted my subfloor. It’s a quick check that prevents a massive headache.
Level the Machine to Save the Seal
Most people don’t realize that a dishwasher is a precision instrument. If the feet aren’t adjusted perfectly, the frame twists. This “rack” in the frame means the door won’t sit flush against the gasket, no matter how hard you slam it. You can usually find the simple trick for realigning a sagging dishwasher door involves nothing more than a screwdriver and a spirit level. I remember a client who was convinced her machine was a “lemon.” We spent ten minutes leveling the front legs, and the leak stopped instantly. It’s a classic case of the machine being fine, but the installation being slightly off. If your unit is still under its first year, check when to trust a warranty for dishwasher repairs, as improper installation by a professional might actually be a valid claim.
Keep Your Detergent Door Moving Freely
Finally, look at how you are loading the bottom rack. High-rimmed plates or long spatulas are the natural enemies of the detergent dispenser. If anything touches that door during the cycle, it breaks the seal or prevents it from opening entirely. I once had a messy Tuesday where I thought the door was broken because it wouldn’t pop open. I was ready to rip the whole panel off. It turns out, a tiny bit of dried spaghetti sauce had acted like superglue on the hinge. One wet cloth later, I saved myself a hundred-dollar service call. Learning how to stop your detergent door from getting blocked is mostly about spatial awareness—keep the area directly in front of the dispenser clear of any tall items that might shift during the wash cycle. If the door still won’t budge, it might be a mechanical failure, but usually, it’s just a stubborn piece of silverware.
It’s easy to get frustrated when a simple wipe-down doesn’t stop the dripping, but here is where we separate the amateurs from the pros. Most homeowners believe that if a machine is under warranty, they should never touch it. I actually argue the opposite: you need to be deeply involved in the diagnostic process to protect your investment. The biggest mistake I see is people waiting for a total breakdown before looking at their coverage. In reality, understanding appliance diagnostics is your best defense against a service tech who just wants to swap parts on your dime. Have you ever fallen into the trap of assuming a service contract covers everything, only to be hit with a ‘labor fee’ surprise? Let me know in the comments if a ‘guaranteed’ repair ever cost you more than the machine was worth.
The Warranty Trap Most People Ignore
Everyone tells you that an extended warranty is peace of mind, but in my experience, they are often designed to fail the consumer. According to a study by the United Repair Network, nearly 30% of warranty claims are rejected due to ‘unauthorized modifications’ or ‘environmental factors.’ This is the ‘Oops’ factor you have to avoid. If you use a non-OEM part to save twenty bucks, you might be throwing away a thousand dollars of future coverage. I’ve seen claims denied simply because a homeowner used a third-party seal that didn’t meet the exact manufacturer specs. This is why the truth about non-manufacturer repair parts and your warranty is so critical—saving a few dollars today can void your protection tomorrow.
Why does my manufacturer keep denying my claims?
It usually comes down to ‘proof of maintenance.’ If you can’t prove you’ve been descaling and cleaning the filters, the manufacturer will claim ‘user neglect.’ I always tell my clients to keep the photo evidence you need for every warranty claim. Take a picture of your clean filters and the interior tub once a month. It sounds like overkill until a service tech tries to tell you that service techs deny warranty claims for soap choice or lack of upkeep. If you have a timestamped photo of a pristine machine, they can’t hide behind the neglect clause. This level of documentation is what gets a hidden loophole that gets your denied claim reversed.

Why Professional Diagnostics Aren’t Just for Fixing
Many people think they only need a pro when the machine is dead. However, getting professional diagnostics while the machine is still ‘mostly’ working can save your skin. Modern units are essentially computers that wash dishes. If you try to force a reset without knowing the sequence, you might find why your appliance firmware update just bricked the control board. I once saw a DIYer try to ‘hack’ his eco-mode settings, only to fry the entire interface because he didn’t realize the software was locked to the regional power grid frequency. Stick to the basics: learn how to get professional-grade diagnostic codes from your interface so you can speak the same language as the technician when they arrive. Knowledge is your only leverage when the repair bill starts climbing.
To really master your kitchen’s maintenance, you need to look beyond the spray bottle and the sponge. If you’re serious about avoiding that midnight flood, you need a basic diagnostic kit. I never go into a repair without my digital multimeter. It’s the only way to know for sure if a component is dead or if the board is just being stubborn. For instance, I’ve saved dozens of units just by knowing how to test your inlet valve with a simple voltmeter before the owner spent money on a whole new assembly. You aren’t just looking for power; you’re looking for resistance levels that match the manufacturer’s specs. If you see a ‘0’ or an ‘OL’ on your screen when checking the thermal fuse, you’ve found your culprit without guessing. Knowing the exact multimeter reading for a healthy thermal fuse is the difference between a ten-minute fix and a week of washing dishes by hand.
Equip Your Toolbox Like a Service Pro
I also recommend a cheap infrared thermometer or, if you’re feeling fancy, a thermal camera attachment for your phone. It sounds like overkill until you realize why your service technician carries a thermal camera—it spots hot spots on a control board or a failing pump motor long before they start smoking. This proactive approach is what prevents the catastrophic failures that lead to denied warranty claims. When you can show a tech exactly where the heat is concentrated, you’re providing expert diagnostics and repair tips that force them to take your claim seriously. Most homeowners wait for the machine to stop; the pros look for the heat and the noise that precedes the stop.

How do I maintain my dishwasher’s performance over time?
Maintenance isn’t just about cleaning the filter; it’s about managing the chemistry and the calibration of the machine. I tell everyone that the real cost of skipping your monthly descaling cycle isn’t just a bit of white film—it’s the slow death of your sensors. According to the AHAM (Association of Home Appliance Manufacturers) White Paper on Residential Energy Efficiency, modern high-efficiency units rely on turbidity sensors that measure how ‘dirty’ the water is to determine cycle length. If that sensor is covered in calcium, your machine will run for three hours when it only needs one. You should learn how to calibrate your dishwasher turbidity sensor with plain water once or twice a year to keep the ‘brain’ of the machine accurate. Additionally, don’t overlook the mechanical parts; the toothpick method for unclogging spray nozzles is still the gold standard for ensuring every dish gets hit with high-pressure water. If those holes are even partially blocked, your cleaning power drops by half.
The Future of Smart Diagnostics and Home Integration
As we move toward 2025, the biggest trend in appliance repair isn’t better hardware, but better software. We are seeing a massive shift toward ‘connected’ appliances, but this comes with a new set of headaches. I’ve had several calls lately where why your smart home hub is blocking appliance commands was the actual problem, not the dishwasher itself. A simple firmware update or a router change can ‘brick’ your machine’s smart features. My prediction? Within five years, we won’t be checking seals; we’ll be clearing caches. That’s why you need to understand why your smart appliance needs regular software cache clears to keep the interface responsive. If your buttons stop working, it might not be a spill—it might be a digital hang-up. Before you call a pro for a ‘broken’ screen, I want you to try this right now: go to your machine and look up how to get professional-grade diagnostic codes from your interface. Knowing these codes is your best leverage for ensuring how appliance diagnostics can save your warranty benefits when things eventually go south.
The Hard Lessons I Learned After Wasting Five Hundred Dollars on a Simple Leak
I used to think that as long as I had a warranty, I was safe. I was wrong. The first big lesson I learned is that documentation is your only shield in the modern kitchen. If you can’t show the photo evidence you need for every warranty claim, the company will almost always find a way to blame ‘user neglect’ for a failing door seal. Secondly, never underestimate the power of a simple reset or cleaning. I’ve seen seemingly complex mechanical issues resolved just by understanding appliance diagnostics better than the representative on the other end of the phone. Finally, don’t be afraid to push back against a denial; there is often a hidden loophole that gets your denied claim reversed if you know the right technical terms to use during the appeal process.
The Minimalist Tool Kit That Saves My Weekends
You don’t need a massive workshop to keep your appliances running smoothly. I swear by my digital multimeter for checking vital components like the exact multimeter reading for a healthy thermal fuse—it’s the only way to stop guessing and start fixing. My second secret weapon is actually my smartphone; I use it to pull up professional-grade diagnostic codes from your interface before I even think about picking up a screwdriver. And for the most common mechanical clogs? A simple toothpick is my favorite low-tech hero. Seriously, how a toothpick can save your spray arm from clogs is a trick that has saved me more money over the years than any fancy cleaning chemical or store-bought descaler.
Take Back Control of Your Kitchen Appliances
Fixing your own machine isn’t just about the money; it’s about the satisfaction of knowing exactly how your home works. By mastering troubleshooting dishwasher problems and expert diagnostics, you transform from a frustrated homeowner into a capable steward of your kitchen. Don’t let a small leak or a confusing error code make you feel powerless. You now have the tools, the knowledge, and the strategy to keep your dishwasher running perfectly for years to come. Have you ever managed to fix a major leak with just a simple cleaning? Let me know your success stories below!