

There I was, standing in my pajamas at 7:00 AM, staring at a dishwasher full of soaking wet, greasy plates and a perfectly dry, unopened soap pod. It felt like a personal betrayal. I had spent forty-five minutes the night before meticulously scraping lasagna off those plates, only for the machine to essentially run a very expensive, very useless rinse cycle. I will be honest with you: I tried to pry that little plastic door open with a butter knife in a fit of caffeine-deprived rage. That was a mistake. I snapped a plastic clip that costs forty dollars to replace. But after that expensive lesson, I finally realized that the ‘big scary broken appliance’ wasn’t actually broken at all.
Stop Staring at the Soggy Mess and Fix the Latch Yourself
It is the most annoying thing in the world. You pay a premium for a high-efficiency machine, you buy the fancy pods, and yet you are left hand-washing because the soap stayed stuck in its little plastic cubby. Today, we are going to walk through the real reasons this happens. We will look at everything from how to fix a loose gasket to the simple physics of how you are stacking your cereal bowls. I promise you, nine times out of ten, you do not need a new machine—you just need to stop making the same rookie mistakes I did.
Is your dishwasher actually broken or just being picky?
Most of us jump straight to the worst-case scenario. We start Googling new models or looking up professional diagnostics costs when the solution is often sitting right in front of us. Did you know that according to the Association of Home Appliance Manufacturers, nearly 25% of appliance repairs could be avoided with simple regular maintenance? Early in my DIY journey, I assumed a stuck door meant a dead solenoid or a fried control board. I even tried to call in a pro, but my claim was denied because of poor maintenance. The truth is, the real reason your detergent cup won’t open often has more to do with sticky residue or a misplaced tall plate than a mechanical failure. Have you ever opened your dishwasher only to find that little pod mocking you from behind its closed door? Let me know if you’ve ever felt that ‘dirty dish’ heartbreak. Now, let’s get into the nitty-gritty of how to get that door popping again without breaking the hinge like I did.
Stop the Cookie Sheet Blockade
First things first: check your stacking habits. It sounds simple, but this is the number one reason why your soap pod stays high and dry. If you place a tall cookie sheet or a large dinner plate right in front of the detergent dispenser, the door cannot swing open during the wash cycle. Think of it like trying to open a bedroom door when a heavy trunk is sitting right in the way; no matter how hard the handle turns, the door isn’t moving. I remember one Tuesday night I was so proud of my ‘Tetris’ skills, cramming an extra-large pizza stone right at the front of the bottom rack. The next morning, the stone was clean, but the soap pod was melted into a gooey mess inside the closed cup. I felt like an absolute amateur. Before you start taking things apart, verify the real reason your detergent cup won’t open isn’t just a misplaced pan.
Dissolve the Hidden Soap Glue
Over time, liquid detergent and pods leave behind a sticky, wax-like residue. This film acts like a weak glue, holding the door shut even when the latch releases. You might hear a ‘click’ during the cycle, but if that door is stuck to the frame, the soap stays put. To fix this, grab a damp microfiber cloth and some warm water. You want to focus on the tiny lip of the dispenser and the gasket that seals it. If you have been dealing with a lot of build-up, you might need to learn the secret to clearing a gritty soap reservoir without scratches. A quick wipe-down every week prevents the soap from turning into an adhesive. 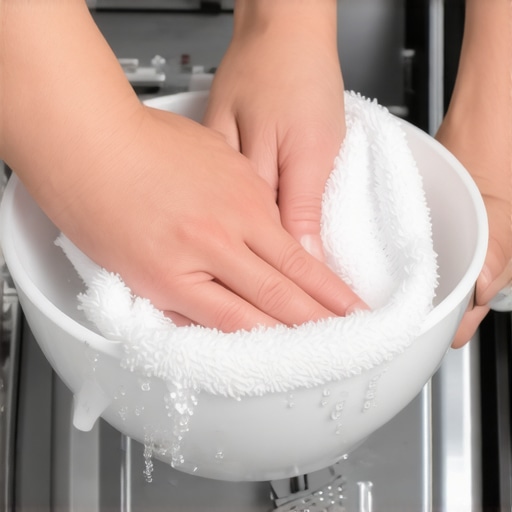
Give Your Latch a Manual Test Drive
If the door is clean and the rack is clear, but the pod still isn’t dropping, you need to check the mechanical latch. This is basically a tiny plastic mouse trap that springs open when the machine tells it to. You can actually how to test a door latch using a screwdriver handle without having to run a full sixty-minute cycle. Just press the latch shut and use the handle of the screwdriver to gently simulate the trigger. If it doesn’t pop open instantly, the spring might be worn out or the plastic might be warped.
Fix the Gasket Before It Jams the Works
Sometimes the problem isn’t the latch at all, but the rubber seal around the main dishwasher door. If your main door seal is sagging or loose, it can actually press against the soap dispenser and prevent it from opening. I once spent an entire afternoon chasing a phantom electrical issue only to realize I just needed to how to fix a loose gasket that had slipped an eighth of an inch. If yours is out of place, make sure you know the correct way to reseat a slipped tub gasket so it stays put during high-heat cycles.
When It Is Time to Pull Out the Multi-Meter
If you have checked the physical obstacles and the latch still won’t budge during a live wash, the issue might be electrical. Your dishwasher uses a wax motor or a solenoid to pull that latch open. If these parts don’t get power, the door stays shut. You can try testing a thermal fuse for continuity without a pro kit to see if the circuit is even complete. If you are seeing error lights or the machine is acting erratic, those are the top signs your dishwasher needs professional diagnostics. Don’t be afraid to dig into troubleshooting dishwasher problems expert diagnostics repair tips before calling in a technician; often, it is a simple loose wire or a bit of corrosion that you can spot with a flashlight.I’ve learned the hard way that more ‘elbow grease’ isn’t always the answer when it comes to modern appliances.
Ditch the Pre-Rinse if You Want Cleaner Dishes
Everyone tells you to rinse your plates until they are spotless before they hit the rack. It feels productive, but in reality, why pre-rinsing dishes actually makes your machine less efficient is one of the biggest industry secrets. Modern high-efficiency machines are equipped with turbidity sensors that ‘see’ how dirty the water is. According to experts at Energy Star, these sensors adjust the water temperature and cycle length based on the initial soil level. If you pre-rinse, the sensor gets a false reading, thinks the load is easy, and cuts the cycle short—leaving your dishes less than sanitary because the detergent has nothing to ‘grab’ onto. Have you ever fallen into this trap? Let me know in the comments.
Why does your machine stay on the last minute for forever?
It’s the ultimate test of patience: seeing that ’00:01′ on the display and waiting ten minutes for the beep. This isn’t a mechanical glitch; it’s often the machine performing a final calibration of sensors or waiting for the internal temperature to drop for safe steam release. If you find yourself staring at that number every night, you might be looking at why your new machine stays on one minute for ten minutes. It’s a subtle nuance that separates the pros from the frustrated homeowners who end up pulling the plug unnecessarily. 
The Hidden Clauses That Kill Your Warranty
Most people assume a warranty is a universal safety net, but it is often more like a sieve. I once saw a neighbor’s repair claim get tossed simply because their dishwasher drain was incorrectly linked to a new disposal. Knowing how appliance diagnostics can save your warranty benefits is vital before you even pick up the phone. If you call a tech out without doing your homework, you might find that your warranty claim got denied because of your garbage disposal installation. Even worse, many people don’t realize there is the clause in your service plan that voids coverage for hard water damage. If you have a white film on your glasses, you are not just looking at an aesthetic problem; you are looking at a potential repair bill that the manufacturer won’t touch.
Why Your Service Tech Is Obsessed With the High Loop
If you ever watch a pro work, they almost always look under the sink before they even touch the dishwasher. This is because why your service tech always checks the drain hose high loop is often the answer to why a machine smells like a damp basement. Without that simple loop of hose tucked high under the counter, dirty water from your sink or disposal drains right back into your clean machine during the night. It is a five-minute DIY fix that saves a hundred-dollar service call. Before you assume you need professional diagnostics, verify your plumbing isn’t working against you.
The Three Tools I Won’t Start a Saturday Without
After that forty-dollar plastic clip fiasco, I stopped ‘winging it’ and started building a real appliance kit. If you are serious about avoiding a three-hundred-dollar service call, you need more than just a screwdriver. My go-to is a digital multimeter. I use it for using a voltmeter to check your power cord connection safely before I ever assume the control board is fried. Next is a simple paperclip—trust me, the proper way to clean spray arm nozzles using a paperclip is a meditative art form that fixes 90% of ‘my dishes are still gritty’ complaints. Finally, keep a bag of citric acid handy. It is the only way I have found to remove cloudiness from glasses using citric acid without scratching the finish. 
How do I maintain my dishwasher’s performance over time?
Consistency is the name of the game. I’ve found that running a ‘clean cycle’ with a dedicated descaler once a month prevents the internal valves from seizing up. You also need to be your own detective; understanding appliance diagnostics improving your warranty claims means you have the data ready when the manufacturer asks for proof. According to the Appliance Service Training Institute (ASTI) handbook, mechanical failure in circulation pumps is often preceded by a 15% increase in amp draw—a subtle sign most homeowners miss until the motor actually seizes. By how to identify a dying circulation motor by its pitch, you can order the part while your machine is still technically working, saving you from a week of hand-washing.
Listen Closely to Your Machine’s Cries for Help
Your dishwasher is constantly talking to you through hums, clicks, and the occasional beep. If you hear a high-pitched squeal, it is usually a sign that your pump bearings are drying out. I recommend troubleshooting dishwasher problems expert diagnostics repair tips early because once that sound starts, you are on a ticking clock. If you aren’t sure where the sound is coming from, you can use the secret diagnostic mode hidden on your touch control panel to run individual components like the drain pump or the wash motor one by one. This is how the pros do it, and there is no reason you can’t do the same.
The Crystal Ball of Kitchen Tech
Looking ahead, I predict we are about to see a massive shift toward ‘predictive maintenance’ sensors. In the next five years, I expect we’ll see self-healing sensors that use ultrasonic pulses to clear their own scale build-up before it even becomes a problem. For now, we are the sensors. You should definitely try accessing the secret diagnostic mode on your panel tonight; it feels like hacking your own kitchen and gives you data that keeps you ahead of the repairman. If the results look grim, check the top signs your dishwasher needs professional diagnostics before you start unscrewing the main sump assembly.
The Hard Truths My Broken Soap Latch Taught Me
Looking back at that forty-dollar plastic clip I snapped, I realize that most dishwasher frustrations come from a lack of listening to the machine. First, I learned that a clean dishwasher isn’t just about the plates; it is about the data. If you aren’t understanding appliance diagnostics improving your warranty claims, you are essentially flying blind when things go wrong. Second, the gentle touch beats force every time. If a door won’t open or a rack won’t slide, there is usually a physical obstruction or a waxy build-up of gunk, not a need for more muscle. Finally, maintenance is a conversation you have with your home. When you skip the monthly descaling, your machine stops talking to you and starts shouting with expensive error codes.
The Fixer’s Kit for Every Kitchen Counter
If you want to move from frustrated owner to kitchen hero, you only need a few specific items in your arsenal. I never start a weekend project without my digital multimeter; it is the only way for using a voltmeter to check your power cord connection safely so you don’t misdiagnose a dead control board. I also keep a high-lumen flashlight in my junk drawer because the flashlight trick for finding micro-cracks in your spray arm has saved me from buying a new circulation pump more than once. Lastly, keep a bag of citric acid on hand. It is my favorite secret weapon to remove cloudiness from glasses using citric acid without using abrasive cleaners that eventually degrade your rubber seals.
Reclaim Your Kitchen From the Appliance Gremlins
Taking the leap into DIY repair might feel daunting, but remember that you are the best advocate for your own home. By taking the time to master troubleshooting dishwasher problems expert diagnostics repair tips, you aren’t just saving a service fee—you are gaining the confidence to maintain everything in your kitchen. Don’t be afraid to poke around that bottom rack or run a secret diagnostic cycle tonight. Even if you eventually see the top signs your dishwasher needs professional diagnostics, you will be able to speak the technician’s language and ensure your warranty is respected. Your dishwasher is a tool, not a mystery. Go ahead, give that latch a clean and see the difference for yourself. Have you ever discovered a surprisingly simple fix for an appliance you thought was totally broken? Let me know in the comments below!