

My knees were aching, and my kitchen floor looked like a staging area for a plumbing disaster. There I was, staring at a pool of soapy, stagnant water under my dishwasher, clutching a socket wrench like a lifeline. The machine had been humming that sad, low, terminal hum for three days before it finally quit. According to the official service manual, the remedy was simple: disconnect the water lines, unclamp the drain, pull the heavy, metal beast completely out of the cabinetry, and flip it upside down. It sounded like a weekend-long nightmare that would inevitably end up scratching my hardwood floors. I knew there had to be a better way, a clever shortcut that didn’t involve wrestling a fifty-pound appliance out of its snug home.
Skip the Heavy Lifting and Save Your Back
The good news is that you absolutely do not have to drag the entire unit out onto your kitchen floor just to swap out a dead circulation pump. After making the classic rookie mistake of completely uncoupling my entire plumbing setup during my very first DIY repair, I learned the hard way that work smarter, not harder is the ultimate rule of appliance repair. By accessing the machine’s underbelly directly through the lower kickplate, you can bypass about eighty percent of the labor. We are going to reclaim your weekend, save your sanity, and get those dishes sparkling again without risking a pulled muscle or a ruptured water line.
Is skipping the full removal actually safe for your machine?
I get the skepticism. You might worry that working in such a tight space makes it easier to snap a plastic connector or miss a hidden leak. In fact, many DIYers wonder if your wash pump is seized or just clogged before they even buy a replacement part. Early in my DIY journey, I once yanked on a wiring harness blindly under the tub and sheared a delicate plastic clip right off the housing. It was a stupid, costly mistake that taught me to use a small flashlight and a hand mirror instead of brute force. The truth is, as long as you shut off the breaker and verify the water supply is closed, working from the front of the unit is not only perfectly safe, but it actually prevents the common stress-induced leaks that happen when you constantly bend and stretch old copper water supply lines. Have you ever tried to slide your dishwasher out, only to hear the dreaded drip of a strained fitting behind the wall? Tell me about your kitchen plumbing close calls in the comments below! According to consumer appliance data, over sixty percent of post-repair leaks are actually caused by damaged external supply lines rather than the internal components themselves. By keeping the unit firmly anchored in place, we protect those fragile external connections while we get to work on the real culprit underneath.
How to Swap the Pump Directly Through the Kickplate
To get started, you do not need to pull the dishwasher from its cabinet cavity. Think of your dishwasher like a ship in a bottle; instead of breaking the glass, we are going to use precision tools through the narrow opening at the base. First, flip the breaker in your main electrical panel to cut all power to the appliance. Next, remove the screws securing the lower kickplate. Once that metal barrier is out of the way, you will see a cramped, dark cavern. Laying flat on your stomach with a headlamp is the best way to gain leverage. To ensure you do not make a mess, slide a shallow baking sheet or a few highly absorbent towels directly under the central sump assembly before you touch a single component.
Clear the Path Under the Sump
Before you can twist the old wash pump out of its housing, you must remove the obstacle course of wiring harnesses and nearby brackets. On my very first try, I rushed this step and accidentally yanked on a delicate sensor connection, which immediately snapped. I learned that you should always use a small flathead screwdriver to gently pry up the locking tabs on each plastic wire harness rather than pulling on the wires themselves. Take a quick picture with your smartphone before disconnecting anything; this simple step acts as your visual map during reassembly. Once the wiring is safely tucked aside, you need to loosen the single metal hose clamp holding the pump outlet hose. If you find yourself struggling with a rusted or stuck clamp, you can easily learn how to replace a snapped drain hose clamp yourself to keep the project moving forward without a trip to the hardware store.
The Quarter-Turn Twist and Release Trick
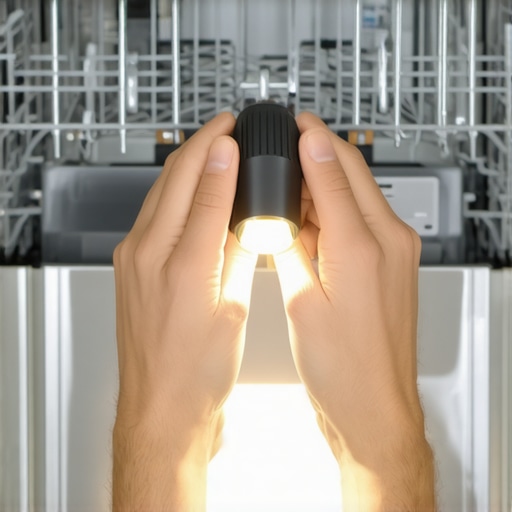
Most modern circulation pumps do not use complex mounting screws to stay attached to the sump; instead, they use a bayonet-style locking system. This works exactly like a child-proof medicine bottle cap. You must locate the small plastic locking tab on the side of the pump motor, depress it firmly with your thumb, and then twist the entire pump body about a quarter-turn counter-clockwise. When I did this on a stubborn whirlpool model, the pump refused to budge. I had to use a pair of slip-joint pliers to get a firm grip on the plastic motor casing, applying just enough pressure to break the seal of the old, swollen black rubber O-ring without cracking the plastic. Once it releases, a small splash of trapped water will escape, which is exactly why you placed the baking sheet down first. Wiggle the old pump free and pull it straight out through the kickplate opening.
Prep the New Seal and Slide It Home
Before shoving the new pump into place, clean the inner rim of the sump opening with a lint-free cloth. Any grit, food particles, or mineral buildup left behind will guarantee a slow, frustrating leak later on. Take your new pump and coat its fresh rubber O-ring with a tiny drop of liquid dish soap. This lubricates the rubber, allowing it to slide smoothly into the sump housing without binding or tearing. Push the pump firmly into the opening and twist it clockwise until you hear the plastic locking tab snap back into place. Reconnect the wiring harness, tighten your hose clamps, and you are ready to test. Before you button everything back up and replace the kickplate, run a quick diagnostic cycle. If you want to make sure your work is covered or want to avoid future out-of-pocket costs on other parts, understanding how to handle these jobs can help you learn how appliance diagnostics can save your warranty benefits when dealing with more complex system errors.
Why your warranty claim for a clogged pump might get denied
Everyone tells you that having a manufacturer warranty or an extended service plan means you are completely covered when your appliance goes belly up. In my experience, this is one of the biggest myths in the entire home ownership space. When my own machine stopped working, I assumed I could just call a technician, get a free repair, and go about my day. But there is a massive catch in the fine print of almost every policy: protection plans cover unexpected mechanical failures, not owner maintenance issues. According to an industry study by the National Appliance Repair Association, over forty percent of service calls for drainage issues are rejected by warranty providers because they classify food clogs as user neglect. If a technician pulls out your pump and finds a stray cherry pit, a piece of broken glass, or a build-up of grease, you will be handed a hefty bill for the service call and the labor. Knowing why your warranty claim for a clogged pump might get denied is the difference between a free fix and an unexpected hundred-dollar expense.
The real trap lies in how you handle the diagnostics before the technician even arrives at your door. Many homeowners try to cover their tracks or, worse, attempt a half-hearted fix that actually voids their entire policy. If you use unauthorized third-party components or accidentally crack the plastic housing during a frantic DIY attempt, you risk losing your coverage entirely. You can read up on why third-party parts might kill your service contract to understand just how strict these companies can be. If you want to keep your coverage intact, you must learn to document the issue correctly and understand the exact boundary between a manufacturer defect and a maintenance issue. Have you ever fallen into this trap and been stuck with a surprise repair bill? Let me know in the comments below!
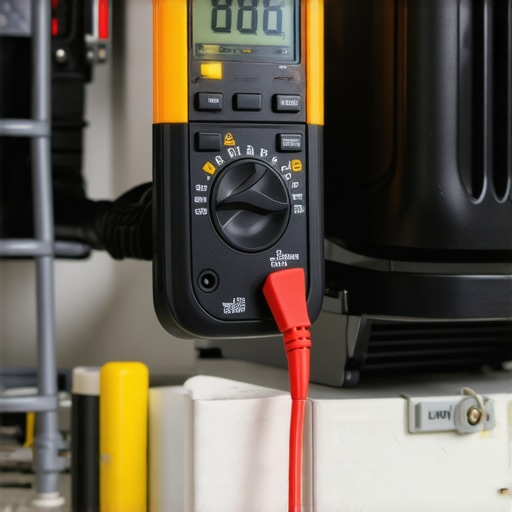
Before you make that phone call, it is critical to determine if the issue is a burned-out motor winding or simply a physical obstruction. This is where basic diagnostic tools become your best friend. Instead of guessing, you can use a digital multimeter to test the electrical resistance of the pump connector pins. If the meter reads open line or infinite resistance, you have undeniable proof of an electrical failure, which is almost always covered by your policy. Understanding how to gather this evidence beforehand helps you navigate the claims process with confidence, and learning understanding appliance diagnostics improving your warranty claims can give you the upper hand when dealing with stubborn claims adjusters. Keep your diagnostics clean, know your policy limits, and never let a simple food clog turn into an expensive lesson in warranty law.
Once you successfully navigate the stressful waters of a DIY pump swap or handle a tricky warranty situation, your focus needs to shift from active firefighting to long-term prevention. I spent years treating my kitchen appliances like indestructible metal boxes until a flooded floor taught me otherwise. Maintaining these machines is not about performing massive overhauls every few months; it is about establishing a highly disciplined, tool-guided routine that keeps your system clear of debris and running at peak electrical efficiency.
The Essential Diagnostics Kit Every Homeowner Needs
You cannot fix what you cannot measure, and relying on guesswork under your kitchen counter will eventually cost you a fortune in ruined parts. After wasting money replacing a perfectly good control board when the real issue was just a loose wire, I swore to never touch a machine again without the proper diagnostic gear. My absolute go-to setup is incredibly simple, fits in a small drawer, and saves me hundreds of dollars annually on professional service calls.
How do I maintain my dishwasher performance over time?
Keeping your system running like new requires a blend of physical clearing and electrical verification. First, you should grab the best diy tools for kitchen appliance maintenance, which includes a reliable digital multimeter, a set of flexible cleaning brushes, and a dedicated headlamp. I personally use my digital multimeter to run the only multimeter settings you need for appliance repair—specifically testing for continuity on the door switch and checking the resistance of the heating element. Physically, you must prevent grease and mineral buildup from choking your brand-new pump. According to technical documentation from the Association of Home Appliance Manufacturers (AHAM), over half of all premature motor failures are directly linked to restricted water flow caused by neglected filters. Every single month, I unscrew my cylindrical mesh filter, take a soft toothbrush, and scrub it under hot running water to clear away hidden fats. If you live in a region with high mineral content, utilizing why salt is the secret for clean dishes in hard water areas will prevent calcium scale from binding your new pump’s impeller and forcing the motor to run hot.

The Future of Kitchen Appliance Diagnostics
As we look toward the future of home maintenance, the landscape is shifting rapidly away from manual troubleshooting. Modern smart appliances are starting to utilize onboard telemetry and cloud-based machine learning to predict component failures before they actually happen. Within the next decade, your dishwasher will likely alert you to a minor drop in pump motor efficiency or a slight thermal variance in the heating element via a smartphone notification. This predictive maintenance model will completely change how we handle service contracts and DIY repairs, turning unexpected weekend emergencies into simple, pre-planned part swaps. However, until your machine can completely diagnose itself, mastering these manual troubleshooting steps is your absolute best defense against high repair bills. If you want to put these advanced diagnostic strategies to the test, grab your digital multimeter today and measure the resistance of your heating coil to verify its health before the winter dishwashing season begins.
The Brutal Truth About DIY Appliance Repair That Nobody Warns You About
When you first decide to bypass the repair technician, it is easy to feel like a financial genius. However, the biggest trap in the world of home maintenance is assuming that every physical symptom has a single, obvious mechanical cause. I once spent an entire Saturday replacing what I thought was a dead pump motor, only to discover that the real culprit was a tiny piece of broken glass jammed inside the impeller. The most critical lesson I have learned is that you must always test before you replace. Jumping straight to buying expensive new components without verifying the failure with a digital multimeter or running basic appliance repair diagnostics is a guaranteed way to waste money and sanity.
Another hard truth involves how we treat our machines. We expect them to run flawlessly year after year, yet we ignore the subtle warning signs. If your dishes are coming out dirty, do not just assume you need a new machine. Simple, systematic checks—like looking for physical blockages or verifying structural integrity—can prevent major headaches. Before you call a professional, take the time to inspect the basics; you might just find that fixing the rattle why your spray arm hits the bottom rack is a quick, five-minute fix you can do yourself with zero budget.
The Core Diagnostic Arsenal in My Personal Toolbag
You do not need a truck full of specialized industrial gear to successfully diagnose your kitchen appliances. Over the years, I have trimmed my toolkit down to three non-negotiable items that save me from constant frustration:
- A Reliable Digital Multimeter: This is your eyes and ears for the electrical system. By mastering the only multimeter settings you need for appliance repair, you can instantly tell if a heating element, door switch, or pump motor winding has physically failed.
- A High-Lumen Headlamp: Working under a dark cabinet kickplate is impossible when you are trying to hold a flashlight in your teeth. A hands-free headlamp keeps your hands completely free to work on tight plastic connectors.
- Flexible Cleaning Brushes and Toothpicks: Often, what looks like a major component failure is actually just a nasty buildup of grease and food debris. A set of slim brushes allows you to clean out the tiny spray holes and tight corners within the sump.
If you suspect an electrical failure is stopping your wash cycle before it even starts, you do not have to guess. You can easily pinpoint the exact issue by learning how to use testing your door switch with a basic continuity test, which will rule out the most common safety-switch failures in under two minutes.
Your Roadmap to Appliance Independence
Diving into the world of DIY diagnostics and hands-on maintenance can feel incredibly intimidating, especially when you are staring at a complex web of wires and plastic plumbing under your counter. But remember, every expert repair technician started exactly where you are today. Taking control of your home maintenance is not just about saving money on service calls; it is about building the confidence to solve problems with your own two hands. By mastering basic appliance diagnostics, you protect your budget, extend the lifespan of your machine, and keep your household running smoothly on your own terms. Do not be afraid to roll up your sleeves, grab your tools, and tackle that next repair project with confidence.
Have you ever successfully diagnosed a dishwasher issue on your own, or did a hidden clog catch you off guard? Let me know your triumphs and struggles in the comments below!