

I was showing off my kitchen remodel to my neighbor when the afternoon sunlight hit the dishwasher at just the right angle. There it was: a jagged, white scratch right across the plastic faceplate. It looked like a permanent scar on a brand-new face. I felt my stomach drop. I had spent thousands on the cabinets and countertops, and this one little mishap made the whole appliance look like a thrift store find. You probably know that sinking feeling. Maybe you bumped it with a grocery bag or a stray fork caught the edge while you were loading. I immediately started looking for solutions, only to realize that why your appliance warranty won’t cover cosmetic scratches is the first thing they tell you when you call support. If the machine still washes dishes, they do not care how it looks. I have spent years mastering expert diagnostics and repair tips, and I realized that fixing the exterior is just as satisfying as fixing the motor. Today, I am going to show you exactly how to buff out those eyesores so your kitchen looks brand new again. [image_placeholder]
Why You Should Fix Those Scratches Instead of Replacing the Panel
Years ago, I made a classic amateur mistake. I saw a small scratch and thought, “I will just use some baking soda and a heavy-duty scrubby sponge.” I ended up creating a massive, dull, foggy patch that was way more noticeable than the scratch itself. It was a total disaster because I did not understand that plastic requires a much gentler, progressive touch than stainless steel. Replacing the whole control panel assembly can cost upwards of $200, which is ridiculous for a piece of molded plastic. By learning a few basic techniques, you can save that money for things that actually matter. It is about more than just vanity; it is about taking pride in your home maintenance. Just like learning how to tighten a loose handle without taking the door apart, this is a skill every homeowner should have in their back pocket.
Is it really worth the effort to buff this out?
You might be thinking, “It is just a dishwasher, who cares?” But those small imperfections add up. According to the Association of Home Appliance Manufacturers, well-maintained appliances can last significantly longer simply because owners who care about the aesthetics are more likely to perform routine maintenance. If you let the exterior go, you might start ignoring why your dishwasher buttons are unresponsive after cleaning, which could lead to real mechanical failures. Trust me, spending forty minutes with some polishing compound is far better than staring at a damaged unit for the next five years. Have you ever tried a ‘quick fix’ that ended up making a scratch look worse? I would love to hear your stories—misery loves company, after all! We are going to dive into the exact process, but first, let us make sure we have the right supplies so you do not repeat my foggy-plastic nightmare.First, gather a headlight restoration kit or individual sheets of 1000, 2000, and 3000-grit wet/dry sandpaper. You also need a plastic polishing compound—I usually grab the stuff meant for car taillights because it’s engineered for the same polymer density as a dishwasher faceplate. Before you touch a single grain of sandpaper to that plastic, you have to clean it. Any tiny piece of grit trapped under your hand will act like a diamond-tipped chisel, creating new gouges while you try to fix the old ones. I learned this the hard way on a high-end Bosch unit. I thought a quick wipe with a paper towel was enough, but a single grain of salt from the counter got caught under my cloth and turned a one-inch scratch into a four-inch swirl.
Start with a Clean Surface or You’ll Make More Scratches
Use a mild dish soap and a microfiber cloth. Avoid those ‘miracle’ sponges for now; they are actually microscopic sandpaper and can dull the finish prematurely. If you’re worried about the electronics while you’re scrubbing, it’s worth knowing the real reason your dishwasher wont start often boils down to moisture getting where it shouldn’t. Tape off the buttons and display with low-tack painter’s tape. This prevents the polish from gunking up the crevices, which is a nightmare to clean later and can lead to why your dishwasher buttons are unresponsive after cleaning.
Wet Sanding is Scarier Than It Looks
Now for the part that makes everyone nervous. Soak your 1000-grit sandpaper in water for ten minutes. You want it dripping wet. Sanding plastic is like pruning a bonsai tree; you are removing material to create a new shape, and if you go too fast, there is no going back. Lightly sand the scratch in a back-and-forth motion—never circles yet. The water acts as a lubricant and a carrier for the plastic dust. If the water turns milky, you are doing it right. This is similar to the secret to removing cloudy film from plastic containers, only you are physically leveling the surface.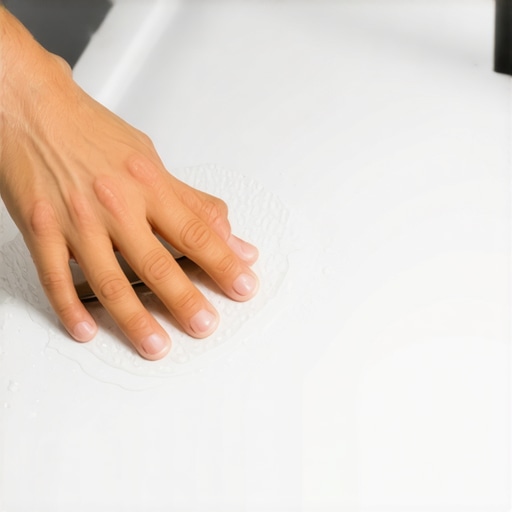 Move up to the 2000-grit, then the 3000-grit. By the time you finish with the 3000, the scratch should be invisible, replaced by a very light, uniform haze. Don’t panic when you see that haze. This is part of the fine print about normal wear and tear on appliances; you’re essentially creating ‘controlled wear’ to blend the damage away.
Master the Circular Buff for a Mirror Finish
Apply a pea-sized amount of polishing compound to a clean microfiber. Now you can use circular motions. Think of it like waxing a car. The compound has even finer abrasives that will vanish that 3000-grit haze and bring back the factory shine. While you are down there working on the aesthetics, keep an eye out for mechanical issues. For example, if you notice the door feels heavy or drops, you should investigate why your dishwasher door falls too fast when opened before the hinges warp the faceplate you just spent an hour fixing. If you ever need to buy replacement trim, be careful and learn how to identify counterfeit replacement parts online so you don’t end up with plastic that melts under the heat of a normal cycle.Now that you have the exterior looking like a showroom model, let us dig deeper into the mechanics. Most homeowners believe that if they touch a single screw, they have signed away their right to a repair. This is a common misconception that often results in people waiting two weeks for a service call they could have handled in ten minutes. In my experience, the biggest trap is not the repair itself, but the lack of preparation before the technician arrives. Everyone says you should call for professional diagnostics the moment a light flashes, but I have found that running your own preliminary checks is the only way to keep the pros honest. If you do not know top signs your dishwasher needs professional diagnostics, you might end up paying a $150 service fee for a tech to simply flip a tripped breaker or clear a piece of glass from the pump. [image_placeholder]
Will DIY repairs actually void your entire manufacturer agreement?
The short answer is: usually not. According to the Federal Trade Commission’s ‘Nixing the Fix’ report, the Magnuson-Moss Warranty Act generally prohibits manufacturers from conditioning a warranty on the use of a specific service provider, unless they provide the parts or service for free. This means you can often perform basic maintenance without fear. However, the ‘oops’ factor is real. The most common trap that leads to denied claims is not the repair work, but your choice of cleaning supplies. I have seen countless claims rejected because a technician found evidence of non-approved detergents or ‘life hacks’ like using too much vinegar, which can degrade sensitive seals. This is exactly why service techs deny warranty claims for soap choice. Before you even think about calling for help, you must ensure your how appliance diagnostics can save your warranty benefits strategy is sound. This includes knowing the photo evidence you need for every warranty claim. If you cannot prove the unit was maintained, they will call it ‘user neglect.’ Have you ever fallen into this trap where a technician blamed your soap or ‘improper use’ to avoid a repair? Let me know in the comments. We also need to talk about the hidden loophole that gets your denied claim reversed, because even if they say no initially, you have more power than you think. Learning how to get a manufacturer to pay for an out of warranty repair is often just a matter of having the right understanding of appliance diagnostics for improving your warranty claims. Do not let a jagged scratch or a stubborn error code convince you that your machine is junk; with a little technical grit, you can keep it running for a decade.
Once you’ve mastered the art of buffing out scratches and navigating the murky waters of warranty claims, you realize that the real secret to longevity isn’t luck—it’s having the right equipment. Most people keep a screwdriver and maybe a pair of pliers in their kitchen drawer, but if you want to truly own your appliance’s health, you need to step up your game. I personally never start a repair without my Fluke 117 digital multimeter. Why? Because guessing if a part is bad is how you waste money on components you didn’t need. Whether you are learning how to test the continuity of a heating element or verifying the exact multimeter reading for a healthy thermal fuse, precision is your only protection against a misdiagnosis. You don’t need a degree in electrical engineering, but you do need to know how to test your inlet valve with a simple voltmeter to rule out simple water flow issues before they become expensive ‘pump failures’ in the eyes of a lazy technician.
Why Needle-Tip Probes Beat the Basic Hardware Store Kit
The biggest frustration I see with DIYers is using standard probes on modern control boards. Dishwasher connectors are getting smaller and more fragile every year. I switched to ultra-fine needle-tip probes because they allow me to back-probe a connector without damaging the plastic housing or the pins. This is crucial when you are trying to how to get professional grade diagnostic codes from your interface. If you poke around with thick, blunt probes, you risk shorting out the very board you’re trying to save. I also recommend keeping a basic thermal camera in your toolkit. While it sounds like overkill, why your service technician carries a thermal camera is no mystery; it’s the fastest way to spot a failing capacitor or a clogged heater that isn’t reaching the 140°F standard set by the Association of Home Appliance Manufacturers (AHAM) in their DW-1-2020 performance guidelines. If your water isn’t hitting that mark, your detergent won’t activate, and your ‘clean’ dishes will still be covered in bacteria.

How can I keep the hardware from failing prematurely?
Maintenance isn’t just about fixing things when they break; it’s about periodic recalibration. Just like a high-end car, your dishwasher’s sensors can get ‘out of sync’ due to hard water or soap film. Once a year, I perform a manual reset of the sensors. Learning how to calibrate your dishwasher turbidity sensor with plain water can solve those frustrating cycles where the machine runs for three hours because it thinks the water is still dirty. This simple calibration ensures the optical sensor knows what ‘clear’ actually looks like, saving you on your electric bill and reducing wear on the motor. I predict that in the next few years, we will see even more AI-integrated sensors that handle this automatically, but for now, the ‘human touch’ is required to keep the system honest. If you really want to stay ahead of the curve, I challenge you to open your bottom kickplate this weekend and check the continuity of your thermal fuse—it’s a five-minute check that could save you from a dead machine right before a big dinner party.
What I Learned After Scuffing My First Five Faceplates
The biggest myth I used to believe was that a scratch is just a cosmetic annoyance. In reality, it is a test of your attention to detail. If you can patiently wet-sand a piece of plastic back to a mirror finish, you definitely have the temperament for troubleshooting dishwasher problems without losing your cool. I have found that a perfect exterior often translates to a more meticulously maintained interior. Also, remember that the appearance of your machine is your first line of defense during a professional service call. A technician who sees a pristine, well-cared-for unit is far less likely to reflexively claim user abuse to deny a claim. This psychological edge is a huge part of how appliance diagnostics can save your warranty benefits in the long run. Finally, never underestimate the power of documentation; having the photo evidence you need for every warranty claim is what separates successful homeowners from those paying out of pocket for pre-existing issues.
The Gear I Keep Within Arms Reach
I always keep a dedicated Plastic Restoration Kit in my utility drawer—the same 3000-grit paper and compound we discussed—because it works wonders on microwave doors and oven displays too. Beyond aesthetics, I swear by a high-quality voltmeter; learning how to test your inlet valve is the single fastest way to transition from a guesser to a fixer. Lastly, I always recommend hunting down your specific tech sheet. Knowing how to find a service manual hidden inside the unit is like having the cheat codes for your specific model’s brain. [image_placeholder]
Stop Looking at the Damage and Start Fixing It
It is incredibly easy to get paralyzed by the fear of making things worse, but every appliance expert was once a beginner with a scuffed-up panel and a sinking feeling in their stomach. By taking these steps, you are not just fixing a surface-level eyesore; you are mastering the fundamentals of home maintenance and appliance diagnostics. Your kitchen should be a source of pride, not a collection of small failures you’ve learned to ignore. Have you ever tried to buff out a scratch only to have it turn into a foggy mess like I did? Let me know your story in the comments below!