

The smell was the first thing that hit me. Not the fresh scent of a lemon grove, but a sharp, acrid chemical cloud that made my eyes sting and my throat tighten. I was nose-deep in my dishwasher, scrubbing away at a stubborn layer of grease, when I realized I was literally holding my breath just to survive the chore. It was a massive wake-up call for me. I spent years thinking that if a cleaner did not smell like a sterile laboratory, it simply was not working. I was wrong. Not only was I choking myself out, but I was also likely doing a number on the delicate components of my machine. If you have ever wondered why a smell persists even after a deep clean, you are likely fighting fire with fire. Today, I am going to share the natural degreasers I have turned to that actually cut through the sludge without making your kitchen a hazard zone. We are going to talk about real-world fixes that keep the grease out of your filter mesh and your lungs happy.
Stop Choking on Fumes and Start Using What Is in Your Pantry
Most of us have been conditioned to believe that heavy-duty kitchen grease requires heavy-duty toxins. I fell for it too. Early on in my homeownership journey, I made the huge mistake of thinking more power was better, and I ended up ruining a door seal because the chemicals were far too corrosive for the rubber. It was a three-hundred-dollar lesson I do not want you to repeat. Since then, I have discovered that a simple mixture of baking soda, citrus, and heat can often outperform the blue stuff in the plastic jug. Natural degreasers do not just protect your health; they protect the lifespan of your expensive appliances. According to the Environmental Working Group, many traditional cleaners contain substances linked to chronic respiratory issues and environmental damage, which is a high price to pay for a shiny stovetop. I have found that cleaning with nothing but steam and water can do wonders if you catch the mess early enough. Have you ever felt like you were just moving the grease around instead of actually removing it? Drop a comment below and tell me your most frustrating cleaning story.
Is This Green Cleaning Stuff Actually Worth the Hype?
I know exactly what you are thinking because I was the biggest skeptic in the room. You are worried that ‘natural’ is just a code word for ‘does not work.’ You have probably tried a vinegar spray before and ended up with a kitchen that smelled like a salad but still felt like a grease trap. The secret isn’t just the ingredient; it is the technique. Most people fail because they do not address the hard water spots without chemicals first, which creates a barrier that grease clings to like glue. When you stop relying on harsh acids that eat through your internal gaskets and seals, your machines will start lasting years longer. We are about to look at the hidden drain screens and filters where this grease loves to hide, and how a few basic pantry staples can melt it away better than any store-bought spray ever could.
Scrub the Filter Before the Bubbles Start
To start, you have to get your hands dirty. You cannot melt away a physical wall of sludge with a spray bottle alone. I learned this the hard way when I once spent three hours running vinegar cycles only to find a solid block of congealed grease and old food bits blocking the hidden drain screen. It was like trying to wash a car with a tarp over it; the cleaner could not reach the actual problem. Pull out that bottom rack and twist the filter housing. If it feels slimy, soak it in a bowl of warm water with two tablespoons of baking soda. This isn’t just about cleanliness; it is about flow. When your filter is blocked, the pump works twice as hard, which is a leading cause for professional diagnostics later down the line. If you leave that filter clogged, you are practically begging for a pump failure that your manufacturer might not even cover.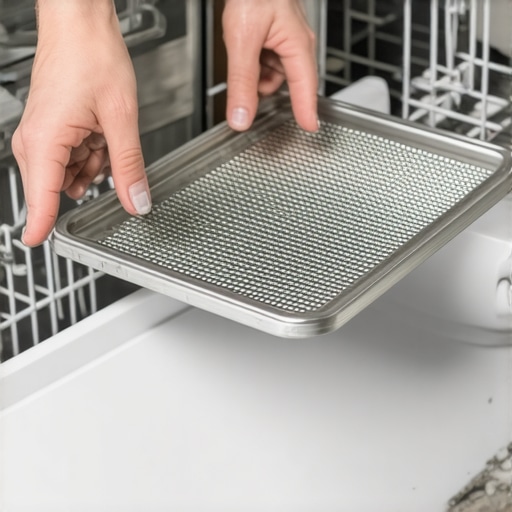
Target the Gunk Hiding in Your Spray Arms
Think of your spray arms like a showerhead. If the tiny holes are plugged with grease or hard water deposits, the water pressure drops to a pathetic trickle. I remember one Sunday afternoon when my dishes were coming out looking worse than when they went in. I realized the dishes stayed wet and dirty because the spray arm was literally paralyzed by a string of hair and grease. I used a simple toothpick to clear the nozzles, and the difference was night and day. Once those holes are clear, the natural degreaser you use in the next step can actually circulate and reach every corner of the tub. While you are down there, check if the arm spins freely; if it hits the rack, you might need to look at fixing the rattle before you run another cycle.
Heat Is the Secret Weapon for Natural Cleaners
Natural degreasers like lemon juice and white vinegar are significantly more effective when the water is scalding. If your water heater is set too low, the grease will just move from your plate to the dishwasher walls and stay there. Before you start a cleaning cycle, run the kitchen sink faucet until the water is hot to the touch. This ensures the dishwasher starts with high-temp water immediately rather than wasting the first ten minutes warming up cold pipes. Check the best temperature for your home to ensure you are hitting the sweet spot of 120 to 150 degrees Fahrenheit. This temperature range is high enough to melt animal fats but low enough that it won’t warp your plastic tub.
Keep Your Warranty Safe While Doing It Yourself
One thing many homeowners overlook is how aggressive cleaning can void a service contract. I always tell people that understanding appliance diagnostics is your best defense. If you use a harsh chemical that corrodes an internal sensor, you might find that your claim for a clogged pump gets denied because the damage was self-inflicted. Using baking soda and citrus is generally much safer, but you should still be careful not to let large chunks of lemon peel fall into the sump. I once had to use a simple tool for removing debris because a lemon seed got stuck in my impeller. By keeping it natural and being meticulous about what goes into the machine, you maintain the integrity of the parts and ensure diagnostic benefits remain in your favor should a real mechanical issue arise later. Once you have the physical debris gone and the heat cranked up, you are ready to let the acidity of the citrus do the heavy lifting for you.Here is the part where most homeowners get tripped up: they assume that a warranty or service plan is an all-access pass to free repairs. In my years of tinkering with kitchens, I have seen more people lose money because they did not understand the fine print than because of the actual breakdown. Everyone tells you to call the manufacturer the moment something goes wrong, but I have found that doing your own preliminary check is often smarter. However, there is a massive trap here. If you start poking around without understanding appliance diagnostics, you might leave behind evidence of tampering that voids your coverage. I once met a neighbor who tried to fix a simple leak and accidentally bent a sensor pin; the manufacturer denied his claim because the damage was ‘user-inflicted.’

The Hidden Cost of ‘Free’ Repairs
A common myth is that a ‘parts and labor’ warranty covers every cent. In reality, why your dishwasher warranty might not cover labor often comes down to the initial diagnostic fee. Most companies will charge you $100 to $150 just to show up and look at the machine. If they determine the issue was caused by poor maintenance—like a grease-clogged pump—they will hand you the bill and walk away. This is why reading the hidden blinking lights on your dishwasher brain is a skill every homeowner needs. If you can tell the technician exactly what the error code means before they arrive, you are less likely to be taken for a ride. According to a study by Consumer Reports, nearly 20% of homeowners face repair costs that are excluded by warranties due to perceived ‘lack of maintenance.’ Have you ever fallen into this trap? Let me know in the comments.
Will a DIY diagnostic help or hurt your claim?
This is the advanced question I get asked the most. The answer depends on your tools and your paper trail. If you are troubleshooting dishwasher problems, keep a log. Taking the time to document intermittent noises for a repair claim gives you leverage. When you have a video of the screeching sound, the tech cannot tell you ‘everything looks fine’ just because it is behaving during their visit. But be warned: using ‘generic’ components is a gamble. I have seen how third-party parts might kill your service contract instantly. Manufacturers use specific serial numbers on their internal boards, and if they see a non-OEM capacitor, your fine print that voids your appliance service plan will come back to haunt you.
Stop Relying on the Tech and Start Protecting the Logic Board
The most expensive part of a modern dishwasher isn’t the motor; it is the control board. People often think that if the machine won’t start, they need a whole new unit. In my experience, it is often just a tripped sensor or a dirty connection. You can save yourself a $400 repair bill by using appliance diagnostics to rule out simple electrical hiccups first. Just remember that while your warranty covers parts but not labor costs in many cases, you are the one responsible for the ‘cleanliness’ of the environment. If a roach or a spill shorts out that board, no warranty on earth will save you. Keep your machine clean, document everything, and never let a technician tell you they ‘can’t find the problem’ when you have the data to prove otherwise.Whenever someone asks me what the single most important item in my junk drawer is, they usually expect me to say a specialized wrench or an expensive screwdriver. It is actually my digital multimeter. If you want to stop being a ‘parts swapper’ who throws money at a problem and start being a true fixer, you need to learn the only multimeter settings you need for appliance repair. I spent way too many years guessing if a motor was dead, only to find out it was a five-dollar fuse. Now, I start by testing your thermal fuse for continuity without a pro before I even think about ordering a major component. It is all about precision. For instance, technical service bulletins from major manufacturers like Whirlpool often specify that a heating element should show between 10 and 30 ohms of resistance; if your screen reads ‘OL’ or zero, you have found your culprit.
#IMAGE_PLACE_HOLDER_D#
How do I keep my machine running for a decade or more?
It comes down to a simple six-month ritual. I pull the unit out just a few inches to spot corrosion in your control board wiring early. Dust and kitchen moisture are the silent killers of sensitive electronics. I also rely on the best DIY tools for kitchen appliance maintenance, specifically a flexible inspection camera. This little device is a lifesaver for tracing the source of that mystery water leak under your kitchen sink before it has a chance to rot your subfloor. According to the Association of Home Appliance Manufacturers (AHAM), while the average lifespan of a dishwasher is roughly 9 years, proactive electrical testing and debris management can easily push that closer to 15. I have seen ‘dead’ machines brought back to life just by cleaning a bit of oxidation off a terminal with a toothbrush and some contact cleaner.
Your Wi-Fi Connection Might Actually Fix the Next Clog
Looking ahead, the trend in home appliances is moving toward predictive maintenance. In the very near future, your machine will not just tell you it is broken; it will alert you that the pump motor is drawing 15% more current than it did last month, indicating an impending failure. We are already seeing the beginning of this with how your smart dishwasher tracks energy use in real time. Sometimes, the ‘repair’ is not even mechanical. I have encountered several instances where your smart dishwasher needs a firmware update to save water or to clear a software glitch that was triggering a false leak error. If you are not checking your appliance app for updates, you are leaving half the diagnostic work on the table. My challenge for you this weekend: Do not just run a cleaning cycle. Actually remove your bottom kickplate and use a flashlight to look for salt trails or damp insulation. If you find anything suspicious, start troubleshooting dishwasher problems immediately. It is the difference between a five-minute tightening of a clamp and a thousand-dollar floor replacement.
Why Natural Cleaners Fail Without Real Diagnostics
After years of scrubbing out sludge, I have realized that even the best lemon juice and vinegar mixture is only half the battle. If you do not address the physical and mechanical health of your machine, you are just masking the symptoms of a deeper issue. Here are the core truths I learned through trial and error:
- Maintenance is not optional for coverage: Most people do not realize that when to trust a warranty for dishwasher repairs depends entirely on whether you have kept the unit clean. If a tech finds a year of grease buildup, they will likely deny your claim.
- Manual cleaning beats chemicals every time: You cannot expect a liquid to melt a solid wall of debris. You must manually clear the filter before the natural degreasers can actually reach the pump.
- Diagnostics are your best defense: Instead of guessing, spend five minutes troubleshooting dishwasher problems by checking for error codes first. It saves hours of unnecessary scrubbing.
#IMAGE_PLACEHOLDER_FINAL#
Gear That Actually Saves You Money
If you want to stop feeling helpless when your machine starts acting up, you need to move beyond the spray bottle. I trust these specific resources because they have saved me thousands in unnecessary service calls over the last decade. First, learn the only multimeter settings you need for appliance repair; it is the difference between knowing a part is dead and just hoping it is. Second, I always keep a copy of the hidden service manual (usually tucked behind the bottom kickplate) to decipher those blinking lights. Finally, I recommend investing in the best DIY tools for kitchen appliance maintenance, such as a flexible grabber tool to snag debris from the drain without a full teardown.
Reclaim Your Kitchen Today
There is a unique sense of satisfaction that comes from hearing your dishwasher start a fresh cycle because you had the courage to open it up and find the problem. Don’t let the fear of technical jargon stop you from understanding appliance diagnostics. When you combine the power of natural degreasers with a proactive maintenance mindset, you extend the life of your appliance and keep your household running smoothly. Have you ever tried to claim a warranty repair only to be told it was a maintenance issue? Let me know in the comments below!