

There is a specific, soul-crushing sound that only a seasoned dishwasher owner knows: the sharp clunk-scrape-splash of a fully loaded bottom rack jumping its tracks. I remember standing in my kitchen last November, hands covered in leftover lasagna sauce, trying to shove that stubborn rack back into place for the third time in ten minutes. It felt like a personal insult from a machine I had paid good money for. I was convinced my appliance was dying, and I even started looking at top signs your dishwasher needs professional diagnostics just to see if I should throw in the towel. But here is the truth: most of us are living with a rack that behaves like a shopping cart with a bad wheel because we think it is a terminal failure when it is actually a ten-dollar, five-minute fix. I realized that my own struggle was born out of ignoring the small things, like a missing end-cap or a brittle roller, which eventually made the whole machine feel broken.
Stop Wrestling with Your Lower Rack Once and for All
I have been there—sweating over a pile of wet plates, wondering why on earth the tracks seem to have a mind of their own. For the longest time, I ignored it. I figured it was just part of the “charm” of an older machine. But that neglect led to chipped glasses and a very sore lower back from lifting the dead weight of a derailed tray. Eventually, I realized that troubleshooting dishwasher problems starts with the physical alignment, not just the motor. If the rack is not sitting true, your spray arms can hit the dishes, leading to poor cleaning or even a rattling noise during the rinse cycle. Today, I am going to show you exactly how to diagnose those flimsy rollers and bent rails so you never have to play “Dishwasher Tetris” again. We will look at why those wheels fail and how a simple visual check can save you from a major headache.
Is a Cheap Plastic Wheel Actually Worth the Hassle of a DIY Repair?
You might be skeptical. I certainly was. I thought, “Surely, if it is broken, I need a whole new tub or a professional technician.” I actually made a classic rookie mistake early on: I tried to “bend” the track back into shape with a pair of heavy-duty pliers. Bad move. I ended up scratching the protective plastic coating, which is a fast-track to rust. If you have already seen that orange tint on your tines, you might want to look into the best way to patch a rusted rack tine with liquid rubber. The reality is that these components are designed to be replaced by the owner. Doing it yourself often preserves your sanity more than “hacking” a solution that voids your protection. In fact, many people do not realize that understanding appliance diagnostics can help you prove that a part failed due to wear rather than abuse. Believe it or not, according to research by Consumer Reports, nearly 20% of dishwasher repairs are related to physical components like racks, door latches, and seals rather than complex electronics. It is one of the most common physical failures in modern kitchens, often caused by the high-heat drying cycles making the plastic brittle over time. Have you ever found yourself shouting at a drawer full of silverware that refuses to stay put? I want to hear your worst “dishwasher avalanche” story. Before we dive into the tool kit, let’s make sure we aren’t overlooking a simple fix that’s staring us in the face.
Inspect the Rollers Before You Buy a New Machine
To get that rack back on track, you first need to look at it like a mechanic looks at a car’s suspension. Most lower racks sit on four to eight plastic wheels that snap onto a small axle on the rack’s frame. Think of these wheels like the casters on a grocery cart; if even one is flat-spotted or missing its hub, the whole thing pulls to the left and jams. Start by pulling the rack completely out of the machine and flipping it over on your counter. You are looking for ‘flat spots’—areas where the plastic has worn down because the wheel stopped spinning and started sliding. If the wheel doesn’t spin freely with a flick of your finger, it is time for a replacement. This kind of troubleshooting dishwasher problems is often purely mechanical and requires zero electrical knowledge. I remember one Tuesday night I was so fed up with my rack jamming that I actually tried to use a binder clip to hold a loose roller on. It worked for exactly four minutes until the heat of the wash cycle softened the plastic grip, and the rack crashed down, nearly breaking a stack of stoneware. That was the moment I realized that skipping the real part for a ‘hack’ was a fool’s errand. 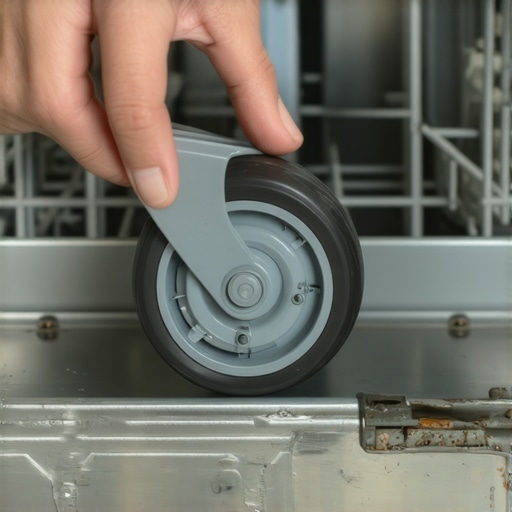
Check for These Hidden Track Obstructions
Sometimes the wheels are fine, but the track itself—the stainless steel or plastic rail built into the tub—has become a graveyard for debris. I once found a single cherry pit wedged into the back of the rail that was causing a massive ‘speed bump’ every time I tried to close the door. Take a flashlight and run it along the entire length of the track on both sides. Look for mineral buildup, which can feel like sandpaper and create friction. If you find white, crusty deposits, you can often clear them without heavy scrubbing. In fact, knowing the eco-friendly way to remove hard water scale can help you clean those tracks effectively without scratching the tub’s finish. While you are down there, check the alignment of the spray arm. If the rack is sagging because of a bad roller, it might be dragging on the arm. Learning how to replace a cracked spray arm without calling a technician is a great skill to have, but often, just fixing the rack height solves the ‘clunking’ noise immediately.
Protect Your Warranty While You Work
Before you start popping parts off, take a second to check your paperwork. It sounds boring, but many people accidentally void their protection by using unapproved third-party parts or by failing to document the issue. I have seen cases where a why your warranty claim was denied due to lack of maintenance clause was triggered simply because the owner ignored a failing part until it caused a bigger leak. By engaging in proactive understanding appliance diagnostics, you can identify if the roller failure is a symptom of a larger issue, like a warped tub. When you order your new rollers, ensure they are the exact OEM (Original Equipment Manufacturer) matches. Using a ‘universal’ kit that doesn’t quite fit can put undue stress on the tub walls, leading to micro-cracks that are much more expensive to fix than a ten-dollar wheel.But even if you buy the right parts, there is a nuance to the warranty game that most people miss entirely. We tend to assume that limited means we are bulletproof, but the reality is much more surgical and, frankly, a bit punishing if you aren’t prepared. I have spent hours on the phone with manufacturers only to find out that why your appliance warranty covers parts but not labor costs is the reason my ‘free’ repair still cost me two hundred dollars in technician fees. It is a bitter pill to swallow when you realize the ten-dollar roller you just replaced yourself was actually the least of your financial worries. Let’s dig deeper into the hidden nuances of these contracts so you don’t get caught off guard.
Don’t Let the Fine Print Burn Your Repair Budget
Everyone says that having a service plan is the ultimate safety net, but in my experience, the fine print is often designed to catch you in a maintenance lapse. For instance, did you know that the clause in your service plan that voids coverage for hard water is one of the most common reasons claims are denied? If you live in an area with high mineral content and haven’t been proactive about descaling, the company can argue that the failure was due to neglect rather than a manufacturing defect. This is why how appliance diagnostics can save your warranty benefits is such a critical concept to grasp; if you can prove you performed regular checks, you have the upper hand. A study by Consumer Reports indicates that while nearly 30% of new dishwashers develop problems by the fifth year, a huge chunk of those repair costs fall back on the consumer because of these specific exclusions.
Can Your Garbage Disposal Actually Break Your Dishwasher?
It sounds like a trick question, but I have seen it happen more times than I can count. A classic ‘oops’ factor for DIYers is the drainage system. Many people rush to replace a seemingly dead pump without realizing that why your warranty claim got denied because of your garbage disposal is often tied to a simple installation error. If you just put in a new disposal and your dishwasher won’t drain, chances are the knockout plug is still in place. Calling a pro for that will not only cost you a service fee but will also likely be logged as a non-warranty ‘user error’ that stays on your machine’s record. If you find yourself in this situation, knowing how to appeal a rejected extended warranty claim can save your skin, but avoiding the mistake in the first place is always better.
Master the Secret Menu to Avoid Costly Tech Visits
If you want to show you really know your machine, you need to stop looking at the blinking lights as a nuisance and start seeing them as a map. Most modern units have a ‘secret’ sequence of button presses that opens a technician’s interface. Accessing the secret diagnostic mode hidden on your touch control panel allows you to see real-time sensor data and historical error codes that aren’t visible during normal operation. This is how you differentiate between a failing motor and a simple sensor glitch caused by a power surge. I once used this mode to find a ‘ghost’ error that was stopping my cycles mid-wash, saving me from a full control board replacement. 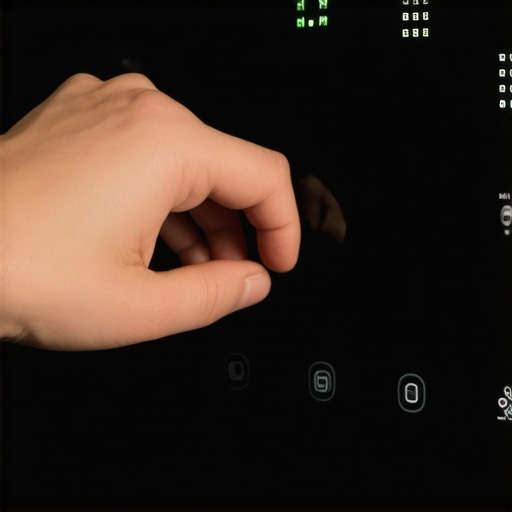 Have you ever fallen into the trap of replacing a part only to find out the real problem was hidden in the settings or a simple plumbing clog? Let me know in the comments below, and let’s troubleshoot it together.If you have ever felt like you were guessing which part to buy, you are not alone. I spent years throwing parts at problems until I realized that a twenty-dollar tool could have saved me hundreds. Every DIYer needs to get comfortable using a voltmeter to check your power cord connection safely before assuming the control board is fried. I personally rely on a Fluke 117 for its accuracy, as cheap knockoffs often give erratic readings in high-humidity environments like a kitchen. For example, technical standards from the Association of Home Appliance Manufacturers (AHAM) suggest that a significant percentage of reported electrical failures are actually just inadequate voltage reaching the machine during peak load. If you do not test, you are just gambling with your wallet.

Invest in the Right Tools to Save Your Sanity
Beyond the multimeter, the most used item in my kit is a simple shop vacuum. It sounds overkill, but knowing how to clear a blocked impeller with a shop vacuum is a game changer. It sucks out the stagnant water and debris that a sponge can never reach. I also keep a roll of high-quality zip ties handy. Why? Because why your service tech always checks the drain hose high loop is a lesson in gravity; if that hose sags, dirty sink water siphons back into your clean dishes. A single zip tie can prevent years of ‘stinky dishwasher’ syndrome. These aren’t just gadgets; they are the frontline defense in understanding appliance diagnostics so you can provide hard evidence if you ever need to file a claim.
How do I maintain my dishwasher’s mechanical performance over time?
Long-term results come down to chemistry and consistency. I have moved away from the ‘big brand’ marketing and focused on the impact of powder vs pods on your machines lifespan. Pods are convenient, but they often lead to detergent overdose, which creates a suds-lock condition that stresses the pump. Once a month, I perform a deep clean. While many suggest harsh chemicals, I prefer the secret to de-scaling your machine using lemon juice to keep the heating element and spray arms free of calcium. This proactive approach ensures that why your warranty claim was denied due to lack of maintenance never becomes your reality. Consistency is the difference between an appliance that lasts eight years and one that lasts fifteen.
Prepare for the Era of Predictive Maintenance
Looking ahead, the trend is shifting toward machines that talk back. We are moving toward a future where why firmware updates are essential for new smart dishwashers becomes as common as updating your phone. I predict that within five years, onboard AI will alert you to a failing bearing by analyzing the acoustic frequency of the motor before it actually breaks. However, this tech is fickle; I have already seen why your smart appliance app keeps crashing during firmware updates, which can leave a machine temporarily ‘bricked.’ The key to navigating this future is to stay informed and keep your manual tools ready. I strongly encourage you to try this today: check your drain hose for a high loop. If it is sagging, fix it now—it is the simplest way to instantly improve your machine’s hygiene and performance.
The Hardest Lesson I Learned While Wrestling With a Stuck Rack
After years of fixing my own appliances, the biggest lightbulb moment wasn’t about a specific part, but about the sequence of my work. I used to jump straight to buying replacements the second I heard a weird noise. Now, I know that you should always listen first; you can often identify a dying circulation motor by its pitch before it ever stops working. Another thing I realized too late is that a physical obstruction, like a loose gasket, can mimic a major mechanical failure. I spent hours worrying about my soap dispenser only to find out how to fix a loose gasket that interferes with the soap cup was the real solution. Finally, never assume the manufacturer is on your side without doing your homework; knowing when to trust a warranty for dishwasher repairs versus when to handle it yourself will save you hundreds of dollars in service fees.
The Three Tools Every Dishwasher Owner Should Own
If you want to move beyond basic guesswork, I recommend keeping a few specific items in your utility drawer. First, a quality multimeter is non-negotiable for checking continuity. Second, a bag of citric acid is a miracle worker for internal maintenance; it is the best way to remove cloudiness from glasses using citric acid while simultaneously cleaning your heating element. Third, a high-lumen LED flashlight helps you spot those tiny hairline cracks in the tub or spray arms that are invisible under standard kitchen lighting. I trust these tools because they provide objective data, taking the emotion out of a stressful repair situation.
Take Control of Your Kitchen’s Reliability Today
Repairing your own machine is about more than just saving money; it is about the peace of mind that comes from knowing exactly how your home works. When you master troubleshooting dishwasher problems, you stop being a victim of planned obsolescence and start being an informed homeowner. Don’t be afraid to get your hands a little dirty—most of these fixes are far simpler than the manuals make them seem. You’ve got the knowledge now, so go ahead and pull that rack out for a check-up!
What is the most frustrating noise or glitch your dishwasher has ever surprised you with? Let me know in the comments below!