

I remember the exact moment I realized I’d failed as a DIYer. It was 11:14 PM on a Tuesday, and I was standing barefoot in a lukewarm puddle that smelled faintly of lemon-scented detergent and pure regret. My dishwasher had been hissing for weeks—a warning I chose to meet with a half-hearted shove of the gasket using a wooden spoon handle. That ‘repair’ lasted exactly three cycles. When the seal finally gave way, it didn’t just leak; it staged a full-scale mutiny against my original hardwood floors. If you’ve been fighting with a sagging seal, you know the frustration of thinking you’ve fixed it only to see that black rubber lip peeking out again an hour later. Today, I’m going to walk you through the proper way to reseat that tub gasket so it stays put for years, not just days. We’ll cover why these seals fail and how to ensure your repair doesn’t accidentally lead to a situation where you’re wondering when to trust a warranty for dishwasher repairs. Have you ever had a minor appliance leak turn into a midnight kitchen flood?
Why a Slipped Gasket is More Than Just a Minor Nuisance
Rubber is a finicky material. It’s designed to be flexible, but over time, the constant cycle of extreme heat followed by cold water causes it to lose its ‘memory.’ When the gasket stops remembering its shape, it starts to wander. I made the classic mistake early on of thinking I could just use a bit of silicone glue to keep it in place, but that’s a disaster waiting to happen because it prevents the seal from expanding naturally. A slipped seal allows steam to escape, which is often why why your dishwasher doesn’t get hot enough on eco mode. This steam doesn’t just disappear; it condenses on your cabinet underside and drips back down, and often how to find the slow leak hiding under your kickplate becomes your next big project because of the hidden moisture. According to the Association of Home Appliance Manufacturers, even a tiny gap in a door seal can increase energy consumption by up to 15% because the machine struggles to maintain internal temperature.
Is This Gasket Fix Actually Worth the Effort?
You might be tempted to just call a pro or look into why your service plan might be a waste of money before touching the machine yourself. It’s a valid fear. If you pull the gasket out completely and can’t get it back in, you’ve turned a drip into a flood. However, reseating a gasket is one of the most satisfying repairs because the results are immediate. You don’t need a degree in engineering; you just need patience and the right technique. I once spent $200 on a service call just to watch a technician do exactly what I’m going to teach you in ten minutes.
Don’t Let a Lazy Seal Ruin Your Kitchen Floor
The real goal here is long-term protection. You want the best way to protect your kitchen floors from leaks, and that starts with a gasket that is properly seated in a clean, debris-free channel. Most people forget that soap scum and hard water deposits build up behind the rubber, acting like a lubricant that helps the gasket slide out. By the time we’re done today, you’ll know how to prep the surface so the rubber grips the metal like it’s brand new. We’ll even look at the simple move that doubles the life of your dishwasher racks while we have the door open, because effective maintenance is all about those little wins that keep the whole machine humming.
Scrub the Gunk Out of the Channel
The biggest mistake I see people make is trying to push a new or slipped seal back into a dirty track. Imagine trying to tape something to a dusty wall; it is never going to hold. You need to get in there with a soft toothbrush and some mild detergent to remove the slime. This buildup is often why your dishwasher still smells like old food after cleaning even after you have run a cycle. I once ignored a small patch of black mold in the corner of the track, thinking the gasket would just squash it down. Three days later, the seal slipped out again because the mold acted like a lubricant. Take the extra five minutes to ensure that channel is bone-dry and spotless before you even touch the rubber.
Warm Water Makes the Rubber Cooperate
If the rubber feels stiff or brittle, it is going to fight you every step of the way. I learned this the hard way during a mid-winter repair in a freezing kitchen. I spent twenty minutes wrestling with a cold gasket until it finally kinked and tore. Now, I always soak the gasket in a sink full of hot water for about five minutes. This makes the material pliable, allowing it to stretch and seat deeply into the tight corners of the tub without snapping back.
Start from the Top Center for a Perfect Fit
Do not start at the bottom corners and work your way up. Find the exact midpoint of the gasket and the exact midpoint of the top of the dishwasher tub. Press that center point in first, then work your way out toward the left and right corners simultaneously. Use your thumb to apply firm, steady pressure. This methodical approach is the core of troubleshooting dishwasher problems expert diagnostics repair tips because it eliminates the variable of uneven tension. If you pull too hard on one side, you will end up with a ‘tail’ of extra rubber at the end that prevents the door from latching.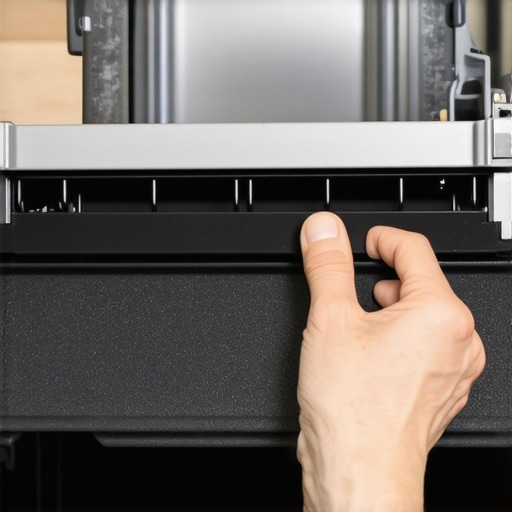
Address the Corners Without Kinking
When you reach the bottom corners, do not just shove the rubber in with a tool. You need to roll it into place using the pad of your thumb. Avoid using a screwdriver to poke it in, as one slip can puncture the hollow core of the seal. If your machine has hard water buildup in those corners that makes the rubber pop out, try the lemon peel trick for clearing hard water scale before you finish the seating process. A smooth, mineral-free surface ensures the rubber creates a vacuum-like seal against the door frame.
Verify the Seal with a Simple Business Card
Once the gasket is in, close the door and feel for resistance. It should feel significantly snugger than before. You can actually how to test a door latch with a business card to see if your seal is even across the entire perimeter. Slide the card between the door and the tub; if it falls through or moves without any drag, that section of the gasket isn’t seated deeply enough or the tub itself is out of alignment. This simple check saves you from the midnight surprise of a mid-cycle flood.Let’s dig deeper into why that gasket keeps jumping ship. Most homeowners assume it’s a manufacturing defect, but in my experience, the culprit is often chemical warfare. Modern detergents are packed with enzymes designed to eat proteins and starches, but if you aren’t using enough water, those same enzymes can eventually soften the EPDM rubber of your door seal. This is especially true if you are over-relying on ‘eco’ modes where water levels are lower, leading to [why-your-low-water-dishwasher-requires-special-rinsing-habits]. You might be struggling with a gasket when the real issue is [how-to-prevent-suds-locks-in-high-efficiency-machines]. I’ve seen countless DIYers try to lubricate a stiff seal with petroleum jelly—don’t do it! Petroleum products are the ‘oops’ factor that will literally dissolve the rubber over time, turning a $30 fix into a $500 flood. Instead, a light coating of food-grade silicone or even just plain water is all you need.
Stop Blaming the Rubber and Start Checking the Chemistry
Everyone tells you to replace the machine the moment it leaks, but I’ve found that [understanding-appliance-diagnostics-improving-your-warranty-claims] can save you thousands. A leaking seal isn’t always a dead machine; sometimes it’s just a symptom of a deeper pressure issue. According to a report by the Journal of Applied Polymer Science, repeated exposure to high-temperature cycles and specific surfactants can alter the cross-linking of synthetic rubbers, making them prone to ‘creep’—that annoying stretching that makes your gasket feel too long for the channel. If you’re dealing with this, you need to know [how-appliance-diagnostics-can-save-your-warranty-benefits] before you start tearing panels off. 
Could a Simple Firmware Update Be the Secret to a Dry Floor?
It sounds like science fiction, but modern ‘smart’ machines control water pressure via software. If your pump is over-pressurizing during a specific cycle phase, it can force water past even a brand-new seal. This is why [how-smart-diagnostic-apps-are-changing-home-appliance-repair] is becoming a vital skill for the modern DIYer. Before you assume the rubber is the enemy, check if [why-your-appliance-firmware-update-just-bricked-the-control-board] isn’t causing erratic pump behavior. Have you ever fallen into this trap of replacing a part only to find the problem was digital all along? Let me know in the comments. If the gasket seems fine but the leak persists, you might need to look at [the-truth-about-non-manufacturer-repair-parts-and-your-warranty] before buying a cheap knock-off on a whim. Sometimes, the ‘nuance’ is just that—a slightly different thickness in an off-brand part that causes the door latch to fail. You can always [how-to-test-a-door-latch-with-a-business-card] to be sure. If all else fails, don’t be afraid to [contact-us] or seek [top-signs-your-dishwasher-needs-professional-diagnostics] to protect your kitchen from structural damage.If you’re serious about never waking up to a kitchen lagoon again, you need to stop guessing and start measuring. I spent years trying to ‘feel’ if a part was failing, but feelings don’t fix electronics. Now, I never touch a machine without my digital multimeter in hand. This isn’t just for experts; knowing the exact multimeter reading for a healthy thermal fuse can tell you if your machine’s lack of heat is a blown fuse or a dying board. I personally use a high-quality multimeter because of its accuracy, which prevents ghost voltages from lying to you. When you’re trying to how to test your inlet valve with a simple voltmeter, that accuracy is the difference between a $15 fix and a $300 mistake. Beyond the meter, I’ve found that a simple telescoping inspection mirror is my best friend for checking the back corners of that gasket track without breaking my neck. It’s these small additions to your kit that transform you from a panicked DIYer into someone who actually understands troubleshooting dishwasher problems expert diagnostics repair tips.
Pack Your Toolbox Like a Pro
Most people overlook the most important diagnostic tool of all: the documentation. Every machine has a ‘cheat sheet’—the technical data sheet. If you how to find a service manual hidden inside the unit, you’ll often find it tucked behind the kickplate or inside the door panel. This sheet gives you the exact error codes and voltage specs for your specific model. I remember a case where a neighbor was about to junk a two-year-old machine because of a ‘fatal’ error code. We found the manual, performed the one-minute move to reset your control board, and it’s been running perfectly for three years since. 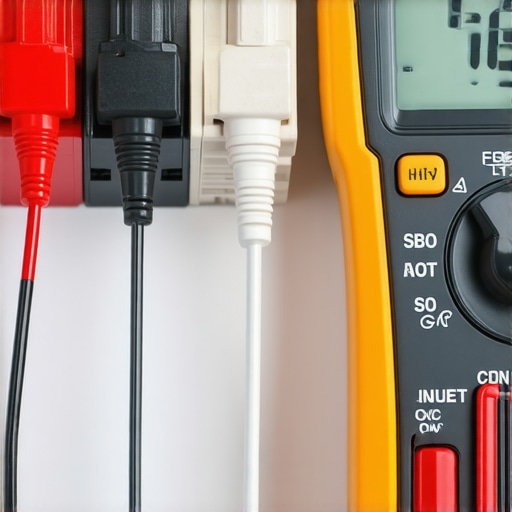
How do I maintain my dishwasher seal over time?
Consistency is your only defense against rubber rot. I’ve made it a habit to wipe down the entire perimeter of the tub with a microfiber cloth once a month. No chemicals—just warm water. You have to realize the real cost of skipping your monthly descaling cycle isn’t just about the heating element; it’s about the calcium buildup that creates abrasive ‘teeth’ on your gasket. According to technical documentation from RepairClinic, over 30% of premature seal failures are caused by mineral deposits cutting into the rubber during the door’s opening and closing cycle. If you live in a hard water area, this isn’t optional.
Where Appliance Repair is Heading Next
We are entering the era of predictive maintenance. In the next five years, I expect dishwasher gaskets to come embedded with moisture-sensitive resistive strips that alert your phone the second a micro-leak starts. Until that tech hits our kitchens, though, your best bet is to stay vigilant and trust your diagnostics. Don’t wait for the puddle. Go grab a business card and a flashlight right now, check your seal corners, and if you find even a hint of moisture, take five minutes to reseat it properly. It’s the easiest way to avoid when to trust a warranty for dishwasher repairs and keep your hardwood floors exactly where they belong: dry and under your feet.
What I Learned While Mopping My Kitchen Floor at Midnight
Fixing a dishwasher gasket isn’t just about the rubber; it’s about shifting your mindset from being a passive owner to an active maintainer. My biggest lightbulb moment happened when I realized that a $30 seal is the only thing standing between my beautiful kitchen and thousands in water damage. I learned that force is almost never the answer in appliance repair; if you have to shove something, you’re likely doing it wrong. Proper seating requires a gentle touch and a clean channel. Most importantly, I realized that finding a slow leak hiding under your kickplate early is far better than reacting to a flood once it reaches your carpet. Patience pays off more than any expensive power tool ever could.
The Only Gear You Actually Need to Stop a Leak
You don’t need a massive toolbox to handle most door seal issues, but there are three things I never repair without. First, a digital multimeter is essential; knowing the exact multimeter reading for a healthy thermal fuse helps you diagnose if your leak-related issues are causing electrical shorts. Second, I swear by a simple telescoping inspection mirror. It allows you to see the underside of the tub and the back corners of the gasket track where debris likes to hide. Finally, always look for the documentation. If you can find a service manual hidden inside the unit, you’ll have a roadmap that most people never even know exists. These tools turn guesswork into a scientific process.
Take Back Control of Your Kitchen Maintenance
There is a unique sense of pride that comes from closing your dishwasher door and hearing that perfect, airtight “thump” after a successful repair. You don’t have to live in fear of the next cycle or wonder how to salvage your hardwood floors after a dishwasher flood. By taking the time to clean the tracks, warm the rubber, and seat it starting from the center, you are extending the life of your machine by years. If you hit a wall and the leak persists despite a perfect seal, it might be time to check the signs your dishwasher needs professional diagnostics. But for most of us, this simple gasket fix is the first step toward total appliance independence. Have you ever successfully stopped a major leak with a minor adjustment like this? Let me know in the comments below!