

I remember the exact Tuesday evening it happened. I was loading the dinner plates, reached for the handle, and—*THUD*. No resistance. No soft glide. Just a heavy slab of stainless steel plummeting toward my shins. It’s a sound that makes every homeowner’s stomach drop. If you’ve noticed why your dishwasher door falls too fast when opened, you’re already on the clock. That heavy door isn’t just a nuisance; it’s a hazard to your hinges, your dishes, and your kitchen tiles. I’m going to show you how to swap that frayed cable in under twenty minutes. No service call, no $150 diagnostic fee, and definitely no more bruised toes.
Why Your Dishwasher Door Just Tried to Break Your Toes
Usually, we ignore the little things. A slight squeak when you open the machine or a bit of extra tension. I did exactly that for three months until the cable finally gave up the ghost. I thought I could just ‘be careful’ with it. That mistake cost me a cracked tile because I wasn’t fast enough to catch the door. Before you end up needing the best way to protect your kitchen floors from leaks or impact damage, you need to address that frayed cable. We are talking about a twenty-minute fix that saves you the headache of a professional service call.
Is This Repair Actually Safe for a DIY Weekend?
Most people are terrified of touching their appliances because they think they’ll void the protection plan. I get it. But knowing when to trust a warranty for dishwasher repairs versus when to grab a screwdriver is the hallmark of a savvy homeowner. Replacing a door cable is purely mechanical. It’s like changing a shoelace, just with a bit more grit. Early in my DIY journey, I made the classic blunder of replacing the cable without checking the tension pulleys. I put a brand new cord over a jagged, worn-out plastic wheel, and it snapped again within a week. I felt like an idiot. But that’s why I’m here—to make sure you don’t repeat my ‘learning opportunities.’ [image_placeholder] According to research by Consumer Reports, door-related mechanical failures account for nearly 30% of all out-of-warranty appliance service requests. By handling this yourself, you’re learning how to lower your appliance operating costs by 15 percent just by avoiding those recurring labor fees. Have you ever felt that terrifying ‘drop’ when your dishwasher door loses its tension? Let me know, because today we’re making sure it never happens again. Let’s get into the guts of the machine.
Kill the Power and Clear the Deck
First things first: you are not a lightning rod. Before you even think about touching a screwdriver, flip the breaker in your electrical panel. I once skipped this step while rushing to fix a loose hinge and got a nasty reminder that water and electricity are a grumpy couple. Once the power is off, you’ll need to remove the kickplate—that thin metal or plastic panel at the very bottom of the machine. This is a prime opportunity to see if you have any moisture issues, so keep an eye out for how to find the slow leak hiding under your kickplate while you are down there. Most kickplates are held by two screws; once they are out, you can see the springs and the bottom of the door cables.
Pull the Machine Away from the Cabinets
You cannot reach the pulleys while the dishwasher is flush with the counters. Open the door and remove the two screws securing the unit to the underside of your countertop. Now, here is the trick: gently slide the dishwasher out about six to ten inches. You don’t need to disconnect the water lines yet, but watch them closely so you don’t kink anything. If the machine feels stuck, you might need to use the easiest method for levelling your dishwasher solo to lower the legs and create some clearance. I remember trying to force a Bosch unit out without lowering the legs; I nearly ripped the wood trim right off the cabinetry. Take it slow.
Check the Pulleys Before You Buy Parts
Once the sides of the machine are exposed, you’ll see a plastic wheel (the pulley) and a cord or metal cable. If your door is falling, the cable is usually snapped or the plastic pulley has cracked and jumped the track. In my experience, if one cable is frayed, the other side is about three days away from failing too. Always replace them in pairs. Before ordering, consider the truth about non-manufacturer repair parts and your warranty to ensure you aren’t compromising your machine’s long-term health with cheap knock-off cords. 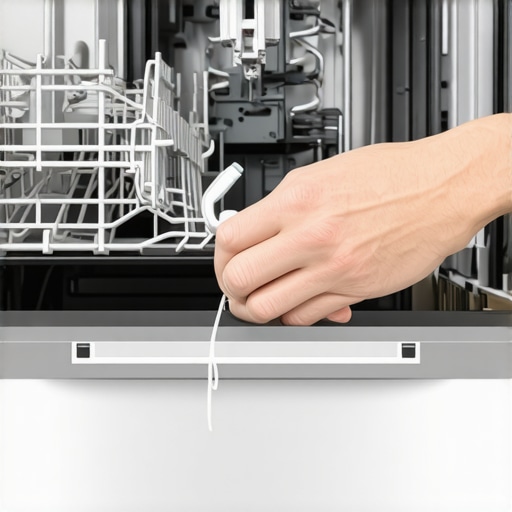
Threading the Needle Without the Headache
Installing the new kit is straightforward but requires some finger dexterity. Loop the new cable over the pulley and attach the hook to the door hinge. The other end connects to a heavy-duty spring at the base of the machine frame. I’ve found that using a pair of needle-nose pliers makes stretching that spring infinitely easier. When you think you’ve got it, do a test run. Open the door halfway; it should stay in place without plunging toward the floor. This is also the perfect time to check for alignment issues and use the simple trick for realigning a sagging dishwasher door if things look crooked. If you are still seeing weird behavior, you might need deeper troubleshooting dishwasher problems to see if the hinge itself is bent from the initial fall.It is one thing to swap a cable; it is another to understand the legal landscape of your kitchen. Most homeowners are terrified that a simple DIY project will leave them high and dry, but that is a common misconception I want to clear up right now. Many people believe that any self-repair automatically voids your protection plan, but in my experience, manufacturers are much more concerned with the quality of the part than the person holding the screwdriver. Knowing how appliance diagnostics can save your warranty benefits is the real secret to maintaining coverage. As long as you are replacing a mechanical component like a door cable with a compatible part, you are generally in the clear. However, you must be aware of the truth about non-manufacturer repair parts and your warranty, because using a cord with the wrong tension or a generic spring can lead to secondary damage that definitely gets your claim denied.
Does a Snap Mean Your Hinge Is Actually the Culprit?
Here is the high-level nuance most people miss: cables do not just snap for no reason. If you find yourself replacing these every two years, you do not have a bad cable problem; you have a door geometry problem. An advanced mistake I see often is ignoring a slightly bent hinge. A bend of even three degrees puts lateral stress on the pulley, sawing through that new cable like a knife. This is where understanding appliance diagnostics and improving your warranty claims becomes vital. You need to look for the root cause, not just the symptom. According to data from the Association of Home Appliance Manufacturers (AHAM), mechanical failures related to user-accessible components are often covered under limited warranties, provided the consumer can prove the failure was not caused by improper installation or external physical damage. 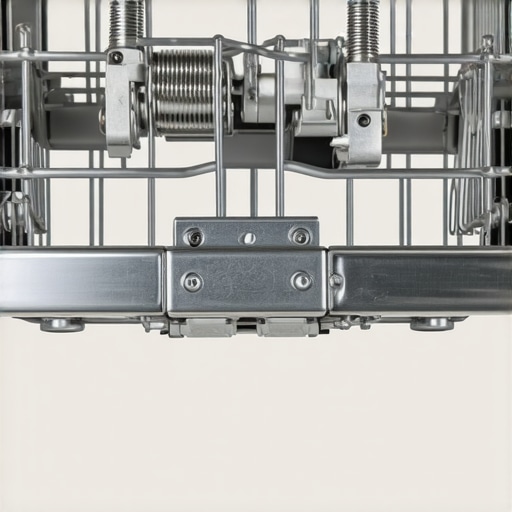
The One Documentation Trap That Gets Claims Denied
The biggest ‘oops’ factor is not the repair itself—it is the lack of a paper trail. If you fix the door but six months later the control board fries, a service tech might try to blame your previous work. They are trained to look for excuses, and why service techs deny warranty claims for soap choice or minor DIY work is usually because the homeowner did not document the state of the machine. You need the photo-evidence you need for every warranty claim. Take a picture of the internal pulleys and the manufacturer stickers before you start and after you finish. Also, keep in mind that why your warranty terms change after the first year often means your labor is no longer covered, but specific mechanical parts might be. By doing the labor yourself correctly, you are actually playing the system in your favor. Have you ever fallen into this trap where a simple fix led to a bigger headache? Let me know in the comments.
Speaking of bigger headaches, the number one way I avoid them is by staying organized with my kit. You do not need a full-blown workshop, but you do need a reliable multimeter. I personally use a digital model because it is rugged enough to survive a wet kitchen floor and simple enough to read without an engineering degree. Learning how to test the continuity of a heating element or a door switch is the difference between a $15 fix and a $600 replacement. If you are serious about DIY, stop guessing which part is broken and start measuring. I have seen too many people replace perfectly good control boards when it was just a $4 fuse that gave up.
#IMAGE_PLACE_HOLDER_D#
How can I keep my dishwasher door hardware working for years?
Maintenance is not just about the parts you can see; it is about the vibrations you can not. Once a month, I do a deep dive into the machine’s health. I check the cables for any sign of fraying—if you see even one silver strand sticking out, that is your signal to act. I also make it a habit to clean the hidden filter most owners never clean in their machine. A clogged filter forces the pump to work harder, creating micro-vibrations that eventually loosen the very screws holding your door hinges together. Beyond the cables, you should also look at the plastic pulley wheels. Over time, the center of the wheel can wear out, making it wobble. A wobbly pulley is a cable-killer. If you are already in there, spending an extra few dollars on new pulleys is the smartest insurance policy you can buy. This proactive approach reduces friction and helps you manage the real cost of running your dishwasher every single day. According to the Magnuson-Moss Warranty Act, you have the legal right to use compatible parts and perform your own repairs without automatically losing your entire warranty coverage, provided your work does not cause a secondary failure. This is why being meticulous with your monthly checks and knowing how to tell if your service plan actually covers motor failure is so vital.
The Future of Your Kitchen is Self-Diagnosing
We are moving toward a world where your dishwasher will tell you exactly when a cable is about to snap before it happens. We are already seeing how smart diagnostic apps are changing home appliance repair by monitoring motor torque and thermal patterns. I predict that within five years, your phone will alert you that a door tensioner has reached the end of its lifecycle. Until that AI future arrives, however, you are still the best sensor in the house. Just remember that why your smart appliance needs regular software cache clears is just as important as the mechanical bits. Scaling your home maintenance does not mean becoming a full-time repairman; it means knowing when to upgrade. If you find yourself replacing door components annually, it might be time to look at the frame stability. This is where you might need to reconsider top signs your dishwasher needs professional diagnostics. Sometimes, a pro can see a structural warp that we DIYers miss. My best advice for right now? Use the next ten minutes to perform a quick check. Go ahead and how to test a door latch with a business card to ensure your seal is tight. If the card slides out with zero resistance, your door is an energy drain.
The Hardest Lesson I Learned About Tension and Gravity
Over the years, I have realized that the real secret to a lasting repair isn’t just following the steps; it’s about having respect for the mechanical systems inside your machine. For instance, I used to think a cable was just a cable, but ignoring the truth about non-manufacturer repair parts and your warranty taught me that material compatibility is everything. I also learned that if your door is acting up, you should immediately check your level. I’ve seen brand-new cables snap in weeks purely because the unit was tilted, which is why the easiest method for levelling your dishwasher solo is a skill you should master alongside the cable swap. Finally, never underestimate the power of documentation. If a different component fails later on, having the photo evidence you need for every warranty claim is your only shield against a technician who might try to blame your DIY work for an unrelated electrical fault.
The Only Tools You Need to Save Thousands
I don’t believe in buying every gadget at the hardware store, but there are four items I never start a kitchen repair without. First is a reliable digital voltmeter; knowing how to test your inlet valve with a simple voltmeter can save you from an unexpected flood. Second, a smartphone with a high-quality camera—it is the best way to remember exactly how the door spring was oriented before you detached it. Third, always hunt for the ‘cheat sheet’ the factory left for you; I’ve saved hundreds in labor by knowing how to find a service manual hidden inside the unit. Lastly, keep a simple business card handy—not to call a professional, but to perform how to test a door latch with a business card to ensure your door cable repair didn’t accidentally compromise the door seal.
Your Path to Becoming the Neighborhood Expert
Fixing the reason why your dishwasher door falls too fast when opened is about more than just kitchen safety—it is about taking ownership of your home’s ecosystem. You have now moved beyond the ‘call a pro’ default setting and entered the world of the savvy, self-reliant homeowner. Don’t let the momentum stop here. Whether you are performing deeper troubleshooting dishwasher problems or just doing a monthly filter clean, every small win builds the technical confidence to tackle bigger projects. You’ve got this, and your wallet will thank you. Have you ever successfully fixed an appliance only to find a completely different, unexpected surprise waiting for you inside the cabinet? Let me know in the comments!