

I was standing there, heart sinking, as my neighbor held a wine glass up to the light. It wasn’t dirty in the way where there is a piece of spinach stuck to the side. It was worse. The glass was covered in a ghostly, milky film that no amount of rubbing with a tea towel could fix. I’d spent three hours on the risotto, but all anyone could talk about was how my glasses looked like they’d been buried in the backyard for a decade. I felt like a failure in my own kitchen. I’d just run a full cycle, but the results were honestly depressing. This wasn’t just a cosmetic annoyance; it felt like my dishwasher was betraying me.
My Dinner Party Disaster and the Lesson it Taught Me
For years, I made the classic mistake of thinking more detergent equaled cleaner dishes. I’d practically fill the dispenser to the brim, thinking I was being thorough. In reality, I was just fueling a chemical buildup that made the cloudiness even worse. I eventually learned that a dishwasher isn’t just a set-it-and-forget-it box; it’s a delicate ecosystem of temperature and chemistry. If you’re seeing that same white film, you might need to look into the natural way to strip hard water buildup from your machine’s interior before it ruins your next set of tumblers. Most of us just assume the machine is dying, but the culprit is often hiding in plain sight—or rather, in your pipes.
Is it actually possible to get that showroom shine back?
You might be worried that your expensive glassware is permanently ruined. I certainly was. But unless the glass is physically etched, which is a permanent scratch-like damage from soft water and high heat, that film is just a layer of stubborn minerals. According to the U.S. Geological Survey, hard water is found in over 85 percent of American homes, and it is the single biggest enemy of your dishwasher’s performance. If you’re tired of hand-polishing every single plate, you need to check if your machine is actually doing its job. Sometimes the problem isn’t the water at all, but a mechanical failure. I’ve seen cases where a beeping control panel was trying to warn the owner about a failing sensor long before the glasses started looking like they came from a dusty attic. Have you ever pulled out a load only to find everything covered in a weird white haze? It’s frustrating, right? Before you go out and buy a whole new appliance, let’s look at the simple things first. Often, the solution is as simple as skipping your monthly descaling cycle, which allows minerals to clog up the very parts meant to clean your dishes. If your machine is older, you might also want to see if your water softener is actually working as intended. [IMAGE_PLACEHOLDER] The real reason your glasses are coming out cloudy isn’t just bad luck. It’s usually a combination of your local water quality and how your machine is handling the load. Let’s dive into how you can diagnose this without calling a repairman just yet.
Clear the Path Before You Blame the Water
The first thing I do when my dishes look like they’ve been through a sandstorm is look at the spray arms. It’s the most basic component, yet the most likely to fail silently. Think of your spray arms like a garden sprinkler; if half the holes are plugged with hard water deposits or tiny seeds, the water pressure drops and the cleaning pattern becomes chaotic. I remember a particularly frustrating week where the bottom rack was consistently filthy while the top was fine. I tore the whole thing apart only to find a single cherry pit jammed inside the spray arm. I used the toothpick method for unclogging spray nozzles, and the change was instant. If you aren’t sure if the water is even reaching your dishes correctly, you can try the paper plate test for spray arm coverage to see where the dead zones are.
Stop the sensor from making bad decisions
Modern dishwashers are ‘smart,’ but they can be easily fooled. The turbidity sensor is the ‘eye’ of your machine, measuring how much dirt is in the water to decide how long the cycle should run. If this sensor is coated in the same white film as your glasses, it thinks the water is clean when it’s actually filthy, causing it to cut the cycle short. You can often fix this without a repairman by learning how to calibrate your dishwasher turbidity sensor with plain water. Cleaning it manually with a soft cloth can save you from a massive headache and ensure the machine actually completes its job. [IMAGE_PLACEHOLDER_B]
Mechanics that keep the film away
If cleaning the arms and sensors doesn’t work, we have to look at the water level. A dishwasher that doesn’t fill enough is like a car trying to drive on empty; it just can’t build the pressure needed to rinse away minerals. This is often caused by a sticky float switch. You can quickly check this using a trick I learned from an old tech: how to test your float switch with a simple magnet. If the switch is stuck in the ‘up’ position, the machine thinks it’s full and won’t let any more water in, leaving your glasses to dry with a soapy, mineral-heavy residue.
Build a paper trail for your warranty
If you find yourself deep in troubleshooting dishwasher problems expert diagnostics repair tips and realize a motor or valve is genuinely failing, don’t just grab your wallet. If your machine is relatively new, understanding appliance diagnostics improving your warranty claims can be the difference between a free fix and a $400 bill. Manufacturers often look for proof that you’ve performed basic maintenance before they honor a claim. Documenting that you’ve checked the intake and cleaned the filters shows you aren’t the cause of the failure. Knowing how appliance diagnostics can save your warranty benefits is essential for any homeowner who wants to protect their investment long-term.Most people swear by the ‘Normal’ or ‘Eco’ cycle for every load, thinking they are being efficient and gentle on the appliance. However, this is a common myth that actually shortens the lifespan of your machine. In my experience, the ‘Heavy’ cycle is often the superior choice for the internal health of the unit. The higher water temperatures are essential for fully dissolving fats and the complex surfactants found in modern detergents. When you stick exclusively to cooler cycles, you allow a fatty sludge to accumulate in the sump and drain lines. You might find that why the heavy cycle is actually better for your machines health isn’t just about clean plates; it’s about preventing the ‘gutters’ of your machine from clogging with grease.
The Pre-Rinse Trap is Ruining Your Glassware
The biggest ‘oops’ factor I see with homeowners is the urge to pre-rinse dishes until they are spotless. While it feels like you’re helping, you are actually sabotaging the wash. Modern dishwashers use turbidity sensors to ‘see’ how dirty the water is. If you load clean dishes, the sensor detects no soil and tells the control board to run a shorter, weaker cycle. This means the detergent doesn’t have enough time or agitation to be properly rinsed away, leading to that milky film on your glasses. According to a study by the Association of Home Appliance Manufacturers (AHAM), modern detergents are engineered to latch onto food particles; without them, the chemicals can actually become slightly corrosive to the glass surface itself.  If you’ve already fallen into this trap, you might need to look at the secret to removing cloudy film from plastic containers and glassware to undo the damage.
Why does my machine still fail even when I follow the manual to the letter?
It usually comes down to the things the manual doesn’t emphasize: water chemistry and firmware. A dishwasher is a computer that handles water, and like any computer, it can glitch. Sometimes, why your appliance firmware update just bricked the control board is a more likely culprit for a sudden failure than a mechanical break. Furthermore, many manuals don’t account for the specific mineral content of your local water, which can vary wildly and render standard dosage instructions useless. If your machine is acting up, knowing top signs your dishwasher needs professional diagnostics can save you from replacing parts that aren’t actually broken.
Protect Your Warranty from Service Tech Denials
When a repairman steps into your kitchen, they aren’t just looking at the broken part; they are looking for reasons to deny your claim. Many homeowners don’t realize that why service techs deny warranty claims for soap choice is a very real threat. If they find evidence of non-HE detergent or excessive sudsing, they can mark the failure as ‘user error.’ This is why understanding appliance diagnostics improving your warranty claims is so vital. You should always keep the photo evidence you need for every warranty claim, showing that you’ve maintained the filters and used the recommended cleaning agents. Have you ever fallen into the pre-rinse trap or had a warranty claim denied for a silly reason? Let me know in the comments below!Once I realized that my dishwasher wasn’t just a magic box but a computer-controlled hydraulic system, I stopped using a ‘guess and check’ approach to repairs. If you really want to keep your machine alive for fifteen years instead of five, you need to transition from being a passive operator to an active diagnostician. I started by investing in a cheap digital multimeter. It’s the single most important tool in my kitchen drawer. I used it last month when my machine wouldn’t heat water, and by knowing the exact multimeter reading for a healthy thermal fuse, I saved myself from buying a $200 control board I didn’t actually need. Technical documentation from experts like Repair Clinic suggests that almost 30% of appliance parts returned by DIYers are actually fully functional, which means people are throwing money away because they don’t know how to test for continuity.
Stop Guessing and Start Measuring with a Multimeter
I personally use a multimeter because it takes the emotion out of the repair. Instead of wondering if the heating element is burnt out, I just pull the bottom panel and check the terminals. If you are comfortable with basic safety, learning how to test the continuity of a heating element can clarify exactly why your dishes are staying wet. I once had a situation where the machine ran for hours but never got warm; I assumed the element was dead, but the meter showed it was fine. The culprit? A loose wire that had rattled off during a particularly heavy load. If I hadn’t tested it, I would have been $80 deep in a part that wouldn’t have fixed the problem. You might also want to learn how to find a service manual hidden inside the unit. Most manufacturers tuck a ‘tech sheet’ behind the kickplate or inside the door panel that gives you the specific resistance values for every motor and sensor in your specific model. 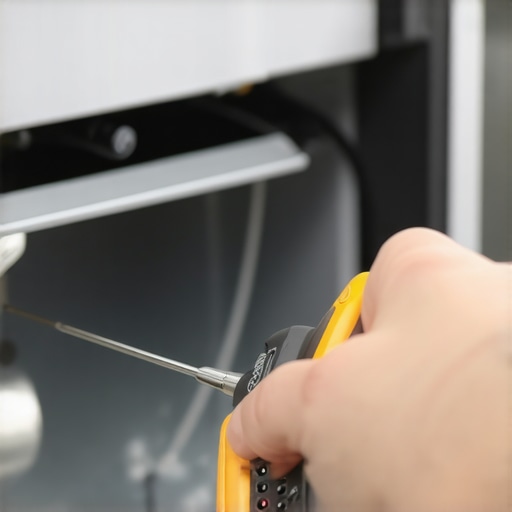
How do I maintain my machine’s efficiency over several years?
Long-term maintenance is less about big repairs and more about the ‘hidden’ chores. We all know about the main filter, but there is often the hidden filter most owners never clean in their machine located near the intake valve. If this gets clogged with sediment from your water lines, the machine takes longer to fill, putting unnecessary strain on the pump. I make it a habit to check the debris trap most owners miss during monthly cleaning, which is usually tucked under the spray arm assembly. By keeping these passages clear, you ensure the motor doesn’t have to work twice as hard to move the same amount of water. I’ve also started using smart features to lower my electric bill, such as delayed starts during off-peak hours. It’s a simple move that keeps more money in my pocket while reducing the load on the local grid.
AI is Coming for Your Broken Appliances
Looking ahead, the days of scratching our heads over a blinking light are almost over. I’m already seeing a massive shift in how we handle home maintenance. We are moving toward a future where how smart diagnostic apps are changing home appliance repair becomes the standard. Soon, your dishwasher won’t just beep; it will send a high-frequency acoustic signature to your phone that an AI will analyze to tell you exactly which bearing in your pump is failing. It sounds like science fiction, but this technology is already being integrated into high-end European models. For now, we still have to do some legwork. If your machine stops mid-cycle, you need to understand why your appliance overheated without tripping a fuse to prevent a potential fire hazard. If you’re feeling stuck, don’t wait for the floor to get wet—take ten minutes this weekend to pull your kickplate and find your tech sheet so you’re ready for the next time those buttons go dark.
The One Habit That Ruined My Glassware More Than Hard Water Ever Could
I used to think that a more expensive pod or filling the detergent reservoir to the brim meant a better clean, but my biggest ‘lightbulb moment’ was realizing that I was actually blinding my machine. Most homeowners don’t realize that excessive detergent creates a chemical feedback loop where the sensors can’t accurately read the soil level. This is exactly why service techs deny warranty claims for soap choice; they can see the white residue left behind by over-sudsing. If your glasses are still cloudy after a deep clean, you might need to calibrate your dishwasher turbidity sensor with plain water to reset its baseline. It’s a simple fix that most people never think to try before calling a pro.
The Three-Piece Toolkit That Replaces a Service Call
If you want to move beyond guessing and start actually fixing, there are three things I never go without. First is a basic digital multimeter. Knowing the exact multimeter reading for a healthy thermal fuse will tell you instantly if your heating circuit is dead or if it’s just a software glitch. Second, I always locate the ‘tech sheet’ tucked inside the frame by following the steps on how to find a service manual hidden inside the unit. This sheet is your secret weapon for decoding those blinking lights. Finally, keep a small magnet in your kitchen drawer; it is the most efficient way to test your float switch without having to drain the tub manually. [IMAGE_PLACEHOLDER_FINAL]
Take Back Control of Your Kitchen Countertop
The days of feeling helpless when your appliance beeps are over. We are entering a new era where how smart diagnostic apps are changing home appliance repair makes it easier than ever to be your own hero. By mastering basic troubleshooting dishwasher problems expert diagnostics repair tips, you aren’t just saving money; you’re ensuring your machine lives its longest possible life. Don’t forget that how appliance diagnostics can save your warranty benefits by providing the proof you need to get repairs covered. You’ve got the tools and the knowledge—now it’s time to get that showroom shine back. Have you ever tried to fix an appliance yourself only to find it was a five-minute solution? Let me know your biggest DIY win in the comments!