

I stood in my kitchen last Tuesday, staring at a plate of lasagna that looked more like a science experiment than a clean dish. My dishwasher was humming, it was spraying, but everything came out covered in a fine, gritty film. I felt defeated. I had already tried the heavy cycle and three different brands of heavy-duty detergent. It wasn’t until I got on my hands and knees and looked past the bottom rack that I found it: the swamp. A tiny, cylindrical mesh trap that looked like it hadn’t been touched since the 90s. This little piece of plastic is the gatekeeper of your appliance’s health, and if you’re like me, you probably didn’t even know it existed. Today, I am going to show you exactly how to find this ‘invisible’ culprit and how a five-minute scrub can save you from a massive repair bill.
Stop Blaming Your Detergent for Greasy Plates
Most of us grew up with dishwashers that had loud, grinding food disposals built right in. You could practically throw a whole steak in there and it would disappear. But modern machines are different. They are designed for efficiency, which means they use filters instead of grinders to catch debris. When that filter gets choked with old coffee grounds and pasta bits, the water just recirculates the same old gunk onto your ‘clean’ glasses. This is exactly why your low water dishwasher requires special rinsing habits that you might be ignoring. Early in my DIY journey, I made the classic mistake of thinking more soap solved everything. I kept tossing in extra pods, thinking the chemistry would eventually win. I was wrong. In fact, why your service tech secretly hates pod detergents often boils down to how they interact with a clogged system, creating a sudsy mess that never actually drains.
Is cleaning this filter actually worth the effort?
You might be thinking that a little bit of old food can’t hurt, but the stakes are higher than just some spots on your wine glasses. According to research by NSF International, the dishwasher filter is consistently ranked among the top five germiest places in a modern kitchen, often harboring yeast and mold that thrive in warm, damp environments. Neglecting it doesn’t just ruin your dinner party; it puts a massive strain on the motor. I learned the hard way that a neglected debris trap most owners miss during monthly cleaning can lead to a burnt-out pump. If you start hearing a high-pitched whine, you might already be dealing with the specific noise that means your circulation pump is dying. Have you ever pulled out that bottom rack and been genuinely terrified of what you found underneath? Leave a comment and let me know—I honestly thought I was the only one with a ‘swamp’ in my kitchen!
Save Your Machine Before the Warranty Expires
If you are still under a service plan, ignoring this basic maintenance could actually cost you money. Many people don’t realize that why service techs deny warranty claims for soap choice or lack of maintenance is a very real thing. They look for signs of neglect the moment they pop the door open. By staying on top of this one hidden filter, you ensure that how appliance diagnostics can save your warranty benefits remains an option for you rather than a reason for a technician to walk away. It’s about taking control of your kitchen’s hardest-working machine before it decides to quit on you during a holiday weekend.
Get Under the Bottom Rack First
To start, pull the bottom rack entirely out of the machine and set it on the counter. You cannot do a halfway job here; you need full access to the floor of the tub. Once the rack is gone, look at the very bottom, usually directly under the spray arm. You will see a circular plastic assembly. This is the debris trap most owners miss during monthly cleaning, and it is the only thing standing between your dishes and a recycling loop of old lasagna water. If you see standing water here, don’t panic yet. This is usually how to fix a dishwasher that wont drain in five minutes—by simply clearing the physical blockage that is choking the flow. 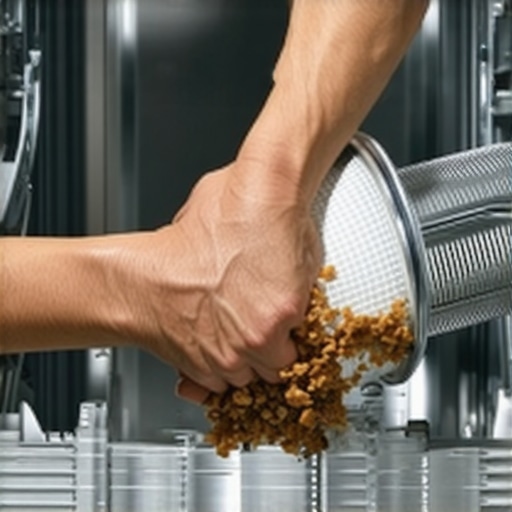
Twist and Lift the Debris Trap
Most modern filters use a simple ‘twist-to-lock’ mechanism. Look for arrows on the plastic housing. Usually, a quarter-turn counter-clockwise will release the primary cylindrical filter. When I did this for the first time, I expected a little bit of lint. Instead, I pulled out a grey, slimy cylinder that smelled like a wet basement. This assembly usually consists of two parts: the fine mesh cylinder and a flat large-mesh screen. Pull them both out. If you find hard objects like cherry pits or bits of broken glass, you have likely just saved your motor from a catastrophic failure. I once found a single unpopped popcorn kernel that had wedged itself so perfectly it was making a clicking sound that I thought was a dying motor.
Scrub the Mesh Without Tearing It
Take the filter to your sink. Do not just rinse it; you need to break down the fatty oils that build up from detergent and food waste. Use warm, soapy water and a soft-bristled brush—an old toothbrush is perfect for this. Be gentle with the mesh. If you rip the screen, you’ll need to buy a replacement immediately, as those holes will let debris straight into the pump. While the filter is soaking, take a moment to look into the hole where the filter sat. If you see thick, white sludge, you should be learning the best way to degrease a clogged pump impeller to prevent a total drainage failure.
Poke Those Clogged Spray Nozzles
While you are down there, take a look at the spray arms. These are the ‘engines’ of the cleaning process. If the tiny holes are plugged with calcium or seeds, the water pressure drops and your plates stay dirty. You can often clear these without removing the arms by using the toothpick method for unclogging spray nozzles. It is tedious, but seeing the water actually reach the top rack again is incredibly satisfying.
Check the Float Switch for Smooth Movement
Before you put the filter back, find the small plastic ‘mushroom’ or tower nearby. This is your float switch. It tells the machine when to stop filling. If it is gummed up with soap scum, it might get stuck in the ‘up’ position, telling the machine it is full when it is actually empty. You can easily verify its health by learning how to test your float switch with a simple magnet or just a manual wiggle to ensure it clicks freely. If the machine still acts up after all this cleaning, it might be time to learn how to get professional grade diagnostic codes from your interface to see if a sensor has finally given up the ghost.Everyone tells you to use the ‘Eco’ mode to save a few pennies on your electric bill, but in my experience, running only light cycles is a recipe for a dead machine. It sounds counterintuitive, but why the heavy cycle is actually better for your machines health often comes down to internal temperature. Modern detergents and enzymes need heat to fully activate and dissolve animal fats. If you only ever run cool cycles, that fat eventually solidifies inside your drain lines, leading to a sluggish performance that no amount of vinegar can fix.
Why does my modern machine take three hours for a simple wash?
If you have upgraded recently, you might be frustrated by the marathon runtimes. This isn’t a defect; it is a design choice forced by energy regulations. Because machines are restricted on how much water they can use, they compensate by splashing that small amount of water for a much longer period. This is exactly why modern dishwashers take three hours to run a cycle, and interrupting it early can actually leave your dishes less sanitary than you think. According to a study by the Association of Home Appliance Manufacturers (AHAM), modern sensors, specifically turbidity sensors, are constantly measuring how dirty the water is. If your sensor is coated in a thin layer of lime scale, it might ‘think’ the water is clean when it’s still filthy. This is where how to recalibrate your turbosity sensor manually becomes an essential skill for the advanced DIYer.
Don’t Fall for the Maintenance Cycle Trap
A common ‘oops’ factor I see is owners trusting those store-bought cleaning tabs to do the dirty work. While they help with smells, they rarely reach the deep crevices of the pump impeller. I’ve seen countless people waste money on cleaners when they really needed to learn the best way to degrease a clogged pump impeller by hand. Relying on chemicals alone is a trap that leads to a false sense of security. 
Master the interface before calling a tech
Before you reach for the phone, you need to understand that your machine is likely smarter than you realize. Most modern units have a ‘service mode’ that provides a roadmap to the problem. Learning how to get professional grade diagnostic codes from your interface can tell you if a part is actually broken or if you just have a temporary clog. This is vital because understanding appliance diagnostics improving your warranty claims is the difference between a free repair and a $300 bill. Manufacturers often look for any excuse to deny a claim, and why service techs deny warranty claims for soap choice or lack of documented maintenance is a very real hurdle. Have you ever fallen into the trap of thinking a long cycle meant your machine was broken? Let me know in the comments—I’d love to hear your ‘long-wash’ horror stories! Always remember to keep these three receipts to ensure a smooth repair claim if you do end up needing professional help. Staying ahead of the machine’s logic is the only way to win the appliance game.
Get the Right Tools Before You Open the Panel
If you are serious about skipping the $200 service call, you need more than just a screwdriver. I personally swear by a digital multimeter. It’s the only way to stop guessing and start knowing. As noted in the Whirlpool Technical Service Manual (W10591522), a reading of near-zero ohms across the thermal fuse is the only way to confirm a closed circuit; anything higher indicates a failure. When I first started, I was terrified of electrical components, but learning the exact multimeter reading for a healthy thermal fuse gave me the confidence to fix my own machine rather than blindly replacing parts. I also recommend a cheap borescope camera that connects to your phone; it’s perfect for finding how to find the slow leak hiding under your kickplate without having to pull the entire unit out and risk scratching your floors. 
Stop Hard Water Before It Stops Your Pump
Every six months, I do a deep descale. If you live in an area with hard water, that white crust isn’t just ugly—it’s a sandpaper-like abrasive that eats through your pump seals. You might think you’re saving money by skipping the cleaner, but the real cost of skipping your monthly descaling cycle is a shortened lifespan for your heating element. While you are at it, check your racks for any exposed metal. I use a specific nylon touch-up paint the moment I see a nick because why your appliance warranty wont cover cosmetic scratches or rust is a standard clause that can lead to expensive rack replacements later.
How do I maintain my dishwasher efficiency as it ages?
The secret to a ten-year lifespan is power quality. Modern control boards are essentially small computers, and they hate the ‘dirty’ power that comes with summer brownouts or thunderstorms. I took the extra step of how to wire a surge protector directly into your kitchen island specifically for my dishwasher. It sounds like overkill until you realize a single spike can fry a $300 board. I predict that in the next five years, we will see AI-driven sensors that notify your phone the second a pump’s amperage fluctuates, but until then, we have to be the sensors. If you do run into a major issue, remember that the photo evidence you need for every warranty claim is your best weapon. Even if you are past your first year, you should know how to get a manufacturer to pay for an out of warranty repair by documenting consistent maintenance. Try this today: grab a multimeter and test your heating element for continuity; it’s the ultimate ‘pro’ move that takes ten minutes and gives you total peace of mind.
The Hard Lessons That Saved My Kitchen Sink Budget
Looking back at my journey from a flooded kitchen to a DIY pro, I’ve realized that most ‘broken’ machines are simply misunderstood. The biggest lightbulb moment for me was discovering that the fine print about normal wear and tear on appliances often covers the very clogs we ignore. I also learned that proactive care is the only way to navigate why your warranty terms change after the first year, often leaving you responsible for the most common mechanical failures. My third big takeaway? Never underestimate a simple reset; sometimes the control board just needs a ‘nap’ to clear a sensor error.
Gear I Use to Outsmart the Repairman
You do not need a workshop full of tools to keep your kitchen running. I swear by a digital multimeter because learning how to test the continuity of a heating element is the fastest way to stop guessing and start fixing. I also recommend keeping a simple borescope camera and a dedicated soft-bristled brush in your utility drawer. These tools allow you to see and clean what the average owner ignores, helping you decide when to trust a warranty for dishwasher repairs and when to just handle it yourself for the cost of a cup of coffee.
You Are More Capable Than the Warranty Fine Print
That first time I pulled the kickplate off my dishwasher, I felt like I was defusing a bomb. But here is the truth: these machines are designed to be serviced. Once you master the basic diagnostics, you stop being a victim of planned obsolescence. You have the power to extend the life of your dishwasher by years just by paying attention to the small sounds and smells before they turn into major leaks. Don’t let a technical manual intimidate you; you are the boss of your appliances, not the other way around. Did you find a ‘swamp’ in your filter during your first cleaning, or was it surprisingly clean? Let me know your dishwasher horror stories in the comments below!