

I was standing in my kitchen on a Tuesday evening when I felt it: that cold, squishy sensation of water soaking into my favorite wool socks. My dishwasher was running, but instead of cleaning my plates, it was slowly flooding my floor. I’d just installed it myself the weekend before, and I thought I’d done a great job. I was wrong. I had ignored the most basic law of physics—gravity—and now my machine was leaning forward like a tired marathon runner. I spent the next three hours trying to lift the heavy unit while blindly reaching for the back feet, nearly throwing my back out in the process. It was a classic expert mistake. I thought I knew better, but I ended up with a scratched floor and a machine that rattled like a bag of marbles. Today, I’m going to show you that you don’t need to go through that physical therapy-inducing nightmare. You can level your dishwasher perfectly, all by yourself, with just a few simple tools and a bit of neighborly wisdom.
Stop the Lean and Save Your Hardwood Floors
Levelling your appliance isn’t just about making sure the door lines up with your cabinetry for the sake of aesthetics; it is a critical functional requirement. When your machine is off-balance, you often end up wondering why your dishwasher is leaking from the bottom corners. I’ve seen so many homeowners jump straight to top signs your dishwasher needs professional diagnostics when the real culprit is just a quarter-inch tilt. If the unit isn’t level, water doesn’t pool correctly in the sump, the door gasket doesn’t seal under pressure, and you might even find that your trick for fitting oversized pots doesn’t work because the rack keeps sliding out on its own. According to Consumer Reports, improper installation is a primary factor in early appliance failure and unnecessary service calls. This is a big deal because understanding appliance diagnostics can be the difference between a free fix and a denied warranty claim; if a tech sees the machine wasn’t installed level, they might blame you for the leak.
Can one person really do this without help?
I know what you’re thinking because I thought the same thing: there is no way I can lift this 80-pound box and adjust the feet at the same time. You’re imagining a scene of you pinned against the cabinets while your level rolls under the fridge. But here is the secret I missed during my first disastrous attempt: most modern machines are designed for solo installation. There is usually a specific bolt at the front that controls the height of the rear foot via a long rod. Once I discovered the simple trick to leveling a dishwasher on an uneven floor, the whole process went from a three-hour struggle to a ten-minute adjustment. Have you ever found a mysterious puddle and immediately assumed the worst for your kitchen budget? Don’t call the pro just yet; let’s see if we can get this thing balanced first.
Grab Your Level and Clear the Counter
Before you start cranking on those little metal feet, you need to know exactly what you’re looking at. My buddy Mike once tried to level his unit by just shoving cardboard shims under the front until the door stopped swinging open on its own. Two weeks later, he was texting me frantically asking what to do when your kitchen floor is suddenly damp and you can’t find the leak. Shims are a temporary band-aid that will eventually rot or shift. The real fix involves a spirit level and a 5/16-inch nut driver or a simple flat-head screwdriver. Start by placing the level across the top of the dishwasher frame inside the door. If that bubble isn’t perfectly centered between the lines, your machine is going to fight you every single cycle, and your spray arms might not even hit the right spots.
Fix the Side-to-Side Wobble First
Adjusting the front legs is the most intuitive part of the process. These are usually threaded bolts with a hex head or a wide slot for a screwdriver. If the right side of the unit is sitting low, you need to unscrew the leg (turn it counter-clockwise) to raise that corner. You want the top of the machine to be snug against the underside of your countertop, but not so tight that it bows the metal frame. I once over-tightened a front leg on a high-end unit and couldn’t figure out why the door was sticking until I realized I’d twisted the entire chassis. Keeping a perfectly balanced frame is how you avoid needing the trick to tightening loose dishwasher hinges later on, because an unlevel machine puts constant, uneven torque on the door springs and cables every time you open it.
The Secret Center Screw for That Back Leg
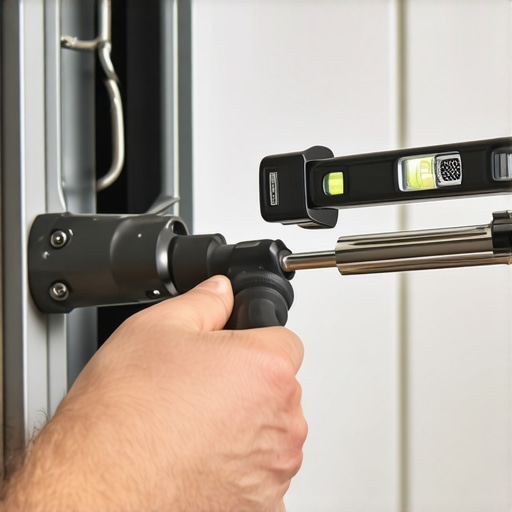
This is where most homeowners give up and reach for the phone to call a repairman, but you don’t have to pull the whole 80-pound machine out to reach the back. Most modern units have a single screw located right in the middle of the bottom front kickplate, often hidden behind a small plastic cover. Turning this screw operates a long internal rod or cable that raises and lowers the rear foot from the front. When I was first learning the simple trick to leveling a dishwasher on an uneven floor, I sat on my kitchen tiles for twenty minutes just staring at that screw, terrified I was going to snap a plastic gear. But as I turned it slowly, the back of the machine rose like it was on a hydraulic lift. It was a “lightbulb” moment that saved my back and my sanity. If you find the back is too high, simply reverse the turn until the machine sits flush.
Why Your Front-to-Back Angle Is a Floor Killer
Once your side-to-side balance is perfect, turn your level 90 degrees and check the front-to-back tilt. This is the most dangerous axis for your flooring. If the machine leans forward even a fraction of an inch, water will pool against the door seal during the high-pressure wash cycles and eventually find a way out. This is a classic, hidden reason for why your dishwasher is leaking from the bottom corners. On the flip side, if it leans too far back, the pump might struggle to clear all the dirty water out of the basin, leading to smells and residue. You want a very slight backward tilt—just enough to nudge the bubble toward the back line—to ensure gravity helps the water stay in the tub where it belongs. To be safe, I always recommend the simple paper towel test for checking leak locations after your first test run. Lay a single sheet under the kickplate and run a cycle; if it comes back dry, you’ve officially mastered the art of the level.
The Hidden Geometry That Ruins Your Wash Performance
Most people assume that as long as the water stays inside the machine, the job is done. But here is the contrarian truth: a dishwasher can be perfectly level according to your bubble, but if the chassis is torqued—meaning the front is square but the back is twisted by the cabinetry—you’re still headed for trouble. I’ve seen countless DIYers focus so much on the feet that they neglect the mounting screws. If you pull those top brackets too tight against an uneven countertop, you warp the tub. This causes the spray arms to hit the same spot repeatedly, leading to shadowing where your plates on the far left stay dirty no matter how much soap you use. You might think you need to learn how to identify a faulty control board without a technician because the cycle isn’t cleaning right, when in reality, your machine is just physically stressed.
Can a twisted frame mimic a major mechanical failure?
Absolutely. When the frame is out of alignment, the door latch might not click into place with enough force to engage the sensor. This is a classic trap that leads to homeowners understanding appliance diagnostics the hard way. You call for service, the tech arrives, levels the machine in five minutes, and hands you a $150 bill because installation issues aren’t covered by the manufacturer. The Association of Home Appliance Manufacturers (AHAM) has frequently highlighted that structural stress from improper installation—even if it seems minor—is a leading cause of premature motor wear and door seal degradation. This is why why your warranty provider might deny a no-failure-found claim; if the failure is just your floor being slanted and your leveling being lazy, you’re on the hook for the cost.

Is your warranty provider looking for an excuse to say no?
I always tell my neighbors to keep the photo evidence you need for every warranty claim, including a shot of your level sitting on the machine during the initial install. Warranty companies look for any sign of owner negligence to avoid a payout. If a technician notes that the unit was vibrating excessively due to an uneven base, they might classify the resulting leak as the fine print about normal wear and tear on appliances rather than a factory defect. Before you assume you need top signs your dishwasher needs professional diagnostics, double-check that your kickplate isn’t pinching the insulation or the water line, as this can also throw off the sit of the machine over time. Have you ever fallen into this trap where a simple adjustment felt like a major repair? Let me know in the comments. It’s better to spend an extra ten minutes with a wrench now than to be when to trust a warranty for dishwasher repairs only to find out you’ve voided the protection by skipping the basics.
Once you’ve nailed the leveling, you’re not out of the woods. I used to think ‘set it and forget it’ applied to kitchen appliances, but after replacing a fried control board on a three-year-old unit, I realized I was being naive. For the serious homeowner, I highly recommend picking up a basic digital multimeter. I personally use a Klein Tools MM400 because it’s rugged and handles the high-moisture kitchen environment better than the flimsy five-dollar versions. Knowing how to test your inlet valve with a simple voltmeter can save you an entire afternoon of guessing and prevent you from buying parts you don’t actually need. If you aren’t seeing 120 volts when the machine should be filling, you know the board isn’t sending the signal. It’s that level of precision that separates a mere ‘parts changer’ from someone who actually knows how to perform expert diagnostics.
How do I keep my dishwasher running like new for a decade?
Consistency is your best friend here. Every month, I take five minutes to learn how to clean the tiny holes in your spray arms using a simple toothpick or a thin piece of wire. It sounds trivial, but even a tiny piece of popcorn hull can throw off the spray pattern and leave a gross film on your glasses. Also, don’t skip the right way to de-scale your machine without chemicals; hard water is a silent killer for heating elements. According to technical documentation from major manufacturers like Bosch, over 40% of circulation pump failures are actually caused by calcium buildup that could have been prevented with a simple descaling cycle. This is especially vital because why service techs deny warranty claims for soap choice or lack of maintenance is a very real threat to your wallet. If a tech pulls out a pump clogged with lime, they’ll likely charge you full price for the visit.

Looking ahead, I predict we are moving toward ‘self-healing’ appliances where internal sensors will recalibrate the leveling feet or adjust pump speeds automatically to compensate for structural wear. We’re already seeing the start of this with smart sensors that detect turbidity, but the next step is mechanical self-adjustment. Until that future arrives, you need to be the brain of the operation. Check the exact multimeter reading for a healthy thermal fuse if your machine suddenly goes dark and won’t respond. If you’re feeling adventurous today, try pulling the kickplate one more time and check for any white, salt-like residue around the pump—that’s your early warning sign for a slow leak. Go grab your phone right now, set a recurring calendar alert for ‘Dishwasher Deep Clean,’ and actually follow through. Your future self, and your kitchen floor, will thank you for the extra effort.
The Hard Truth About Skipping the Spirit Level
One thing I’ve learned through years of tinkering is that your dishwasher doesn’t just sit on the floor; it lives in a delicate ecosystem of plumbing and electricity. If the geometry is off, everything else suffers. I once spent a week trying to figure out how to find the slow leak hiding under your kickplate, only to realize that the machine was leaning just enough to let water bypass the front gasket. It’s a humbling lesson, but getting it right means you avoid the stress of understanding appliance diagnostics under the pressure of a flooded basement.
Another lightbulb moment for me was realizing that stability equals longevity. When a machine vibrates because it isn’t properly supported, it’s not just noisy—it’s actively shaking its internal components apart. This simple alignment is actually the simple move that doubles the life of your dishwasher racks and door hinges because the weight is distributed exactly how the engineers intended. Don’t wait until you see a puddle; treat your leveling like the foundation of a house.
The Survival Kit for Your Kitchen Floor
You don’t need a truck full of gear, but there are a few items that make appliance repair much easier for the DIYer. First, get a magnetic torpedo level; it sticks to the frame so you have both hands free to adjust the feet. Second, keep a digital multimeter like the Klein MM400 handy. It’s the only way to know for sure if a component is dead or just not getting power. Finally, I always suggest you keep these three receipts to ensure a smooth repair claim: the original purchase, the installation kit, and any professional maintenance records. Having these organized saves more money than any tool in your box.
Stop Worrying and Start Washing
Taking the time to level your unit is the first step toward true home autonomy. When you know how your machine is supposed to sit, you can tell the difference between a minor adjustment and when to trust a warranty for dishwasher repairs. You’ve got the knowledge, the tools, and the wisdom to keep your kitchen dry and your dishes sparkling. Mastering diagnostics, warranty, and dishwasher maintenance isn’t just about saving money; it’s about the peace of mind that comes from knowing your home is in good hands—yours. Have you ever discovered your dishwasher was tilted only after a major leak occurred? Let me know your story in the comments below!