

I still vividly remember the sinking feeling in my stomach when my dishwasher started acting up right before a dinner party. Water wasn’t draining, and I was sure I’d be calling a pricey repair technician or—worse—a new unit. It was in that panic that I realized I’d overlooked a simple, cost-effective way to diagnose the problem myself. That lightbulb moment led me to discover a humble, budget-friendly tool that can save you hundreds—testing your heating element with just ten bucks and a bit of know-how.
Why Trust a Ten Dollar Tool for a Critical Appliance Diagnostic?
When appliances malfunction, most folks jump straight to expensive repairs or replacement. But often, the root cause is surprisingly simple and accessible to diagnose—like a faulty heating element in your dishwasher or washing machine. I’ve learned firsthand that with just a multimeter and a few minutes, you can identify problems early, saving you money and preventing future headaches. Early diagnosis can even protect your warranty benefits, which, as I found out, can be voided by neglecting proper troubleshooting—something I mistakenly did early on, thinking I needed a professional for everything.
Is Testing Heating Elements Really Worth the Hype?
Honestly, resolving to test and troubleshoot on your own initially sounds intimidating. I was skeptical—I mean, how much can a ten-dollar multimeter really tell you? Turns out, quite a lot. But a common mistake I made was assuming that if my appliance wasn’t working perfectly, it was always a complex issue. In reality, many problems boil down to simple electrical faults, like a blown fuse or a broken heating element. Recognizing these can make all the difference. Want to learn how to do this yourself? I’ll walk you through the steps so you won’t have to rely solely on costly professional diagnostics.
If you’ve faced unexpected appliance failures and wondered whether DIY troubleshooting is worth the risk, you’re not alone. Many homeowners jump straight to costly repairs without keeping in mind that some issues are simple to fix. Plus, understanding diagnostics can help reinforce your warranty benefits—something I wish I’d known from the start. For further insights, check out how appliance diagnostics can save your warranty.
Up next, I’ll show you exactly how to test your heating elements with just a multimeter and a few basic steps. Trust me, it’s easier than you think—and it might be the most empowering DIY move you make today.
Locate and Prepare Your Heating Element
First, unplug your dishwasher and open the access panel to find the heating element—usually a metal coil at the bottom of the tub. Use a flashlight (see how) to spot it clearly. Remember, safety comes first—disconnect power and wear gloves if necessary. I once started testing without unplugging; a short zap reminded me why caution is vital.
Disconnect Power and Remove the Element
Carefully detach the wires connected to the heating element terminals, noting their positions. Then, unscrew the element from its mounting brackets. Keep track of these screws—you’ll need them during reinstallation. When I did this for my own dishwasher, I made a quick sketch to remember wire placement. Label the wires if necessary to prevent mix-ups.
Test the Resistance with a Multimeter
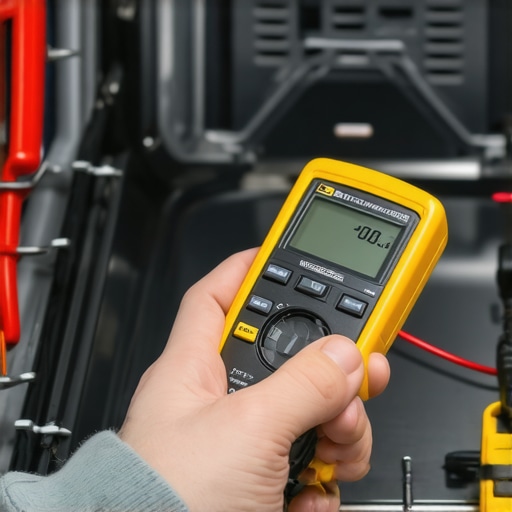
Set your multimeter to the lowest resistance setting (Ω). Touch the multimeter probes to the element’s terminals. A healthy heating element typically shows a low resistance—usually between 10-20 ohms. If the reading is infinite or shows no continuity (check fuse continuity), the element is broken and needs replacement. I once tested mine and it read open circuit, confirming my worst suspicion. Replacing it fixed my dishwasher’s heating problem instantly.
Perform the Move to Verify the Break
If the reading indicates a break, gently wiggle the element to check for micro-cracks or corrosion that might cause intermittent failure. Sometimes, I noticed corrosion around the terminals—a sign that replacement is due. Remember, a faulty heat element impacts both cleaning efficiency and warranty status—more on that here.
Reinstall and Test
Once you’ve confirmed the condition, reattach the wires securely, screw the element back into place, and restore power. Run a short cycle to see if the dishwasher heats correctly. If it still doesn’t warm or if the resistance test was clear but issues persist, consider other components like thermostats or sensors. Diagnostic modes can help pinpoint remaining faults—see how to force a diagnostic test.
Document Your Findings
Keep notes of the resistance readings and steps taken. This documentation can be useful if you need to claim warranty benefits or consult a professional. Remember, early diagnosis and proper troubleshooting not only save money but also protect warranty coverage—learn more here.
< >Many homeowners operate under the misconception that warranty policies cover all repair costs and unforeseen damages. However, this belief often leads to costly surprises, as warranties typically exclude pre-existing conditions, improper use, or neglectful maintenance. An advanced understanding reveals that warranties are designed with specific clauses that consumers rarely scrutinize, making it essential to carefully review the fine print before relying solely on warranty claims.
One prevalent myth is that professional diagnostics are always necessary to validate warranty claims. In reality, many diagnostic steps can be performed at home with basic tools—like testing heating elements or checking for loose connections—which can prevent unnecessary service calls. Misinterpreting warranty coverage can also result in voided warranties; for example, some manufacturers specify that DIY repairs or unauthorized modifications void the warranty entirely. This nuance underscores the importance of understanding the warranty’s precise language, rather than assuming blanket coverage.
Are Most Appliance Warranties Actually Worth It or Just a Costly Gamble?
This question isn’t just about the initial expense but also about the real value retained when a major fault occurs. Many warranty policies come with long waiting periods, deductibles, and exclusions that diminish their practicality. A study by Consumer Reports emphasizes that, on average, consumers only benefit from warranties in about 15-20% of appliance repair incidents, making their cost-effectiveness questionable if not carefully managed. Recognizing the fine details—for instance, the necessity of professional diagnostics—can make a significant difference in preserving your warranty benefits. To ensure you’re getting the most out of your coverage, consider implementing proactive diagnostics, such as regularly assessing components like thermostats and sensors, which can often be tested DIY with minimal investment. For comprehensive guidance on safeguarding your warranty rights, visit this detailed guide on diagnostics and warranties.
Understanding these nuances helps avoid the common pitfall of thinking warranties are a catch-all safety net. Instead, approach them as tools that require informed usage—knowing their limitations and how to supplement them with basic DIY diagnostics can save you hundreds in the long run. Have you ever fallen into this trap? Let me know in the comments.
Maintaining your dishwasher over the years isn’t just about quick fixes; it involves a systematic approach with the right tools and methods to ensure longevity and performance. Having invested in diagnostic tools like a digital multimeter—a device I personally rely on for its precision and reliability—has transformed my maintenance routine. Unlike basic models, my multimeter offers auto-ranging capabilities, making tests faster and more accurate, especially when checking components like thermostats or heating elements. This trusted guide emphasizes the importance of choosing quality diagnostic equipment for appliance health.
Beyond hardware, software or diagnostic modes integrated into newer dishwashers are game changers. For example, know how to access and interpret error codes using manufacturer-specific diagnostic modes; this can help you identify issues before they escalate. I recommend spending time familiarizing yourself with these modes—many models have a secret combination of button presses, detailed in this guide. Regularly performing diagnostic checks every year, especially if your appliance is under warranty, can preserve coverage and avoid voiding the warranty through neglect or improper DIY fixes.
Consistency in cleaning critical parts like the filter, spray arms, and drain trap significantly impacts performance. I schedule biannual inspections and use specialty tools such as a small brush and a flexible pick-set—these help reach embedded debris without damaging delicate components. Maintaining water pressure and temperature via simple tests ensures the appliance operates within optimal parameters, preventing problems like scale buildup or sensor errors. Analyzing resistance readings from heating elements periodically using a multimeter helps catch potential failures early, protecting your investment.
How do I keep my appliance performing well over time?
Adopting a proactive maintenance routine reduces unexpected breakdowns and keeps your warranty intact. It’s crucial to stay informed about the specific requirements for your dishwasher model—the manufacturer’s manual provides essential guidance on recommended cleaning intervals, part replacement schedules, and calibration procedures. Leveraging advanced tools like thermal cameras or water pressure testers can further enhance your diagnostic accuracy. For instance, using a flashlight and mirror to inspect hidden leaks is a simple yet effective technique that can prevent costly water damage.
As technology progresses, I predict that integrated IoT diagnostics will become standard, alerting homeowners about issues via smartphone apps before problems manifest. Until then, mastering these hands-on maintenance tools remains invaluable. I encourage you to start by testing your heating element resistance at home—it’s a straightforward step that can save money and extend the life of your dishwasher. Remember, consistent, informed maintenance is the key to reliable long-term operation and preserving your warranty benefits. Want to dive deeper? Reach out through our contact page and let’s discuss tailored maintenance strategies for your appliance.
Three Surprising Truths I Discovered About Warranty, Dishwasher, Appliance Repair, Diagnostics
- Patchwork Fixes Can Mask the Real Issue: I learned that temporary repairs often overlook underlying problems like a faulty heating element, which, if left unchecked, can lead to costly breakdowns down the line.
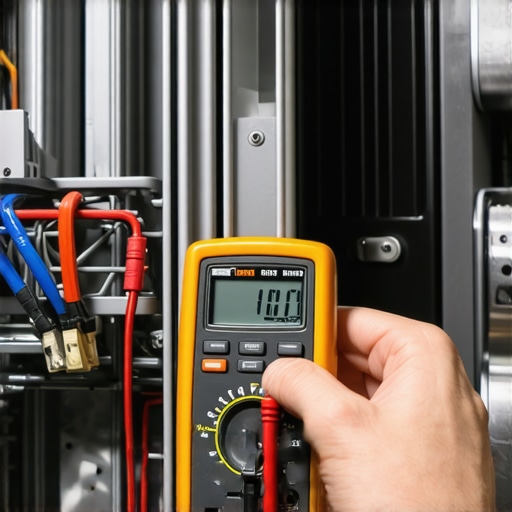
- Reading Resistance Is a Game Changer: Using a multimeter to check resistance taught me that small electrical faults are often the root cause of performance issues, and these diagnostics are surprisingly accessible even for beginners.
- DIY Troubleshooting Protects Your Warranty: Knowing how to test components at home means I can document and verify issues before calling in professionals, ensuring my warranty remains valid and my repairs are justified.
Tools That Transformed My Maintenance Routine
- Reliable Multimeters: I trust brands like Fluke and Klein because they offer durability and precision, making resistance testing straightforward and trustworthy.
- Manufacturer Diagnostic Codes: Access to specific error codes from the dishwasher manual or online resources helps me quickly identify issues without guesswork.
- Inspection Cameras: Small, affordable inspection cameras allow me to see inside tight spaces, revealing hidden leaks or corrosion that simple tests might miss.
- Water Pressure and Temperature Testers: These tools help me verify that my appliance receives optimal water flow and heat, preventing problems before they escalate.
Step Into Your Power—Start Small, Dream Big
Taking control of your dishwasher diagnostics might seem daunting at first, but with the right tools and mindset, you can become your own maintenance hero. Early troubleshooting not only saves money but also builds confidence in your ability to care for your appliances effectively. Remember, a little knowledge combined with simple tools can unlock a world where you’re never at the mercy of costly repairs. Want to explore more DIY tips or share your own experiences? Reach out to us—let’s keep your appliances running smoothly and your warranty benefits intact!
**