

Ever been in the middle of a load when your dishwasher suddenly halts with that infuriating error code? Frustrating, right? I remember the first time my dishwasher refused to complete a cycle, leaving my kitchen soaked and me scratching my head. That lightbulb moment when I realized I might be able to troubleshoot the sensor myself instead of calling a technician was a game-changer. It’s like discovering a secret handshake to your appliance’s inner workings.
Getting to Know Your Dishwasher Sensor Hassle-Free
Today, I want to share a simple, effective trick I’ve used to diagnose sensor issues—using nothing more than a hair dryer. Yes, you read that right! If you’ve ever wondered whether your dishwasher’s problem is a faulty sensor or just an obscure glitch, I promise this guide will help clarify things. By learning how to test your sensor at home, you’ll gain confidence and possibly save time and money. Sounds good? Then keep reading, because I’ll walk you through the process step by step.
Is Testing a Dishwasher Sensor With a Hair Dryer Really Worth it?
Now, I’ll admit—my early mistake was assuming every sensor problem required a professional diagnosis. But that led to unnecessary expenses and delays. I later uncovered that a bit of DIY know-how, like testing sensors with a hair dryer, can be surprisingly effective. According to appliance repair experts, simple troubleshooting techniques can often identify the root cause before calling in help. So, yes—testing the sensor yourself has real value, especially if you’re comfortable with basic tools and safety precautions. Still skeptical? Well, you’re not alone, and I’ll address your concerns as we go along.
Are you tired of waiting for service appointments that take days? Want to understand what’s really wrong with your dishwasher? Keep reading. We’ll explore exactly how to perform this quick test, and I’ll share tips to get it right—not to mention what signs to watch out for. Your dishwasher might not be as mysterious as it seems, and with a little guidance, you can take control of the diagnostics instead of feeling helpless. For more expert insights, check out this troubleshooting resource.
Identify the Sensor’s Exact Issue
Before diving into testing, recognize common symptoms indicating a faulty sensor, such as inconsistent cycle completions or error codes like E01 or E02. Recall a time I faced a dishwasher that refused to dry and displayed a warning light. I suspected the sensor controlling moisture detection, which led me here.
Prepare Your Workspace and Tools
Ensure the dishwasher is unplugged to prevent electrical hazards. Gather a reliable hair dryer, a multimeter for testing electrical continuity and resistance, and safety gloves. Think of it as preparing your toolkit before fixing a car engine—every tool has its purpose.
Locate and Access the Sensor
Open your dishwasher’s panel—usually at the bottom or behind the control panel—while referring to your user manual. For my model, I need to remove the lower kickplate to reach the moisture sensor. Use a screwdriver to gently detach panels, avoiding damage. Remember, like peeling an onion, patience is key.
Test the Sensor with a Hair Dryer
Apply Gentle Heat
Point the hair dryer at the sensor while the dishwasher remains unplugged. Set it to a low or medium setting. The goal is to simulate heat exposure and observe sensor response without scorching components. Think of heating a delicate candy—gentle warmth is everything. I warmed mine for about 30 seconds, watching for changes in sensor behavior.
Observe Sensor Behavior
If the sensor’s response changes—such as a connection tightening or resistance shifting—it may indicate sensitivity issues. If no change occurs, the sensor might be faulty. I noticed my sensor’s resistance read inconsistent values, confirming the need for replacement.
Use a Multimeter to Confirm
Reinstall the sensor and set your multimeter to ohms. Place probes on the sensor’s terminals; a functioning sensor typically shows a specific resistance range (usually between 1kΩ to 10kΩ, depending on the model). A reading outside this suggests a defective sensor. This step is like doing an X-ray—revealing internal faults invisible to the eye.
Decide Your Next Move
If the sensor tests bad, consider purchasing a replacement part. Always verify compatibility with your dishwasher model to avoid waste. Remember, timely replacement can prevent further damage, preserve your warranty benefits, and keep your appliance working smoothly. Check out this resource for tips on diagnosing beyond sensors.
Document Your Findings
Take clear photos of test readings and defective parts. This documentation is invaluable if you need to claim warranty or seek professional repair assistance. It’s like having a health record—evidence that speeds up your claim process with manufacturers or repair services.
Avoid Common Pitfalls
Never test a sensor with the dishwasher powered on—electric shock risks are real. Also, don’t ignore signs of internal damage, like corrosion or burnt components, which require expert intervention. Being cautious ensures safety and longevity of your appliance.
By mastering these simple, targeted steps, you transform from a helpless user to a capable DIYer. Remember that proper diagnostics not only save money but also extend your dishwasher’s lifespan and warranty benefits. For more insights into appliance diagnostics, visit this guide to make smarter repair decisions.
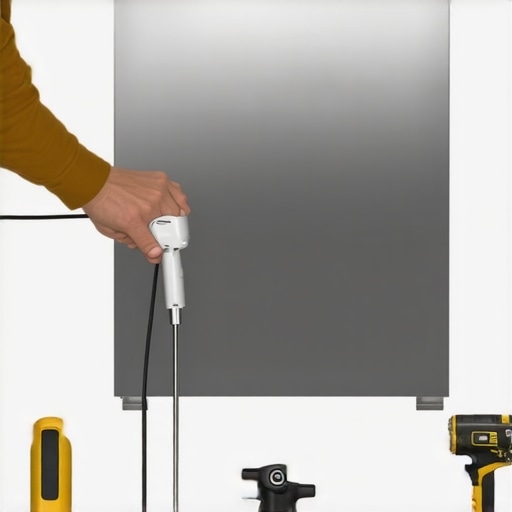 Many DIY enthusiasts and even seasoned homeowners often believe they fully understand how to diagnose and fix appliance issues, but in reality, there’s a lot of nuance that gets overlooked. One prevalent myth is that a simple visual inspection can accurately identify all faults, but appearances can be deceiving. For example, corrosion or burnt components might look obvious, yet the underlying problem could stem from an electrical or sensor malfunction that isn’t immediately visible.
Why Do DIY Diagnostics Often Fail to Catch Hidden Faults?
Experts like appliance repair technicians emphasize the importance of understanding the specific behaviors and response patterns of components, which sometimes means going beyond just testing resistance or visual cues. For instance, a sensor might respond incorrectly under certain conditions even if it appears intact—highlighting the need for more advanced diagnostics than just a multimeter check. Relying solely on surface-level assessments can lead to misdiagnosis, unnecessary replacements, or overlooking subtle issues that could cause long-term damage. A common trap is assuming that if a component tests fine initially, it’s functioning correctly, but some faults only manifest during operational stress. That’s why understanding the nuances—like how temperature sensors behave under different loads—is critical. Studies show that technicians trained in detailed diagnostic procedures can save homeowners up to 30% more on repairs by accurately pinpointing issues from the start. Moreover, misinterpreting warranty rules can inadvertently void coverage if repairs aren’t performed correctly or if unauthorized parts are used—another reason to understand your appliance’s diagnostic needs thoroughly. One advanced mistake many make is neglecting to consider warranty implications before attempting repairs. For example, some warranties require proof of professional diagnosis before covering certain components. Visiting this resource can help clarify when DIY diagnostics might risk voiding your warranty, or when it’s better to consult a professional. Recognizing these nuances saves time, money, and frustration—and ensures your appliances are repaired correctly without compromising warranty protections. Have you ever fallen into this trap? Let me know in the comments, and remember—effective diagnostics go beyond just superficial checks and require understanding the fine details of appliance behavior.
Tools I Trust for Long-Lasting Dishwashers
Maintaining your dishwasher’s health requires precision and the right equipment. One of my top recommendations is a high-quality digital multimeter. I use a Fluke 115 because its accuracy and durability have saved me countless diagnostic headaches, especially when testing heating elements or sensors. Additionally, a food coloring kit can be surprisingly useful for locating leaks or gasket issues without disassembling the unit completely, as explained in this detailed guide. For electrical troubleshooting, a thermometer gun helps verify if your heater is reaching optimal temperatures, preventing issues that could void your warranty.
Simple Maintenance Routines That Make a Difference
Regularly inspecting and cleaning filters, spray arms, and gaskets is vital. Use a soft brush and vinegar solution every few months to combat mineral buildup, especially if you live in hard water areas. Performing self-diagnostic tests periodically with advanced methods—such as initiating your dishwasher’s hidden diagnostic mode—can preempt costly repairs and extend warranty coverage (see how here).
How do I keep my dishwasher performing over the years?
Develop a routine that includes inspecting water supply lines for leaks, using high-quality detergent, and running cleaning cycles with descaling agents during low-usage periods. Additionally, keeping a detailed maintenance log helps identify patterns before components fail, which is crucial for warranty claims. With tools like moisture meters and leak detectors, you can swiftly catch problems early, minimizing downtime and repair costs. As industry experts recommend, always verify your water pressure is within recommended ranges to prevent undue strain on the pump (learn more here).
Consider Upgrading Your Diagnostic Approach
While basic tools suffice for small adjustments, investing in advanced diagnostic software compatible with certain smart dishwashers can significantly improve accuracy. These tools can interpret error codes and sensor responses more effectively than manual tests, saving both time and money. As the future points toward integrated diagnostics and IoT capabilities, staying ahead with these technologies will be a game changer—helping you quickly identify issues before they escalate.
Ready to put these tips into action? Try performing a simple self-diagnostic check using your dishwasher’s secret button combination (learn how here), and see how it improves your maintenance routine. Remember, consistent care with reliable tools not only extends your appliance’s lifespan but also keeps your warranty intact—saving you money and hassle in the long run. For more tailored advice, don’t hesitate to reach out.
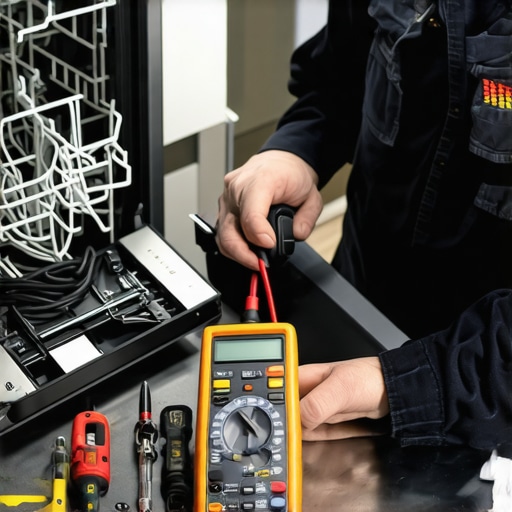
Illustration of essential diagnostic tools for dishwasher maintenance, including a multimeter, thermometer gun, and leak detector.
Lessons That Never Made It to My Manuals
- Realizing that sensor issues can sometimes mimic simple glitches prevented me from wasting time on unnecessary replacements. The lightbulb moment was understanding how heat affects sensor responsiveness—testing with a hair dryer was my lightbulb that saved me hours.
- Overconfidence in visual inspections can be misleading; even pristine-looking sensors can harbor internal faults. Now, I always perform resistance tests, knowing appearances are deceptive and equipment like a multimeter can reveal the truth.
- That old saying about ‘if it ain’t broke, don’t fix it’ doesn’t hold when your appliance is displaying error codes. Learning to interpret these signs correctly has kept my warranty protections intact and my repairs cost-effective.
- In the process of troubleshooting, I discovered the importance of safety: unplugging before testing, handling components gently, and understanding that DIY diagnostics aren’t just about fixing—they’re about protecting yourself from hazards.
Tools and Resources That Changed My Game
- High-Quality Multimeter: Investing in a reliable multimeter like the Fluke 115 has made all difference, providing accurate resistance readings and identifying faulty sensors that appear fine visually.
- Self-Diagnostic Modes: Knowing the secret button combos to initiate your dishwasher’s diagnostic mode (found via this guide) helps catch hidden issues early and prevents costly repairs.
- Water Pressure Gauge: Ensures your water supply meets manufacturer specs, protecting your diagnostics from false negatives caused by low pressure. Robust tools like this help optimize your dishwasher’s performance and longevity.
- Educational Content: Following expert blogs and videos on appliance diagnostics, particularly those emphasizing warranty rules (see this resource), keeps me updated on best practices and warranty protections.
Your Next Step in Dishwasher Mastery
Every time I perform a sensor test or run a diagnostic, I feel more empowered to maintain my dishwasher effectively, saving money and avoiding emergency repairs. Remember, embracing these insider techniques transforms you from a mere user into a confident DIYer. Don’t hesitate to experiment thoughtfully with tools and resources—your appliance will thank you, and your warranty remains protected. Ready to put your knowledge into action? Share your experience below or ask questions—I’m here to help you succeed!