

I’ll never forget the morning I opened my dishwasher, expecting gleaming silverware, only to be greeted by stubborn, greasy utensils that refused to come clean. It was a frustrating moment—one of those lightbulb realizations that something was off, but I didn’t know exactly what. I thought maybe I overloaded the rack or used the wrong detergent, but after some quick troubleshooting, I discovered that the issue was more nuanced.
Uncovering the Hidden Culprit Behind Dirty Silverware
If you’ve ever faced the same disappointment—spent extra minutes hand-washing your silverware or worse, just accepting the grimy appearance—you’re not alone. Many homeowners don’t realize that the problem often lies in overlooked details within their dishwasher’s setup or maintenance. And here’s the truth: solving this isn’t just about running a cycle; it’s about diagnosing the root cause, much like a mechanic troubleshooting a stubborn engine problem.
Is Your Dishwasher Repair Actually Worth It?
Early on, I made the mistake of assuming I needed a costly professional repair or even a replacement unit. Instead, I found that a few simple diagnostics and adjustments made all the difference. Learning to interpret error codes and understanding how to spot issues before they escalate can save you both time and money. For example, understanding the signs of a failing water inlet valve or a clogged spray arm can prevent your silverware from turning out gross after every wash.
Curious whether your dishwasher’s problems are minor or signal a bigger issue? Visit when to trust a warranty for dishwasher repairs for guidance on deciding whether professional diagnostics are the right move for you.
In the next sections, we’ll explore common causes and share expert tips to troubleshoot and fix your dishwasher, so you can finally enjoy spotless silverware without the hassle. Ever faced this problem? Drop a comment below or head over to our contact page if you need personalized advice.
Run a Diagnostic Test to Spot the Issue
My first move was to initiate a diagnostic mode to understand what was wrong with my dishwasher. I pressed the specific button combination (usually holding down the “Cancel” and “Heated Dry” buttons simultaneously) for about 5 seconds, which entered diagnostic mode. This process varies among models, so consult your user manual or visit this guide for detailed steps. Doing this gives you error codes or blinking lights indicating which component might be malfunctioning. When I did this on my unit, it displayed error code E15, pointing to a drainage problem. Recognizing these codes accelerates targeted repairs.
Inspect and Clear the Spray Arms
Clogged spray arms can prevent water from reaching the silverware effectively. I removed the lower and upper spray arms—usually unscrewed by hand or with a simple tool—and checked the nozzles. Using a paperclip or the paperclip trick, I cleared blocked nozzles. A clogged spray arm leaves dishes dirty despite a full cycle. Be sure to also check for debris lodged in the holes, as buildup from hard water minerals can cause stubborn clogs. Regularly cleaning these parts keeps water flowing freely, ensuring spotless results.
Test the Door Gasket for Leaks
A damaged or compressed door gasket can cause leaks and water drainage issues. I used a simple trick—placing a few drops of food coloring around the gasket edge and running a short cycle—to see if colored water escaped during operation. If you notice leaks, inspect the gasket for tears or deformities. Sometimes, a slight misalignment causes sealing problems. Applying the chalk trick can also help identify compression gaps. For minor issues, replacing the gasket is straightforward, and instructional videos make DIY replacement manageable.
Check the Drain Pump and Filter Assembly
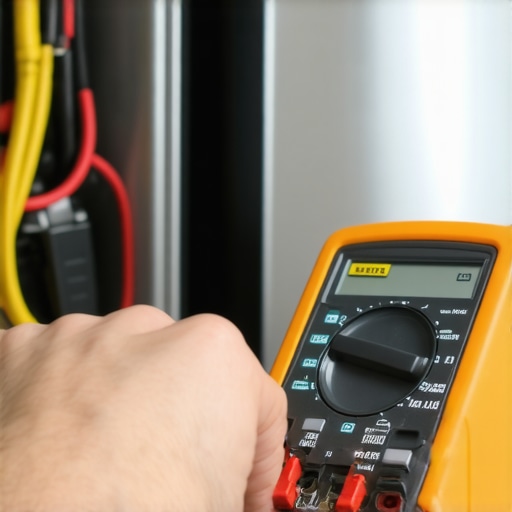
Persistent standing water is often caused by a failing drain pump or clogged filter. I manually accessed the filter—usually at the bottom of the tub—and removed all debris. Using a flexible brush, I cleaned the filter thoroughly. Then, I tested the drain pump motor, which sounded weak or was unresponsive, indicating it might be jammed or burned out. Using a multimeter as shown here helped me confirm a blown fuse or faulty motor. Clearing clogs and ensuring the pump runs smoothly can resolve drainage issues that cause your appliance to malfunction.
Assess Water Inlet and Filling Components
If your dishwasher isn’t filling, the problem could be a clogged inlet valve or a faulty float switch. I turned off the power and disconnected the water supply to verify the inlet valve wasn’t blocked—using a small wire or pin to clear any obstruction. Then, I examined the float switch, which prevents overflow; sometimes debris or mineral buildup causes it to stick. Testing the switch with a multimeter or manually pressing it down to see if the water fills helped diagnose the issue. For more details, visit this article. Fixing or replacing these parts restores correct filling behavior.
Confirm Proper Heating Function
Heating issues prevent dishes from drying properly and can lead to residue buildup. I used a multimeter to test the heating element’s resistance—typically around 10-30 ohms. With the appliance unplugged, I disconnected the heating element and set the meter to resistance mode. If readings are infinite or very high, the element is broken. Additionally, inspecting the thermal fuse (which cuts power if overheating occurs) can prevent safety hazards. Replacing a faulty heating element is as simple as disconnecting and reconnecting newer units, a step explained here. Ensuring the heater functions correctly helps your dishwasher perform optimally.
Evaluate the Control Panel and Switches
If buttons or cycle selection don’t respond, the control board might be at fault. I used the multimeter test on the control switch wiring. Sometimes, a simple reset by unplugging the unit for 10 minutes clears minor glitches; other times, replacing the control board is necessary. Inspecting the wiring connections and ensuring no corrosion or loose contacts exist are vital steps. For complex issues, consulting an expert or visiting this repair resource can streamline the process.
Double-Check Water Drainage Pathways
Finally, confirm that the entire drainage pathway—from the tub to the sewer line—is clear. Use a combination of forced drainage techniques and visual inspections. Any kinked or clogged hoses, or a blocked air gap, can cause water to back up or drain slowly. If necessary, replace the drain hose with a new one, following the guide here. Proper drainage is essential to prevent water from lingering and causing foul odors or damage.
Many homeowners assume that appliance repairs are straightforward and that warranty claims are always worth pursuing. However, the reality is far more nuanced, often leading to costly mistakes and missed opportunities for effective troubleshooting. One common myth is that simply replacing a part will fix the issue; in truth, understanding how to diagnose the root cause can save you time and money. Relying solely on warranty claims without proper diagnostics can result in unnecessary replacements or voided warranties, especially if the problem stems from user error or overlooked maintenance. Experts emphasize that effective diagnostics involve interpreting error codes accurately and inspecting multiple components—sometimes even beyond the obvious—to identify hidden issues. For example, a dishwasher that won’t start might seem like a control board failure, but in many cases, it’s a faulty door switch or a tripped thermal fuse, issues that simple testing can reveal. Overlooking these nuances often leads to the misconception that repairs are complex and best left to professionals, but with proper knowledge, many repairs are manageable DIY tasks. According to appliance repair specialists, understanding the advanced troubleshooting process is crucial for making informed decisions about repairs and warranty claims. Misjudging the severity of a fault can lead to unnecessary expenses or missing out on warranty benefits that could cover genuine repairs. For instance, initiating a diagnostic test effectively can uncover error codes like E15, indicating drainage problems, and guide targeted fixes rather than blind replacements. Furthermore, many believe warranties cover all repairs automatically, but in practice, extensive documentation and correct diagnostic procedures are essential to ensure warranty validity. As highlighted by industry experts, utilizing diagnostic tools—such as multimeters or error code readers—improves your ability to communicate with repair technicians and claim your warranty effectively. Engaging with reputable sources like this guide can elevate your repair confidence. Remember, the key lies in mastering diagnostic processes and understanding common pitfalls—such as misinterpreting error signals or neglecting minor maintenance—that often trip up even experienced homeowners. Don’t fall into the trap of oversimplification; educate yourself on the nuances, and you’ll become a more confident DIYer or informed consumer. Have you ever fallen into this trap? Let me know in the comments.
Tools That Make Maintenance Simpler and More Effective
Maintaining your dishwasher doesn’t have to be guesswork. Having the right tools at hand transforms minor repairs into manageable DIY projects. I personally swear by a high-quality digital multimeter, especially the five-dollar multimeter. It’s compact, affordable, and incredibly precise for testing components like heating elements, switches, and fuses. For instance, when I diagnose a non-heating cycle, I quickly check the resistance of the heating element, ensuring it’s functioning properly or if it needs replacement.
Beyond the multimeter, I keep a set of miniature screwdrivers for opening panels and removing filters. For clogged spray arms, I prefer a paperclip to clear nozzles, which I’ve found more effective than other makeshift tools. Remember, a simple paperclip can be the secret weapon in your toolbox for maintaining optimal water flow.
How do I maintain my dishwasher over the long term?
Routine maintenance is your best defense against costly repairs. I recommend scheduling a regular sump and filter cleaning every few months. Also, inspecting and replacing worn door gaskets using the chalk test keeps leaks at bay, ensuring your appliances run efficiently and safely.
In the next phase, investing in diagnostic tools like error code readers or even smartphone apps that interpret error signals can significantly streamline troubleshooting. As these technologies evolve, they promise faster diagnostics and more precise repairs, reducing downtime and costs. Think of this as future-proofing your appliance care. For example, when an error code like E15 manifests, a quick check with diagnostic software can tell you if it’s a drainage or water inlet issue, pinpointing the problem faster than manual testing alone.
Why not take a step today and test your water inlet valve or clean those spray nozzles with a simple paperclip? These small actions, supported by the right tools, can extend your dishwasher’s lifespan and keep it performing at peak levels for years to come.
The Hardest Lesson I Learned About appliance repair,warranty,dishwasher,diagnostics
One of the most eye-opening moments was realizing that many dishwasher issues aren’t solely about replacing parts—they’re about understanding the interconnected system and diagnosing the real culprit first. Jumping straight to a replacement often means missing the root cause, leading to wasted time and money.
3 Myths About appliance repair,warranty,dishwasher,diagnostics That Held Me Back
- Myth 1: A flashing error code always points to a single, replaceable part. Reality: Error codes can be misleading; they often signal multiple potential issues.
- Myth 2: Warranties cover all repairs automatically. Reality: Proper diagnostics and documentation are crucial to leverage warranties effectively.
- Myth 3: DIY fixes are risky and should be left to pros. Reality: With the right tools and approach, many repairs are accessible and rewarding for homeowners.
What Experts Won’t Tell You About appliance repair,warranty,dishwasher,diagnostics
Professionals often focus on quick fixes, but the true secret lies in mastering diagnostic techniques. Learning to interpret error codes, check voltage outputs, and understand component interactions empowers you to troubleshoot confidently, saving both time and money in the long run. For detailed guidance, explore this resource.
Your New Approach to Dishwasher Troubleshooting
Embracing diagnostic routines and specific toolsets can transform your maintenance mindset. Regularly inspecting spray arms, testing water inlet valves, and understanding error codes—supported by trusted tools like a high-quality multimeter—allows you to tackle problems at their core, rather than just treating symptoms. Remember, learning to read these signals is your best investment for appliance longevity and peace of mind.