

Have you ever loaded your dishwasher, only to find that your dishes aren’t coming out as clean as they used to? Frustrating, isn’t it? I remember the lightbulb moment I had after a particularly disappointing washing cycle when I realized the spray arm nozzles were clogged, limiting water flow and ruining my efforts. It was one of those small frustrations that sneaks up on you—until it doesn’t anymore.
Why Clearing Spray Nozzles Can Save Your Dishwasher—and Your Sanity
Dishwashers rely on those tiny nozzles on the spray arm to distribute water evenly over your dishes. When they get clogged with mineral deposits or debris, the entire cleaning process suffers. I’ve learned that a simple, inexpensive paperclip can come to the rescue, clearing out those stubborn blockages without the need for costly repairs or professional service. This trick isn’t just a quick fix; it’s a game-changer for maintaining your appliance’s performance and extending its lifespan.
Is the Paperclip Trick Really Effective or Just a Myth?
Early on, I was skeptical—probably like you are now. I once tried human hair and toothpicks before discovering the humble paperclip as a perfect, flexible tool to dislodge debris from those tiny orifices. My mistake? Using a wire brush which damaged the nozzle or pushing the debris further inside. Trust me, the paperclip’s small, pointed end does the job without harm. According to appliance repair experts, regular maintenance of spray nozzles can prevent buildup and keep your dishwasher running efficiently — and a paperclip is a handy, accessible way to do it yourself.
Now, are you ready to learn how to do it right? Stay tuned, because in the next section, I’ll walk you through the simple steps to clear your spray arm nozzles and restore your machine to its optimal performance. And if you’re curious about other diagnostic tips or when to call in the pros, I’ve got a few suggestions that might surprise you—like knowing if your warranty covers certain repairs or understanding how diagnostic modes work. You can learn more about the benefits of proper diagnostics here.
Prepare Your Workspace and Equipment
Start by unplugging your dishwasher to ensure safety. Gather a sturdy paperclip, a soft cloth, and some gloves. Place a towel underneath to catch any water drips. I remember the first time I did this; I had to clean up a bit but learned the process quickly.
Access the Spray Arm and Locate Clogged Nozzles
Open the dishwasher door and remove the lower rack to expose the spray arm. Inspect the nozzles on the spray arm for visible debris or mineral buildup. Sometimes, buildup is obvious, but other times you need to feel for blockages with the paperclip. When I did this, I noticed water wasn’t spraying evenly, indicating a blockage.
Remove and Detach the Spray Arm
Carefully unscrew the spray arm from its socket. Usually, it twists or snaps off; check your manual if unsure. Be gentle to avoid damaging the mounting clips. Once removed, place it on a towel to prevent scratches.
Clear the Nozzles with a Paperclip
Use the pointed end of the paperclip to gently poke into each nozzle. Insert the tip into the tiny holes to dislodge mineral deposits or debris. Push softly; do not force or use excessive pressure to prevent damage. I once used a metal pin that was too thick, which bent the nozzle, causing more issues. The key is patience and a gentle touch.
Clean the Nozzles and Spray Arm
Once cleared, rinse the spray arm with warm water to remove loosened debris. Use a soft cloth to wipe away any residual buildup. For stubborn deposits, soak the spray arm in a vinegar solution for 15 minutes, then scrub gently. After cleaning, dry it thoroughly before reinstallation.
Reassemble and Test
Attach the spray arm back into its socket, ensuring it clicks securely. Replace the lower rack, plug in the dishwasher, and run a short cycle with vinegar to flush out any remaining debris. Observe the spray pattern; it should now be even and vigorous. I did this, and my dishes came out spotless afterward, saving me both time and money.
Keep Nozzles Clear Regularly
To prevent future clogs, inspect and clean your spray nozzles every 3-6 months. Using a paperclip is a simple, cost-effective method that can extend your dishwasher’s lifespan and maintain optimal cleaning performance. For more detailed troubleshooting tips, visit this resource.
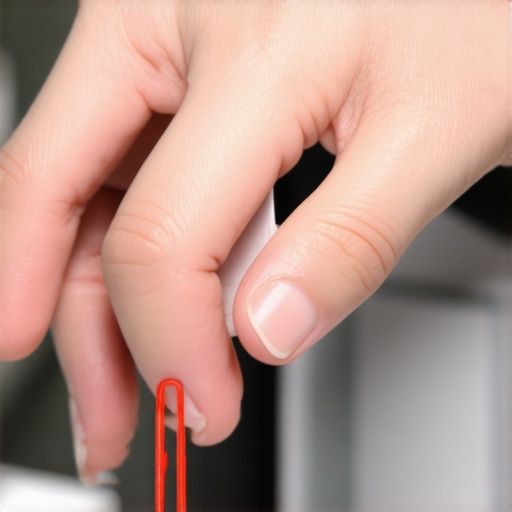
When it comes to maintaining your dishwasher, there’s a common misconception that simple fixes like cleaning spray nozzles resolve all issues. In reality, many homeowners overlook the complexities behind diagnostic processes and warranty limitations, leading to costly mistakes. For instance, relying solely on basic troubleshooting without understanding the underlying diagnostic procedures can result in unnecessary part replacements and voided warranties. Experts emphasize that proper diagnostics is crucial; as detailed in this comprehensive guide, knowing how to properly interpret error codes and diagnostic modes can save both money and time. A common myth is that warranties always cover repairs—however, many plans exclude damage caused by neglect, improper repairs, or accidental damage, which many homeowners fail to realize until it’s too late. Misunderstanding the scope of coverage may lead to paying out-of-pocket for repairs that could have been covered but weren’t properly documented or executed according to warranty terms. Advanced repair scenarios highlight how nuanced these situations can become. For example, some defects, such as subtle control board failures, might not trigger error codes but still cause malfunctions. Diagnosing these requires specialized tools and knowledge, not just superficial inspections. The key is to appreciate the importance of professional diagnostics, as discussed in this expert resource. For the savvy homeowner, understanding these nuances helps prevent falling into common traps—like replacing entire assemblies prematurely or assuming warranty denial is always justified. Always review your warranty policies carefully; many exclude certain damages, especially those attributed to mineral buildup or user-inflicted issues. So, next time your dishwasher acts up, consider whether you might be missing the broader picture of diagnostics and coverage limits. Being informed can be the difference between a costly repair and a simple, effective fix. Have you ever fallen into this trap? Let me know in the comments.
Keeping Your Dishwasher Running Smoothly for Years to Come
To ensure your dishwasher remains reliable, investing in the right tools and adopting effective maintenance routines are essential. From simple cleaning aids to diagnostic software, the right equipment can make all the difference in prolonging your appliance’s lifespan and saving money on repairs. I’ve personally found that maintaining a well-stocked toolkit tailored to dishwasher repairs streamlines troubleshooting and reduces downtime, allowing you to handle minor issues before they escalate.
Why a Digital Multimeter Is a Must-Have for Diagnostics
In my experience, a high-quality digital multimeter is indispensable. It helps verify electrical components like heating elements, door switches, and control boards quickly and accurately. I prefer a multimeter with auto-ranging capabilities, such as the Klein Tools MM6000, because it simplifies testing without fussing over ranges. Regularly checking voltage and continuity prevents guesswork and ensures your repairs are based on solid data instead of trial and error. Experts note that using a multimeter correctly can reveal hidden issues that often go unnoticed, saving you from unnecessary replacements (more here).
Tools That Make Cleaning and Maintenance Easier
Beyond diagnostic gear, I recommend maintaining a set of specialized cleaning tools. A flexible, long-reach brush helps dislodge debris from spray nozzles and filters. For stubborn mineral buildup, a dedicated vinegar sprayer allows for quick, targeted cleaning without dismantling the entire machine. An internal flashlight is also invaluable — it illuminates hidden corners, revealing buildup or corrosion that needs attention. Keeping these tools in your maintenance arsenal empowers you to perform regular checkups, preventing minor issues from snowballing into costly repairs.
Future Outlook: Smarter Tools and Predictive Maintenance
The trend toward smart diagnostics is expected to accelerate, integrating sensors and IoT devices that alert homeowners to problems before they affect performance. Already, some models come with Wi-Fi connectivity, allowing remote monitoring and diagnostics through smartphone apps. As this technology becomes more accessible, DIY enthusiasts will benefit from predictive maintenance tools that notify you of clogged filters, impending control board failures, or leaks via notifications. Staying ahead of potential breakdowns will become easier, reducing service calls and extending your appliance’s service life.
How do I maintain my dishwasher over time?
Consistent cleaning, periodic inspections with the right tools, and understanding diagnostic reports are key. Regularly check and clear spray nozzles, filters, and seals, and run diagnostic or calibration cycles using manufacturer-provided tools or apps. For professional insights, I recommend reviewing this guide to troubleshoot effectively. Implementing these steps now can save you from costly repairs later and ensure your dishwasher stays in top shape for years to come.
Crucially, try using a multimeter to verify the integrity of your control components during routine maintenance. It’s an advanced tip that can uncover issues early. For example, testing the thermal fuse or heating element can prevent a wash cycle from failing unexpectedly. Don’t wait until your dishwasher stops working — equip yourself with the right tools and habits to keep it running seamlessly.
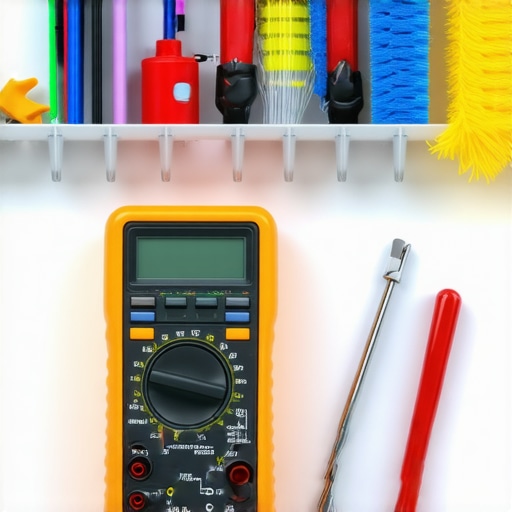
Investing in quality diagnostic and cleaning tools is a wise choice for any homeowner serious about appliance longevity. Regular maintenance, paired with these tools, not only boosts performance but also minimizes the need for professional repairs. As smart diagnostics evolve, staying informed and prepared today will pay off in long-term savings and peace of mind.
My journey with dishwasher maintenance taught me some invaluable lessons that go beyond quick fixes. One of the hardest lessons was realizing that neglecting routine nozzle inspections can silently sabotage your appliance’s lifespan. I once ignored minor clogs, thinking they weren’t worth the trouble, only to face costly repairs down the line. The biggest lightbulb moment? Embracing proactive diagnostics and understanding your warranty’s true scope can save you countless headaches and dollars.
Secrets That Changed My Approach to Appliance Care
- Ignoring small issues costs more in the long run. Regular nozzle cleaning prevents mineral buildup that can lead to complete spray arm failure. Knowing when to escalate issues to professionals, as detailed in this resource, saved me money and frustration.
- Warranty limitations are more nuanced than I thought. Proper diagnostics and documentation matter. I learned to interpret error codes better and understood that neglecting the fine print could void my coverage—see this guide for insights.
- Investing in the right tools empowers DIY repairs. A multimeter isn’t just for electricians. Using one to test components has uncovered hidden issues early. Pairing diagnostics with routine checks keeps my dishwasher humming smoothly, as explained in this article.
Tools That Keep My Dishwasher Running Strong
- Professional-grade multimeter: Essential for accurate electrical tests, like verifying heating elements or control boards.
- Flexible nozzle brushes: Help dislodge stubborn mineral deposits without dismantling parts.
- Vinegar and citric acid kits: Natural solutions for mineral buildup, safe and cost-effective.
- Diagnostic apps: Some newer models offer Wi-Fi diagnostics, offering peace of mind and remote troubleshooting.
Embrace Your Power to Maintain a Dish that Performs
Taking control of your dishwasher’s health might seem intimidating at first, but the truth is, you hold more power than you think. Small weekly inspections, regular cleaning, and understanding diagnostic messages can dramatically extend the life of your appliance. Remember, the key is consistency—your future self will thank you for the effort today. Ready to become your dishwasher’s best friend? Start with those nozzle checks, and you’ll soon see a difference in your dishes and your budget.
What’s the biggest challenge you’ve faced when trying to troubleshoot your dishwasher? Share your stories below—I’d love to hear and help you find solutions!
**[Optional internal link:](https://applianceoutletpro.com/blog/operation-and-maintenance-tips-for-dishwashers)**