

It was an all-too-familiar frustration for me: loading the dishwasher, expecting spotless dishes, only to find those stubborn soap pods clinging together, refusing to dissolve completely, and leaving filmy residues behind. That lightbulb moment hit when I realized my efforts to save time with single-dose pods were actually sabotaging my cleaning performance. Have you ever faced this sneaky issue?
Unlocking the Mystery of Dissolving Soap Pods
Many of us rely on dishwasher pods for convenience, but when they don’t dissolve properly, it can lead to food residues, soap buildup, and even damage to your appliance over time. Today, we’ll explore why this happens and how you can troubleshoot the problem effectively. Believe it or not, a common mistake early on in my troubleshooting led me down the right path—so don’t worry, there’s a way to resolve this.
Is the Dissolution Process Overhyped?
You might be skeptical about whether dissolving issues are actually worth your concern. After all, isn’t it just a matter of a soap pod not melting? Well, it can be more complex—factors like water temperature, cycle selection, and dishwasher design play critical roles. I used to think that simply switching to a different brand would solve everything, but that wasn’t the case. Proper diagnosis is key, and understanding the root causes is what transforms frustration into solutions. For a deeper dive into troubleshooting and diagnostics, check out [expert diagnostics and repair tips](https://applianceoutletpro.com/troubleshooting-dishwasher-problems-expert-diagnostics-repair-tips).
Check Water Temperature Before Running a Cycle
Start by verifying your dishwasher heats water to at least 120°F (49°C). Use a kitchen thermometer or a infrared device to measure temperature at the outlet. If the water isn’t hot enough, soap won’t dissolve properly, leaving residues and inefficient cleaning. To correct this, adjust your water heater thermostat or run hot water in the sink before starting the cycle. I learned this the hard way when a simple thermostat adjustment improved my dishwashing results immediately.
Inspect and Clean the Spray Arms
Clogged spray jets can restrict water flow, reducing temperature and pressure, which hampers soap dissolution. Remove spray arms and clear debris using a toothpick or a small wire. Soaking them in vinegar helps dissolve mineral deposits. Regular cleaning prevents buildup and maintains optimal spray patterns. During my troubleshooting, I found that mineral deposits had formed, and cleaning the spray arms instantly improved water circulation.
Evaluate the Detergent Dispenser and Door Seal
Malfunctioning door latches or clogged detergent compartments cause pods to stay put without dissolving. Test the dispenser by manually releasing the latch and observe if the door closes firmly. Use a flashlight to peek inside and check for residue or mineral buildup. Applying a small amount of food coloring to the detergent slot can reveal if water is reaching it during cycles. If water isn’t entering, inspect or replace the door gasket and latch mechanism. I once discovered a worn gasket that prevented water from entering the detergent compartment, leading to persistence of soap pods.
Test Water Flow and Pressure with Diagnostic Tools
Monitor water pressure and flow using a multimeter or process of elimination. If the water pressure is below 20 psi, it could hinder proper dissolution. Connect a pressure gauge or use a high-loop drain hose to prevent backflow and ensure steady flow. To gauge heater function, a laser thermometer can be employed to verify adequate heating during cycle. In one case, I used a multimeter to check the inlet valve solenoid and confirmed it was functioning correctly, emphasizing the importance of diagnostics in troubleshooting.
Use Food Coloring for Door Leak Detection
Insert a few drops of food coloring into the detergent compartment and run a short cycle. If colored water appears around the door or gasket, you may have a leak preventing water from reaching the pod properly. Seal leaks with a new gasket or sealant as needed. Fixing a leak improved water delivery and soap dissolution.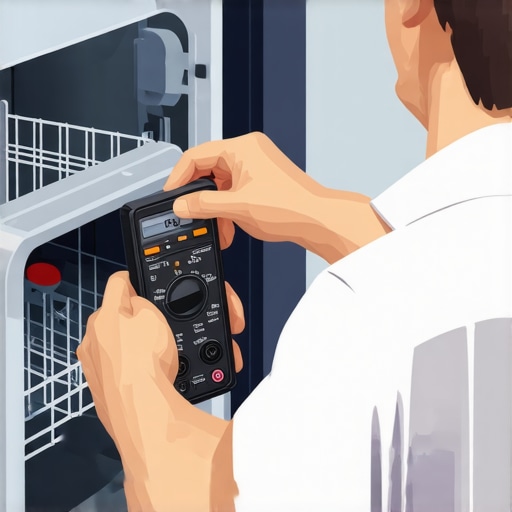
Review Cycle Settings and Trends
Ensure you’re selecting the correct cycle for heavily soiled dishes. Some eco or quick cycles use lower water temperatures and pressure, which may be insufficient for dissolving pods. Consistently use longer, hot water cycles for best results. If your dishwasher takes an unusually long time or completes faster than expected, check for errors or faulty sensors, which might impact water heating and flow. Remember, understanding your dishwasher’s operation can prevent issues before they start.
Many homeowners believe that understanding their dishwasher’s issues is straightforward, but there’s a lot of nuance that’s commonly overlooked. One prevalent myth is that all warranties cover every type of repair; in reality, warranties often exclude damage caused by improper use or DIY repairs. For instance, attempting a repair without proper diagnostics can void your warranty, as discussed in [when to trust a warranty for dishwasher repairs](https://applianceoutletpro.com/when-to-trust-a-warranty-for-dishwasher-repairs).
Are DIY Diagnostics Actually Cost-Effective or Just a False Economy?
Many assume that self-diagnosing issues saves money, but without expert knowledge, you might misidentify the problem, leading to unnecessary parts replacement or further damage. This mistake can be costly and complicated; professional diagnostics ensure the root cause is correctly identified first. Rushing into repairs without proper testing is a common trap. Learn how [expert diagnostics can protect your warranty benefits](https://applianceoutletpro.com/how-appliance-diagnostics-can-save-your-warranty-benefits).
Why Most People Get Dishwasher Troubleshooting Wrong
One often-missed nuance is that symptoms like poor cleaning or leaks are usually caused by multiple factors working together—not just a single faulty part. For example, a clogged spray arm combined with low water temperature can both contribute to poor dishwashing performance. This interconnectedness challenges the myth that replacing one component will fix all problems. Instead, comprehensive diagnostics cover the full system. Be cautious of the trap: replacing parts based solely on visual inspection without testing can waste time and money. Consider consulting with experts or utilizing diagnostic tools to get an accurate reading.
Advanced Troubleshooting: Beyond the Obvious
For seasoned DIYers or professionals, understanding how to interpret diagnostic signals—from subtle noises to error codes—is key. A common mistake is ignoring the significance of minor clues. For example, a slight whine from the pump might indicate cavitation or a worn bearing, which requires specific testing like [using a phone mic to listen for bearing noise](https://applianceoutletpro.com/spotting-motor-bearing-wear-with-your-phone-mic). Such advanced troubleshooting can prevent more extensive damage and save costs. Remember, not every symptom points to the obvious culprit; sometimes, underlying issues are hidden deeper within the system.
What’s the Hidden Nuance That Most Technicians Miss?
One critical aspect often overlooked is water flow dynamics—how pressure, flow rate, and temperature work together to enable proper cleaning and soap dissolution. Small deviations in pressure due to mineral buildup in filters or valves can drastically impact performance. For example, insufficient pressure may prevent soap from dissolving properly, even if the water temperature and spray arms are fine. Understanding these subtle relationships helps in precise diagnostics. To learn more, see [improving warranty claims through diagnostics](https://applianceoutletpro.com/understanding-appliance-diagnostics-improving-your-warranty-claims). Do you recognize any of these pitfalls? Share your experience or questions below—I always love hearing how readers navigate these complex issues.
Investing in the Right Tools for Long-Term Performance
Maintaining your dishwasher’s functionality over time requires precision and the right equipment. I personally rely on a high-quality multimeter to test electrical components like the inlet valve and heating element, ensuring they operate within specifications. A laser infrared thermometer is invaluable for verifying water and tub temperatures; accurate readings help diagnose issues like insufficient heating or scale buildup that can impair performance. For cleaning spray arms, I favor a small brushes and a vinegar soak with a dedicated tool like the specialized drain line clearing tool, which effectively removes mineral deposits without damaging delicate components.
Predicting the Future of Appliance Maintenance
With advancements in smart diagnostics and IoT integration, future appliances will likely provide more comprehensive self-checks, alerting homeowners to issues before failures occur. Continually updating your diagnostic tools and software can help you stay ahead of emerging trends and maintain your appliance proactively.
How do I keep my dishwasher working over time?
Regular inspections and maintenance are key. Using tools like a vinegar soak for spray jets and a multimeter for electrical testing helps identify problems early. Methodical cleaning of spray arms, checking water temperature with an infrared thermometer, and verifying water pressure can prevent most issues. Additionally, documenting repairs and parts replacements with high-quality photos ensures you have accurate records in case of warranty claims or future troubleshooting. For persistent problems, relying on professional diagnostics from reputable technicians can save time and preserve warranty benefits—more details are available at this resource. Remember, proper maintenance combined with the right tools not only extends your dishwasher’s lifespan but also avoids costly breakdowns, making it a worthwhile investment for every homeowner.
What I Wish I Knew About Troubleshooting Early On
One of the biggest lessons I learned was that rushing into part replacements without thorough diagnostics often wastes time and money. Sometimes, the smallest detail—like a tiny mineral deposit blocking a spray jet—can cause major issues, and recognizing these nuances made all the difference. Additionally, understanding that symptoms often stem from multiple interconnected factors changed my approach from guesswork to precision, ensuring I tackled root causes rather than just surface problems.
Another insight was the importance of proper tools. Investing in a good infrared thermometer and multimeter transformed my troubleshooting process, giving me confidence and clarity. Lastly, I discovered that staying patient and methodical, instead of jumping to conclusions, not only protected my warranty but also deepened my understanding of my appliances, turning frustration into mastery.
Gear Up: My Go-To Resources for Dishwasher Mastery
I rely heavily on expert diagnostics tips for step-by-step troubleshooting, which keeps me grounded and informed. A deep dive into appliance diagnostics helps me interpret error codes and subtle clues better, preventing unnecessary repairs. For tools, I recommend a high-quality laser infrared thermometer and a sturdy multimeter; their accuracy simplifies complex diagnostics and extends the life of my dishwasher. Lastly, reading customer testimonials and repair stories on trusted sites provides real-world insights that keep my troubleshooting skills sharp.
Keep Your Appliance Skills Sharp—Your Future Self Will Thank You
Taking charge of your dishwasher maintenance isn’t just about fixing problems—it’s an investment in your peace of mind and warranty protection. Embrace a curious mindset, regularly inspect key components, and use the right diagnostic tools. Remember, every minor detail you notice and learn now builds your confidence for future challenges. Don’t wait for a breakdown to act—stay proactive, keep learning, and enjoy the long-term performance of your appliance. Are you ready to take control of your dishwasher diagnostics today? Share your experiences or questions below—I’d love to hear your story.