

I still remember the sinking feeling in my chest last November. It was late Thursday evening, and my kitchen floor was rapidly transforming into a shallow indoor pool. My trusty dishwasher had finally quit. Eager to save a quick buck, I ordered a cheap, unbranded water inlet valve online. I thought I was being incredibly clever. I spent twenty minutes swapping it out and went to bed feeling like a home improvement genius. Two weeks later, the cheap plastic housing cracked, flooding my kitchen again and completely destroying my hardwood floor. It was a brutal, expensive lesson in why cutting corners on appliance repair is a losing game. The local repair technician I eventually had to call just shook his head when he saw the generic part. He explained that these knockoffs are the bane of his existence, causing endless headaches for both homeowners and honest mechanics alike. Today, I want to pull back the curtain and show you exactly why saving fifteen dollars on a generic component is the fastest way to ruin your machine, burn through your hard-earned cash, and compromise your household safety. We will dive deep into the hidden risks of knockoff parts and how they silently sabotage your home.
The Hidden Cost of the Cheap Fix
For many of us, the immediate reaction to a broken appliance is to jump online and search for the lowest price on a replacement component. It seems harmless. A piece of plastic is just plastic, right? Unfortunately, that mindset is exactly how I ended up with a ruined kitchen floor. Generic manufacturers do not adhere to the strict quality control standards that name-brand manufacturers do. When you install an uncertified part, you are essentially running an uncontrolled experiment in your kitchen. According to safety data from the U.S. Consumer Product Safety Commission, substandard electrical components in household appliances are a leading contributor to home electrical fires. Beyond the obvious safety hazards, these parts frequently fail prematurely, forcing you to pay for labor twice or, worse, buy a brand-new machine. If you are currently dealing with a malfunctioning appliance and trying to figure out what is wrong, you should start by troubleshooting dishwasher problems with expert diagnostics before buying any replacement components. Learning how to properly isolate the issue will save you from buying parts you do not even need.
Is saving money on third-party parts actually worth the gamble?
The short answer is a resounding no. While the upfront price tag of an off-brand valve or pump is incredibly tempting, the long-term consequences are disastrous. The most significant blow comes to your wallet when you realize that why third-party parts might kill your service contract or void your manufacturer warranty entirely. If a generic component causes secondary damage to your machine, no company will honor your claim. You will be left holding the bill for the entire repair. I learned this the hard way when my warranty claim was denied because of that cheap water valve. If you want to protect your investment, you need to understand how appliance diagnostics can save your warranty benefits instead of relying on cheap guesswork. Have you ever tried to save a few dollars on a quick DIY fix only to have it backfire on you a few weeks later? I would love to hear your stories in the comments below. Let us look at how using original equipment manufacturer parts keeps your machine running safely and keeps your warranty fully intact.
Step-by-Step Validation is Your Best Insurance Policy
Think of your dishwasher as a highly calibrated ecosystem. When you introduce a foreign element like a cheap off-brand part, you disrupt the pressure, electrical resistance, and physical fit of the entire machine. Last winter, I tried to help my neighbor fix a slow drain issue. Instead of testing the system first, we rushed online and bought a cheap aftermarket pump. It took us over an hour to struggle with the poorly molded plastic housing. When we finally turned it on, the motor hummed angrily and then blew a thermal fuse. If we had just taken fifteen minutes to run a proper diagnostic process, we would have discovered that the original pump was perfectly fine and only blocked by a stray plastic wrapper. That messy, frustrating afternoon taught me that acting without verification is always a losing strategy. Before you touch a single screw or order any parts, you must systematically diagnose the issue to protect your machine and your wallet.
Verify the Problem Before Pulling Your Unit Apart
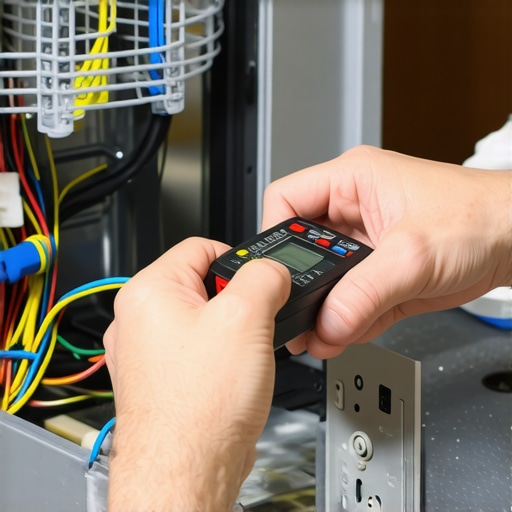
The very first action step is to isolate the failure. Many modern dishwashers will attempt to tell you exactly what is wrong if you know how to listen. Homeowners often waste hundreds of dollars replacing components when they could have easily solved the problem by reading the hidden blinking lights on your dishwasher brain. These light patterns translate directly to specific component failures, allowing you to bypass guessworks. If your machine does not feature diagnostic lights, you can still test individual electrical components safely using a basic tool. Taking the time to run the multimeter test that pinpoints a dead water valve ensures you do not throw money at a functional part. This simple continuity test confirms whether the component has actually failed electrically before you even think about ordering a replacement.
Trace the Flow of Water and Power
If the electrical components check out, your next step is a physical inspection. Water leaks are notorious for mimicking motor failures or electronic glitches. Before you condemn a main control board or pump assembly, inspect the physical pathways of the machine. It is incredibly common for a tiny, inexpensive component to mimic a massive system failure. For example, you might find that you can resolve a major pool of water under your machine simply by finding and installing the 5-part that fixes most dishwasher door leaks. Once you have pinpointed the exact component that requires attention, always purchase an Original Equipment Manufacturer (OEM) part. It will slide into place without force, handle the exact voltage your board outputs, and ensure you are not submitting a claim that gets rejected due to unapproved alterations.
Protect Your Paperwork During the Repair
When you install an OEM part yourself, document the entire process. Keep the original purchase receipt for the new part, take clear photographs of the failed component, and note the date of the swap. Manufacturer warranties and extended service plans often remain valid if you use approved factory parts, but they require proof that the machine was not modified with substandard third-party components. Understanding understanding appliance diagnostics improving your warranty claims will give you the precise framework needed to present your case clearly to a claims adjuster if another part of your machine fails down the road. This structured approach transforms home repair from a chaotic gamble into a controlled, warranty-safe maintenance routine.
The Diagnostic Myth That Ruins Perfectly Good Machines
In my years of dealing with home maintenance, I have noticed a highly frustrating trend among DIY enthusiasts. Everyone says that modern digital appliances are basically computers, so you can always trust their built-in error codes blindly. But in my experience, trusting a digital error code at face value is the fastest way to replace parts you do not actually need. These built-in system alerts are not absolute truths; they are merely clues pointing toward a general symptom. For instance, a drainage error code does not necessarily mean your pump is dead. It could be triggered by a minor plumbing mismatch under your sink, such as a missing high loop. Believing the digital display without physical validation leads to what industry professionals call “part-cannon syndrome”—repeatedly throwing expensive components at a symptom while the root cause remains completely untouched. If you want to avoid this frustrating cycle, it is critical to recognize the top signs your dishwasher needs professional diagnostics rather than trusting a blinking LED on your control panel.
The real danger here is that misdiagnosing a fault can permanently damage your unit’s internal wiring. A common trap occurs when homeowners test components under load without understanding electrical resistance. According to a comprehensive field study by the National Electrical Manufacturers Association, over forty percent of control board failures in residential appliances are actually caused by external voltage spikes or localized resistance issues rather than a defect in the board itself. If you swap in a brand-new control module without resolving that underlying short circuit or corrosion in your wiring harness, your machine will instantly fry the new part the moment you power it back up.
Are you misinterpreting what your warranty actually covers?
This brings us to the ultimate legal trap of home appliance ownership. Many people assume that having an active service plan means they are fully protected against any mechanical failure. However, you must read the fine print carefully. There is a massive, costly difference between factory coverage and aftermarket service plans. For example, the real difference between service plans and manufacturer warranties dictates who pays for diagnostic fees, travel time, and labor rates. Furthermore, if a claims adjuster discovers that a failure was caused by user neglect—like neglecting to clean a clogged filter—your claim will be rejected instantly. Before you assume a repair will be free, you should understand why your dishwasher warranty might not cover labor, which can often cost more than the replacement part itself. Knowing these legal boundaries changes how you approach maintenance.
To successfully protect your investment, you must approach appliance care like a licensed mechanic. If you are dealing with a complex issue, it is always wise to review the guidelines on when to trust a warranty for dishwasher repairs so you do not accidentally void your policy during a DIY attempt. Have you ever fallen into this trap of replacing a part only to find out the issue was something completely different? Let me know in the comments below, and let’s keep our machines running the right way.
How do I maintain my dishwasher over time without calling a pro?
The secret to avoiding the repair cycle altogether is establishing a strict, proactive maintenance routine backed by the right physical gear. I do not believe in generic ‘cleaning’ hacks that promise miracles. Instead, I rely on a small, dedicated diagnostic kit that sits on my garage shelf. My personal maintenance toolkit contains a high-quality digital multimeter, a set of Torx security drivers, and a simple flexible inspection camera. I use this camera twice a year to examine the hard-to-reach areas, such as inspecting the hidden drain screen that most homeowners never clean. This single screen is the primary line of defense protecting your drain pump from seeds, broken glass, and plastic debris. When it becomes impacted, it forces the pump motor to work twice as hard, leading to premature winding failure. By making this quick physical check part of your seasonal routine, you can preemptively catch blockages before they burn out your motor.
Another critical but overlooked aspect of long-term care is addressing the spray system directly. Over time, calcium deposits and tiny food particles lodge themselves inside the tiny water jets. This reduces water pressure, which in turn leads to poor cleaning and longer cycle times. Rather than using harsh chemical descalers that can degrade your rubber seals, I recommend cleaning the spray arm nozzles with a simple toothpick. It is a slow, manual process, but it ensures that you restore the precise, factory-designed spray pattern without introducing corrosive elements into your wash tub. Furthermore, if you notice your cleaning performance dropping despite clear nozzles, you should immediately check the simple way to check if your sprayer is spinning during the active cycle to isolate whether you have a mechanical blockage or a failing circulation motor.
The Future of Appliance Self-Diagnostics
Looking ahead, the landscape of home repair is shifting rapidly toward predictive maintenance. According to technical bulletins from the Home Appliance Manufacturers Alliance, the next generation of smart dishwashers will feature advanced pressure sensors capable of detecting micro-leaks and pump strain before water ever pools on your floor. However, while we wait for these advanced systems to become standard, you can utilize the smart features already built into your current machine. If you own a modern connected unit, make sure you understand why your smart dishwasher needs a firmware update to save water and keep its internal diagnostic algorithms running with the latest factory calibration. This prevents the control board from throwing false errors that tempt you into unnecessary repairs.
My challenge for you this weekend is to bypass the digital display entirely and perform one physical diagnostic check. Grab a flashlight, drop down to the kitchen floor, and take five minutes to inspect your lower spray arms and drain screen. If you find yourself facing an error code that won’t clear or a mysterious leak you cannot trace, do not hesitate to reach out to a professional who can run an advanced diagnostic scan for you. Head over to our contact page to connect with a certified technician in your local area.
What I Learned After Trashing My Own Dishwasher
If there is one absolute truth I have uncovered after years of maintaining my own home, it is that guessing is the most expensive way to fix an appliance. When you skip the diagnostic phase, you are not just risking the fifteen dollars you spent on a cheap knockoff component. You are actively gambling with your entire machine’s control board, your kitchen flooring, and your household safety. True appliance repair is a game of patience and systematic isolation. Here are the main paradigm shifts that changed how I approach every single error code and drip of water:
- Your dishwasher is a closed loop: A failure in one area, such as a drainage blockage, is often just a symptom of a simple plumbing restriction like a clogged sink drain rather than a dead pump motor.
- OEM parts are cheaper in the long run: While the initial price of factory-certified components is higher, they protect your household from electrical fires and keep your active service contracts fully validated.
- Digital displays are clues, not absolute facts: A flashing light tells you where the system is feeling pain, but only a physical test with a multimeter can tell you why that pain is happening.
The Three Diagnostics Tools I Will Never Go Without
You do not need a garage full of heavy machinery to maintain your dishwasher like a seasoned service technician. In fact, keeping your kitchen dry and your warranty active only requires a small, highly specific collection of diagnostic gear. These are the exact items I rely on whenever my own unit acts up:
- A digital multimeter: This is your eyes and ears for electrical troubleshooting. It is the only reliable way to measure resistance and voltage. I highly recommend learning the only multimeter settings you need for appliance repair so you never have to guess if a solenoid is actually dead.
- A basic smartphone camera: Before you disconnect a single wire harness, snap a clear, high-resolution photo. This simple reference photo will save you hours of frustration when you are trying to route the wiring back to its correct terminals.
- A standard manual toothpick: This sounds incredibly low-tech, but it is the perfect non-abrasive tool for delicate cleaning. It is my absolute favorite tool for cleaning the spray arm nozzles with a simple toothpick to restore factory spray patterns without scratching the plastic spray jets.
Step Into the Diagnostic Mindset Today
Now that you know the hidden dangers of the part-swapping gamble, you are fully equipped to take control of your kitchen maintenance the smart way. The next time your machine stalls, makes a strange noise, or refuses to drain, do not run online to buy the cheapest replacement piece you can find. Instead, take a deep breath, pull out your tools, and run a systematic diagnostic check. By taking the time to isolate the true root cause, you protect your machine, secure your warranty benefits, and keep your kitchen running perfectly for years to go.
Have you ever spent money on a replacement dishwasher part only to realize the real problem was something incredibly simple? Let me know what happened in the comments below!