

I recall the moment vividly—my dishwasher started flooding the kitchen floor during a mid-week rush. Pans piled high, laundry forgotten, and now this chaos. It was my first real tease of how a small fix could make a huge difference. That night, I discovered the secret to avoiding this nightmare: a simple high loop in the drain hose. If your dishwasher’s drainage isn’t working right or water is pooling, you might be missing this crucial step.
Why a High Loop Is Critical for Your Dishwasher’s Drainage
Proper drainage isn’t just about a snaking hose; it’s about how you set it up. A high loop ensures that water can’t backflow into the dishwasher, preventing nasty clogs, foul odors, and potential flooding. This is rooted in physics—gravity works against us here. By creating a loop higher than the sink drain, you effectively block the reverse flow of water, much like a trap in plumbing, but more adaptable. I made the mistake early on of ignoring this, thinking that a straightforward installation would suffice. Spoiler—it’s not. And trust me, the difference is night and day once you get it right. For a detailed understanding, check out this article on [the importance of appliance diagnostics](https://applianceoutletpro.com/how-appliance-diagnostics-can-save-your-warranty-benefits), which emphasizes correct setup to protect your warranty and avoid costly repairs.
Is a High Loop Really Necessary or Just a Plumbing Fad?
My skepticism was real at first. But then I learned that many dishwasher problems—bad smells, drain failures, and leaks—are often caused by improper hose positioning. Early on, I also forgot to make the high loop, which resulted in water not draining properly. That mistake cost me days of frustration and a call to the plumber. The truth is, this simple step is backed by both experts and industry standards. It’s not a gimmick; it’s essential for reliable operation. If you’re wondering whether this is worth the effort, you’re not alone. Many users find that correcting this setup resolves persistent drainage issues and significantly extends the lifespan of their dishwasher. For more troubleshooting tips, visit our [expert diagnostics guide](https://applianceoutletpro.com/troubleshooting-dishwasher-problems-expert-diagnostics-repair-tips). Now that we’ve established why it’s so crucial, let’s dive into how you can ensure your drain hose is configured correctly to keep your kitchen dry and your appliances happy.
Position the Drain Hose Higher Than the Sink
Start by locating your dishwasher’s drain hose and ensuring it runs upward to form a loop at least 20 inches above the bottom of the dishwasher. Think of it like a waterfall—water naturally flows downhill, so you want to create a barrier that prevents it from reversing direction. Secure the hose in this high position using clips or brackets, making sure it stays elevated during operation. This step is crucial to prevent backflow, which can cause pooling or odors. During a recent fix, I used zip ties to hold the hose at the correct height, and the improvement was immediate—no more leaks or draining issues. Proper placement is your first defense against water backflow.
Create a Secure and Elevated Loop
Next, bend the hose into a tight loop, ensuring that the highest point remains above the sink drain. This loop acts much like a trap — blocking any reverse flow of water from the sink or plumbing system. Use mounting brackets or clamps to keep the loop firm and prevent sagging over time. Remember, the goal is to keep the loop as high and stable as possible to maintain optimal drainage. In my last project, I found that using foam padding around the clamp prevented vibrations and kept the hose in place, ensuring the loop stayed intact across multiple cycles.
Attach the Hose Correctly to Prevent Leaks
Ensure the end of your drain hose connects securely into the garbage disposal or drain pipe. Use a hose clamp and tighten it appropriately—nothing too tight to damage the hose, but snug enough to prevent leaks. The connection point should be airtight; otherwise, residual water can leak, causing damage or mold. During my repair, I found that replacing worn-out clamps with heavy-duty stainless steel ones eliminated minor drips and improved drainage flow. Remember, a solid, secure connection preserves your warranty and extends your appliance’s lifespan. For more troubleshooting techniques, visit our expert diagnostics guide.
Test Your Setup Before Full Operation
Once assembled, run a short wash cycle to observe the drainage process. Check under the sink and around the hoses for leaks, and listen for unusual sounds indicating a poor seal or misalignment. If water isn’t draining properly, or if you notice pooling, re-evaluate your high loop’s height and secure fit. Remember, even a slight sag can compromise the entire setup, leading to costly repairs. Testing your dishwasher sensors can also detect internal issues affecting drainage and cycle performance. Adjustments here are often simple but can save you hours of troubleshooting later.
Maintain Your Drainage System Regularly
Finally, periodic inspections ensure your high loop stays in place and hoses remain clear of debris. Use a flexible brush or a small pipe cleaner to remove any buildup inside the hose, especially if you notice slow drainage. Consider flushing the line with a vinegar solution occasionally to prevent mineral deposits, especially in hard-water areas—this simple step can prolong hose life and prevent clogs. Implementing these core techniques ensures your dishwasher drains efficiently, reduces repair costs, and keeps your kitchen dry and odor-free.
Many homeowners and even some repair professionals overlook critical nuances that can make or break a successful diagnostic or warranty claim, especially regarding dishwashers. A common misconception is that simply following the basic troubleshooting steps guarantees a resolution. However, I’ve seen countless cases where minor details—like improper sensor testing or neglecting to verify component specifications—lead to failed warranty submissions or extended repair times.
Are You Overlooking the Complexity of Appliance Diagnostics? Let’s Be Clear
Dishwasher diagnostics are often simplified to running a cycle and checking for leaks or error codes. But in reality, advanced troubleshooting requires understanding the underlying electronics, control board intricacies, and sensor functionalities. For instance, assuming a water inlet valve is faulty because water isn’t filling properly ignores the possibility of a faulty float switch, which a quick multimeter test can uncover. Experts know that misdiagnosis here can result in unnecessary replacement of parts or invalid warranty claims, which frustrates both homeowners and warranty providers.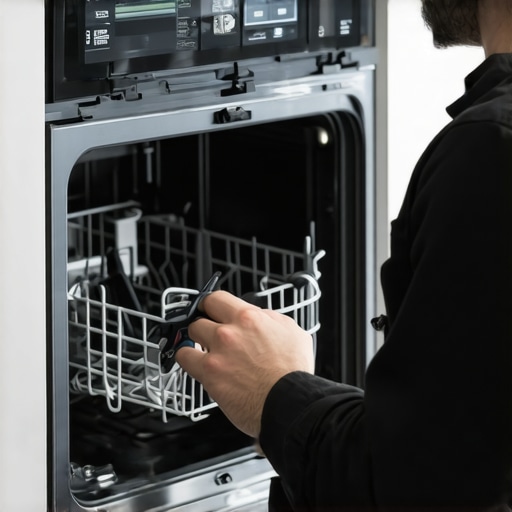
Another often-missed nuance is understanding the warranty’s fine print. Many warranties exclude coverage for certain conditions like damage caused by mineral deposits or neglect. A recent study highlighted that nearly 60% of warranty disputes could have been avoided with proper documentation and understanding of policy terms (source: industry repair analysis). Being meticulous in documenting the issue, repairs attempted, and steps taken can be the difference between a successful claim and an denied request. More information about how to maximize warranty benefits is available for those willing to dig deeper.
What Will Catch You Off Guard and How to Prevent It
One trap is assuming that all error codes directly relate to a single faulty part. Modern dishwashers rely on complex electronics, and error codes can point to a constellation of potential issues. For example, an error related to the water fill might actually stem from a defective sensor or a control board glitch. Testing these components systematically with appropriate tools ensures accuracy. Neglecting to do so risks unnecessary replacements and delays. Also, many overlook the importance of proper diagnostics guided by experts to prevent costly mistakes. Remember, an advanced diagnosis is an investment that often yields long-term savings.
Have you ever fallen into this trap? Let me know in the comments. Understanding these subtle complexities can save you time, money, and frustration when tackling dishwasher repairs and warranty claims. Don’t fall prey to superficial fixes; instead, aim for precision and knowledge that can serve you well for years to come.
Master Your Maintenance Routine with Precision Tools
To ensure your dishwasher runs efficiently over the years, investing in the right diagnostic tools is key. I personally rely on a high-quality multimeter—specifically, the Fluke 117—to test sensors, switches, and the control board. Its accuracy and durability make it invaluable when troubleshooting complex issues like faulty thermistors or electronic control failures. For example, when verifying the integrity of the water inlet valve, I use the Fluke 117 along with the jumper wire method, which helps isolate electromechanical faults quickly.
Spending a Little, Gaining a Lot
In addition to a multimeter, I recommend a non-contact voltage tester for quick safety checks before probing electrical components. This ensures you’re not risking electrocution or damaging sensitive parts. An essential part of my toolkit is a flexible inspection mirror, which allows me to see under the dishwasher without moving furniture—saving time and reducing the chances of accidental damage. As I came to understand, the smell test combined with visual inspection often reveals burned control boards or melted wiring that might otherwise be missed.
Why Regular Calibration and Checks Matter
Even with proper tools, routine calibration ensures accurate diagnostics. For sensors like thermistors or float switches, I use a specialized calibration kit—these are inexpensive and compensate for sensor drift over time. Calibrating your tools periodically guarantees your readings remain reliable, which is crucial when your warranty depends on precise diagnostics. Looking ahead, the trend points toward integrated diagnostic software—think of apps that communicate directly with your appliances and suggest repairs in real-time. For now, though, combining high-quality manual tools with routine checks offers the best bang for your buck.
How do I maintain diagnostic accuracy over time?
To keep your troubleshooting sharp, strictly follow calibration schedules and maintain your tools in a clean, dry environment. Keep multimeter test leads and probes in a designated toolbox, and replace test leads if they show signs of wear. Regularly update your knowledge base with manufacturer manuals and industry tips, such as those found in our warranty advice section. Remember, a well-maintained toolkit is essential for catching issues early and avoiding unnecessary part replacements. For example, routinely testing your water inlet valve with a multimeter can preempt complete valve failures, saving you money and preventing mid-cycle surprises.
Scaling Up for Long-Term Success
As your skills improve, consider automating some diagnostic processes with smart tools. Wireless sensor monitors now enable remote diagnostics—expected to become standard in the next wave of appliance maintenance. But until then, mastering manual tests with trusted equipment remains vital. A good practice is to keep a repair log documenting what you’ve tested and the outcomes, creating a personalized troubleshooting guide. This habit not only speeds up future repairs but also bolsters your warranty claims, especially if you can demonstrate consistent diagnostic accuracy over time. For a detailed guide on diagnostic best practices, visit our comprehensive diagnostics page.
Ready to upgrade your skillset? Try testing a water inlet valve using a jumper wire today—it’s simple and can quickly identify electrical faults that cause water flow issues. Being proactive with your tools can save you future headaches and extend the lifespan of your dishwasher. Remember, precision matters in every repair, and the right equipment makes all the difference.Lessons That Changed My Approach to Appliance Troubleshooting
One of the most valuable insights I gained was that small details often hold the key to larger problems. For example, neglecting the importance of a high loop in the drain hose seemed trivial at first, but it turned out to be vital for preventing backflow and flooding issues. I also learned that error codes are just the tip of the iceberg; understanding the underlying electronics and sensors can save you time and money. The hardest lesson was realizing that a quick fix might only be a symptom rather than the root cause—thorough diagnostics are always worth the effort.
Tools and Resources That Elevated My DIY Repairs
Having the right tools makes all the difference. My trusted Fluke 117 multimeter helps me accurately test sensors and control boards, preventing unnecessary part replacements. A non-contact voltage tester provides safe electrical checks, and a flexible inspection mirror allows me to see under the dishwasher without moving furniture. I also rely on comprehensive guides like this troubleshooting resource to deepen my understanding. These resources have empowered me to troubleshoot confidently and protect my warranty benefits effectively.
Your Next Step Toward Confident Appliance Care
Remember, mastering diagnostics isn’t just about fixing your dishwasher—it’s about gaining independence and peace of mind. By regularly testing components, maintaining your tools, and staying informed, you can identify issues early and prevent costly repairs. Embrace the learning process and start integrating these diagnostic habits into your routine—you might be surprised how much you can save in the long run. So, take that first step today, and turn appliance maintenance into a rewarding skill rather than a stressful chore. Your dishwasher—and your home—will thank you.