

Have you ever stared at a leaky sump pump, wondering if it’s just a slow drip or an impending flood? I remember the first time I faced a stubborn sump leak that seemed to appear out of nowhere. It was late at night, and I was trying to get my basement dry before morning—every bucket I placed under the crack filled up in minutes. That lightbulb moment hit me: sometimes, the fix is surprisingly simple, and it doesn’t require expensive parts or a full replacement.
Today, I want to share a little secret that changed my approach to sump repairs—something I wish I knew from the start. It’s about a tiny component, often overlooked, yet responsible for stopping most sump leaks: the humble O-ring, specifically the one that costs around two dollars. This small part can be a game-changer, and once I discovered its power, my basement stayed dry, and my wallet stayed happy.
The Hidden Power of a Little O-Ring
In my early days troubleshooting sump pump leaks, I made every mistake you can imagine—over-tightening fittings, replacing entire pumps, chasing phantom issues. What I didn’t realize was that many leaks aren’t caused by cracked pipes or worn-out pumps, but by a simple compression failure in the O-ring seal. Replacing or properly installing this tiny ring can prevent most leaks right at the source. According to professional repair technicians, these small components are often the first to fail when water pressure fluctuates or when fittings aren’t properly sealed.
If you’re tired of patching leaks that keep coming back or replacing costly parts prematurely, understanding the role of the O-ring is essential. Curious if this tiny part could be the culprit in your setup? Keep reading. We’ll explore how to identify a failing O-ring, proper installation tips, and some common mistakes that might be sabotaging your efforts.
Is Repairing an O-Ring Worth Your Time or Just a Waste of Effort?
Initially, I was skeptical myself—how could a two-dollar ring make such a difference? But after learning about the common mistake I was making early on—ignoring the importance of a properly lubed and seated O-ring—I gained confidence. Ensuring these seals are intact and well-maintained can save you a stack of frustration and money. Want to learn how to identify these small issues before they turn into big disasters? Check out this guide for diagnostic tips that could help you catch leaks early.
So, if you’ve been battling persistent sump leaks or simply want to safeguard your home from unforeseen water damage, this little O-ring might become your best friend. Ready to dive into how to troubleshoot and replace it? Let’s get started on how a tiny part can have a big impact on your home’s dryness and durability.
Prepare Your Workspace and Gather Tools
First, turn off your sump pump to prevent water flow and disconnect it from the power source. Place a bucket or towel nearby to catch any residual water. You’ll need a set of pliers, a screwdriver, a new O-ring of the correct size, and waterproof lubricant. Remember, a well-organized workspace makes the repair smoother and reduces the chance of missing small parts like the O-ring.
Identify the Leak and Locate the O-Ring
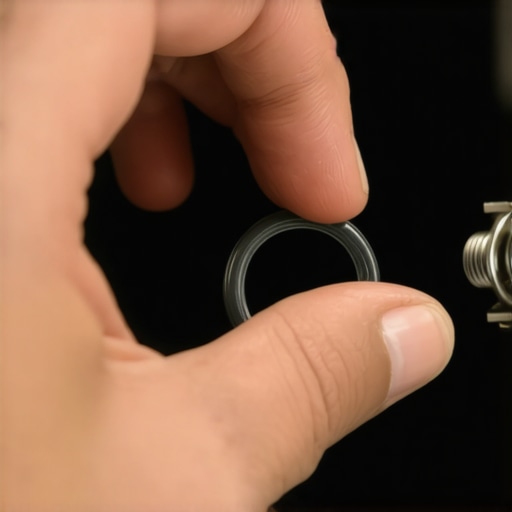
Examine the sump pump fittings and joints for signs of water seepage. The O-ring is typically located where the discharge pipe connects to the pump. It appears as a small rubber ring sealing the connection. I once faced a stubborn leak, and by inspecting this exact area, I discovered a cracked O-ring that caused frequent drips. Confirm the exact size and type before purchasing a replacement to ensure a proper fit.
Remove the Old O-Ring Carefully
Use pliers or a screwdriver to gently pry out the damaged O-ring from its groove. If it’s stuck, apply a little lubricant or heat gently with a hairdryer to soften the rubber. Avoid twisting or stretching it excessively to prevent damage to the fitting. When I replaced my O-ring, I took a photo for reference to ensure proper orientation during reassembly. Keep track of small parts to prevent loss during the process.
Clean and Prepare the Fitting Surface
Clean the groove and surrounding area with a cloth and a mild solvent if necessary. Removing debris or old lubricant ensures a good seal for the new O-ring. In one repair, neglecting this step led to a leak again within days, illustrating the importance of cleanliness for a lasting fix.
Install the New O-Ring Correctly
Apply a thin layer of waterproof lubricant to the new O-ring to facilitate installation and improve sealing. Gently stretch or press it into the groove without twisting. Make sure it sits evenly and snugly. I once used excessive lubricant, which caused the ring to slip out of place during reassembly—less is more here. Double-check that the O-ring is seated properly before reattaching the fittings.
Reassemble and Test the Repair
Reconnect the discharge pipe and tighten fittings securely but avoid over-tightening, which can damage the O-ring or fittings. Restore power to the sump pump and observe the connection for leaks. Watching the system in action immediately confirms the success of your repair. If you notice any drips, turn off the power and re-inspect the O-ring’s position.
Have you struggled with diagnosing appliance leaks? Understanding appliance diagnostics can greatly improve your troubleshooting skills, saving both time and money. Proper maintenance of small parts like O-rings is fundamental to preventing bigger problems later. Replacing the O-ring might seem simple, but attention to detail ensures a long-lasting fix that keeps your basement dry and your repair budget intact.
 Many homeowners believe that warranties and diagnostics are straightforward tools that always guarantee a free fix or a quick solution. In reality, the nuances behind appliance repair often reveal overlooked pitfalls, especially when it comes to dishwashers. For example, it’s a common myth that if a dishwasher malfunctions, the warranty will cover all repair costs. However, many service plans exclude certain issues, like damage caused by mineral buildup or improper installation, which many consumers don’t realize until it’s too late. According to a 2022 report by the Home Appliance Repair Association, nearly 60% of warranty claims are denied due to technical exclusions or misinterpretation of coverage terms. This highlights the importance of understanding the fine print before trusting a warranty blindly.
Another misconception is that diagnostics always lead to a straightforward fix. While diagnostics are invaluable, they require an experienced eye to interpret error codes correctly. For instance, a common mistake homeowners make is relying solely on error codes without understanding the underlying causes. Sometimes, error codes like “Flood” or “Not Filling” point to underlying issues such as faulty water inlet valves or clogged filters, but these symptoms can also stem from electrical problems or control board failures. This is why early diagnostics without deep knowledge can lead to unnecessary part replacements—often costing more and prolonging repair times. The key is to pair diagnostics with expert insights, as discussed extensively in this guide.
Now, let’s talk about the ‘oops’ factor. Homeowners tend to overlook the importance of proper maintenance and correct troubleshooting steps. For example, many damage their dishwasher by attempting DIY repairs without unplugging the appliance or using the wrong tools. Attempting to clean or replace parts without proper safety precautions can lead to further damage, which might void the warranty altogether. An advanced mistake is misdiagnosing a simple part failure—like confusing a clogged drain hose with a defective pump—leading to costly repairs. It’s critical to verify the root cause before replacing parts, and knowing when to trust professional diagnostics can save you time and money.
Speaking of advanced diagnostics, have you ever wondered how technicians detect micro-cracks or subtle electrical issues that standard tests might miss? The answer lies in specialized equipment like non-contact voltage testers and thermal imaging cameras. For example, using a non-contact voltage tester to spot hidden shorts can reveal faults that conventional inspections overlook, preventing unnecessary replacements of functional parts. This underscores why trained professionals often deliver more reliable diagnostics than DIY attempts. And for those wanting to explore this further, understanding these advanced techniques can dramatically improve your troubleshooting success.
In conclusion, being informed about the intricacies of warranties and diagnostics enables you to avoid common pitfalls and make smarter decisions. Remember, blindly trusting a warranty claim or diagnostic report without understanding the exclusions or limitations can lead to unnecessary expenses. Empower yourself with knowledge, question the diagnoses, and don’t hesitate to seek expert opinions when in doubt. If you want to learn more about effective diagnostic techniques, visit this resource. Have you ever fallen into this trap? Let me know in the comments.
Keep Your Dishwasher in Top Shape with Precise Tools
Maintaining your dishwasher isn’t just about replacing worn-out parts; it’s a proactive process that ensures longevity and optimal performance. One of the most effective ways to stay ahead of potential issues is to rely on specialized diagnostic tools. For instance, I personally use a non-contact voltage tester when troubleshooting electrical problems. This device allows me to detect energised circuits without making direct contact, reducing risk and increasing accuracy—especially crucial when dealing with hidden wiring behind panels.
Additionally, a quality multimeter is indispensable for checking continuity and testing components like heating elements or control boards. I prefer a digital multimeter with auto-ranging capabilities; it saves time and provides precise readings that help diagnose issues quickly. Regularly measuring voltage at different points can help identify fluctuating power supplies or faulty relays, preventing bigger breakdowns down the line.
Adopting Routine Maintenance for Long-Term Results
Consistency is key. I recommend setting a schedule to inspect and clean essential parts such as spray arms, filters, and door gaskets. For example, cleaning the door gasket every few months prevents leaks caused by build-up or wear. Similarly, flushing the drainage system with a vinegar solution can prevent clogs and unpleasant odors—an often-overlooked maintenance step that extends the life of your pump and valves.
Another vital tip is to keep detailed logs of any diagnostic readings or repairs. This historical data can reveal patterns over time, helping you catch subtle signs of aging or impending failure. For instance, noticing gradual increases in heating times could point to needing a new thermostat or heating element before complete failure occurs. As technical specifications evolve, staying informed through resources like professional diagnostics becomes even more valuable.
Planning for the Future: Scaling and Upgrades
As appliances become smarter, integrating diagnostic apps and remote monitoring tools is gaining popularity. These innovations allow you to receive alerts about issues before they escalate. By connecting your dishwasher to a home automation system, you can schedule maintenance reminders or receive error notifications directly on your phone. I foresee this trend growing, making preventative maintenance more accessible and less time-consuming.
Ultimately, investing in quality tools and adopting a disciplined maintenance routine will pay off by reducing repair costs and extending your dishwasher’s lifespan. Remember, understanding your appliance deeply means fewer surprises and more confidence during troubleshooting. Trying out a specific tip like regularly testing your heating element with a multimeter can save you from inconvenient breakdowns. Don’t wait for the next leak or malfunction—take control today and keep your appliances running smoothly for years to come.
What the Small Stuff Taught Me About Big Savings
Over the years, I realized that many of my repair headaches stemmed from overlooked details—like that tiny O-ring or a simple connection. Discovering the importance of proper sealing and maintenance taught me that paying attention to small components prevents costly failures and extends appliance lifespan. This lesson underscores that shortcut fixes often lead to recurring problems, emphasizing the value of patience and thoroughness in diagnostics.
My Go-To Tools for Troubleshooting Like a Pro
Relying on a quality non-contact voltage tester, a durable multimeter, and a flashlight has revolutionized the way I approach appliance diagnostics. These tools empower me to pinpoint issues swiftly and confidently—saving time, money, and frustration. After years of hands-on experience, I trust these investments because they turn complex problems into manageable tasks.
Stay Ahead by Combining Knowledge and Routine Checks
Consistent maintenance, like inspecting filters and testing key parts periodically, has been a game-changer in my routine. I recommend creating a checklist that includes testing water inlet valves, examining gaskets, and listening for unusual noises. By staying vigilant, you can catch small issues before they escalate, reducing emergency repairs and safeguarding your warranty benefits. Remember, early detection often means easier fixes and peace of mind.
Let Experience Shape Your Journey in Appliance Care
My biggest insight is that understanding your appliances at a deeper level transforms your DIY repairs from guesswork into confident problem-solving. Embrace learning from every repair—whether it’s changing an O-ring or testing a control board—and continuously build your skills. This proactive approach not only saves money but also transforms a daunting task into a gratifying routine. Want to know more about effective troubleshooting? Check out this resource for expert insights.
Your Move Toward Smarter Repairs Starts Now
Taking control of your dishwasher and appliance maintenance is empowering. With the right tools, knowledge, and habits, you can prevent leaks, extend warranties, and enjoy peace of mind. Don’t wait for a disaster—start today by inspecting your system, learning new tips, and trusting your intuition. Every small step is a leap toward a more reliable and cost-effective home routine. How will you apply these insights to your next appliance challenge? Let me know below!
.