

Just last week, I was about to give up on my stubbornly leaking dishwasher. Water was pooling under it again, and I’d already tried everything—cleaning filters, replacing hoses, even banging on the door like some desperate handyman. That’s when I stumbled upon a secret: a simple gasket cleaning trick that most pros keep under wraps. It felt like discovering a cheat code for appliance repair—something that could have saved me hours of frustration.
How a Tiny Gasket Could Be the Hidden Culprit
Ever notice how your dishwasher starts acting up out of nowhere? Leaks, poor cleaning, or that persistent beep? Sometimes, the problem isn’t the big parts but a tiny, often overlooked piece—your door gasket. This rubber seal keeps water in and prevents leaks, yet we rarely think to give it a thorough clean. Cleaning this gasket isn’t just about wiping away grime; it’s about restoring the seal’s elasticity and preventing water from sneaking out during cycles.
Over the years, I’ve learned that a well-maintained gasket can extend the life of your appliance significantly. The trick is to clean it without damaging the rubber—something most folks don’t grasp early on. Using harsh chemicals or abrasive tools can do more harm than good. Instead, a gentle approach involving a damp sponge and a little white vinegar can work wonders. This simple method can nip problems in the bud before they escalate into costly repairs.
Is This Gasket Trick Really Worth the Effort?
Like many DIY solutions, skepticism is natural. I remember my initial doubts—thinking, “It’s just a gasket, right? How much difference could it make?” Well, I made the mistake early on of ignoring this tiny component, and it cost me a lot more in water damage and appliance replacements. According to industry experts, neglecting gasket maintenance can lead to significant leaks and even void your warranty if water damages occur due to poor sealing (source).
So, have you faced stubborn leaks or inefficient cleaning despite usual fixes? If so, keep reading—because the secret to saving your dishwasher might just be in how you treat that humble rubber gasket. Next, I’ll walk you through the step-by-step process to clean, inspect, and maintain it, unlocking one of the simplest ways to keep your appliance running smoothly for years to come.
Remove the Door Panel Carefully
Start by unplugging your dishwasher to ensure safety. Use a screwdriver to gently remove the screws securing the outer door panel. Carefully lift the panel away, exposing the gasket and internal components. Remember, gentle handling prevents damage and makes reassembly easier. During my last attempt, I accidentally cracked a clip, which delayed my repair but taught me to handle panels gently.
Inspect the Gasket for Damage or Debris
Examine the rubber seal around the door edge for visible cracks, tears, or warping. Also, look for any foreign objects, mold, or soap scum lodged within the seal’s folds. Think of the gasket as the door’s weatherstrip—dirt accumulation can prevent it from sealing effectively, causing leaks. In my experience, debris like hardened detergent can mimic tears, so a thorough visual check is critical.
Use a Damp Cloth to Wipe the Gasket
Moisten a soft cloth with warm water and gently wipe along the gasket’s surface and folds. This removes surface grime and soap residue. Avoid harsh chemicals, as they can degrade the rubber. I once used bleach, thinking it would disinfect better, but it dried out the gasket, leading to cracks. White vinegar diluted with water is a safe, effective cleaner that restores elasticity.
Apply White Vinegar for Deep Cleaning
Dipping a cloth in white vinegar and running it over the gasket helps dissolve mineral deposits and soap scum. For stubborn buildup, wrap the cloth around a toothbrush and gently scrub into the folds. This step rejuvenates the gasket’s flexibility, ensuring it maintains a tight seal during cycles. Remember, a pliable gasket prevents water from leaking out, saving you costly repairs later.
Check for Cracks and Replace If Needed
Feel for cracks or brittleness—these indicate the gasket’s deterioration. If you find damage, replacing the gasket is the most effective fix. Consult your dishwasher’s manual or manufacturer’s website to find the correct replacement part. When I replaced my gasket, I used a DIY tutorial to ensure proper fit, which eliminated ongoing leaks and extended the appliance’s lifespan.
Reassemble and Test the Seal
Reattach the door panel securely with the screws. Before running a full cycle, perform a leak test by running the dishwasher empty on a short wash. Watch for signs of water escaping along the door edges. This proactive step confirms your cleaning and maintenance efforts have paid off. If leaks persist, revisit the gasket for further cleaning or consider professional diagnostics, especially if your appliance is under warranty (see how diagnostics save your warranty).
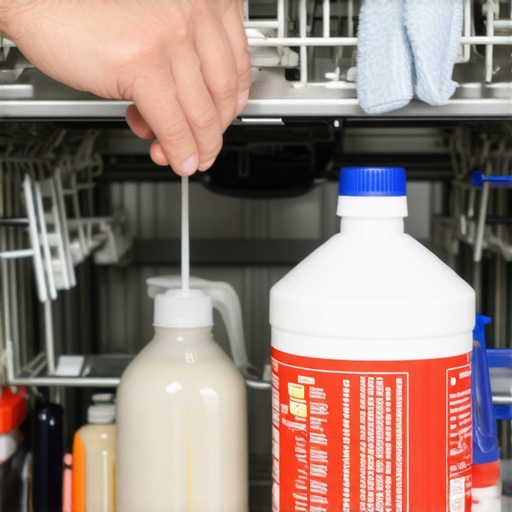
Many homeowners assume that running basic tests or following step-by-step guides is enough to diagnose dishwasher issues or to determine warranty eligibility. However, this frequently leads to misconceptions that can cost time and money. One common myth is that if your appliance shows a fault code, a simple reset or cleaning will fix the problem. In reality, the root cause might be a hidden component requiring specialized diagnostics, which your typical DIY approach can’t identify. According to industry experts, misdiagnoses often result from neglecting the nuanced signals that suggest deeper issues—like inconsistent error patterns or unusual noises during operation (source).
Another widespread mistake is assuming that warranty coverage depends solely on whether the appliance breaks during the warranty period. Many overlook the importance of proper diagnostics and documented repair attempts, which are crucial when making warranty claims. mishandling these aspects can void coverage, especially if the manufacturer determines that improper use or neglect contributed to the failure. For instance, failure to perform a proper diagnostic check before claiming repairs can be seen as user error, leading to denied warranty service (source).
Are Cheap Fixes Actually Costing You More in the Long Run?
Applying quick fixes like replacing a water inlet valve or cleaning a filter without accurate diagnostics often results in repeated failures. This not only wastes money but can cause further damage that complicates repairs. Professionals emphasize that investing time in detailed diagnostics — such as testing heating elements with proper tools or examining control boards for hidden faults (source) — dramatically improves repair success rates and preserves warranty validity. Remember, the key isn’t just fixing the visible problem but understanding why it occurred in the first place.
Let’s also consider the mistake of relying solely on visual inspection. While inspecting parts like door latches or gaskets can reveal obvious damage, many issues hide below the surface, such as microcracks in circuit boards or subtle sensor failures. Advanced diagnostics, including multimeter testing and professional analysis, help uncover these hidden faults, preventing misdiagnosis and unnecessary part replacements (source).
In conclusion, understanding the nuance behind diagnostics is vital for effective appliance repair and warranty claims. Moving past myths and superficial fixes ensures that repairs are accurate, cost-effective, and that your warranty remains intact. For more insights on when to seek professional help and how diagnostics can save your warranty, visit this resource. Have you ever fallen into this trap? Let me know in the comments.
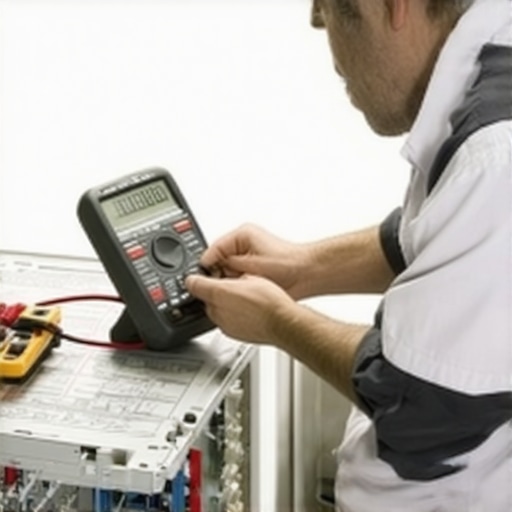
Tools I Trust for Long-Term Appliance Care
When it comes to maintaining your dishwasher, I rely on a few specialized tools that have consistently saved me time and money. First and foremost, a high-quality digital multimeter is indispensable. I use it not just for checking circuit continuity but also to test the integrity of heating elements (learn more about testing heating elements). A good multimeter helps me quickly identify faulty components without unnecessary part replacements.
Second, a dedicated inspection mirror is crucial for accessing tight spots, especially when inspecting door seals and internal compartments. Paired with a reliable flashlight, I can spot microcracks or buildup that might cause leaks long before they become visible. I also keep a set of torque screwdrivers tailored for appliance repairs, ensuring that reassembly is precise and secure.
Advanced Methods to Prolong Your Appliance’s Life
Implementing routine diagnostic checks is a game-changer. Regularly testing the door latch switch with a multimeter (see how to test door switches) ensures your dishwasher won’t unexpectedly stop mid-cycle. Similarly, checking the resistance of the heating element helps prevent potential failures that could lead to costly repairs or void your warranty (detailed resistance testing methods).
Another tip I swear by is installing an inline water pressure regulator to maintain consistent pressure levels. Variations can stress components, leading to early failures. Using a digital level helps confirm your appliance’s leveling—an often-overlooked factor that prevents leaks and uneven wear (see leveling tips).
Future Trends in Appliance Maintenance
The industry is increasingly adopting smart diagnostics that integrate with home automation systems. In the future, we’ll see more appliances equipped with self-monitoring sensors that alert homeowners to issues before failure occurs, much like modern cars. This evolution will make routine maintenance less guesswork and more predictive, reducing downtime and repair costs.
Maintain Your Dishwasher Like a Pro
One simple yet overlooked step is performing periodic drain and filter cleanings using effective tools like a dedicated drain line cleaner (learn how to clear clogs). Additionally, I recommend setting calendar reminders to check door seals and replace worn gaskets proactively—keeping an eye on these components can prevent leaks and water damage.
Want to give your dishwasher a professional touch? Try using a multimeter to periodically test the circuit components—not just during repairs but as part of a monthly maintenance routine. This small investment of time offers peace of mind and can prolong your appliance’s life substantially (discover how diagnostics preserve warranty).
How do I maintain my dishwasher over time? Think beyond cleaning; embrace diagnostics and proper tool usage. Regular checks, like inspecting the door latch and heating elements, can prevent major failures. Integrate advanced tools into your maintenance routine, and you’ll keep your appliance running reliably years longer.
The Hidden Wisdom That Can Save Your Appliance and Wallet
Reflecting on my repair journey, I realize the most enlightening lessons came not from complicated parts but from the humble gasket and diligent diagnostics. The key insight? Never underestimate the power of a clean gasket combined with proper troubleshooting skills. This combination has the potential to extend your dishwasher’s lifespan, prevent leaks, and preserve warranties—saving you time, money, and stress in the long run.
What I Wish I Knew About Maintenance and Warranty Protection
- Ignoring minor leaks or neglecting gasket cleaning is a tactic that may seem harmless but can lead to costly repairs or warranty voids. Regularly inspecting and maintaining the gasket is a proactive step most homeowners overlook, yet it is vital for appliance health.
- Misconceptions about diagnostics often result in unnecessary replacements or missed early signs of failure. Investing in proper diagnostic tools and understanding industry insights allows you to identify issues before they become expensive crises.
- Relying solely on superficial fixes or visual inspections might seem quicker, but it risks overlooking hidden faults. Deep diagnostics and a thorough understanding of your appliance’s inner workings empower smarter repairs and warranty claims.
- Tools like a reliable multimeter and inspection mirror are more than just gadgets—they’re your allies in uncovering problems that lurk beneath the surface, ensuring every part, from sensors to heating elements, functions optimally.
- Embracing routine diagnostics as a monthly habit doesn’t just prevent breakdowns; it transforms maintenance from reactive to strategic, ensuring your dishwasher operates efficiently for years.
The Pocket-Sized Tools That Changed My Approach
- A high-quality digital multimeter has been indispensable for testing circuit integrity and troubleshooting complex issues without guesswork.
- An inspection mirror with a strong light helps me reach tight spaces and verify gasket condition, spot microcracks, and assess hidden buildup.
- A precise torque screwdriver ensures reassemblies are secure, preventing leaks and maintaining proper seal integrity.
- Regularly scheduled checks with these tools enable me to catch problems early, saving money and extending my appliance’s useful life.
Chasing the Future of Dishwasher Care
Smart diagnostics are transforming how we maintain appliances. IoT-enabled sensors and predictive analytics will soon notify homeowners of issues before they manifest as leaks or breakdowns. Staying ahead with routine diagnostics today prepares you for these innovations, ensuring your appliance remains reliable amidst rapid technological change.
Take Charge of Your Dishwasher’s Future
With a little knowledge, the right tools, and proactive maintenance, you hold the power to keep your dishwasher running smoothly for years to come. Don’t wait for leaks or errors to disrupt your routines; start integrating diagnostic habits now and enjoy peace of mind.
What is your go-to method for early detection of appliance issues? Share your tips below—I’d love to hear how you stay ahead of problems!