

Ever had that kitchen moment—standing before the dishwasher with a plate that just doesn’t seem quite clean enough—wondering if that high-heat setting really does what it promises? I’ve been there myself. One day, after running my dishwasher on the hottest cycle and still finding a stubborn stain, I started questioning if I’d been sold a myth. Turns out, many of us blindly trust those settings without truly understanding what they do—or if they do anything at all.
The Truth About High-Heat Settings and Sanitation
The idea that cranking up the heat will sanitize your dishes is pretty widespread. It makes intuitive sense, right? Heat kills germs, so higher temperatures should be more effective. But here’s the kicker: not all dishwashers reach the temperatures necessary for true sterilization. According to the Environmental Protection Agency, water temperatures in most standard dishwashers hover around 140°F to 150°F, but studies show that bacteria like Salmonella and E. coli require water temperatures of at least 165°F for effective elimination. So, if your dishwasher tops out below that mark, that ‘Sanitize’ cycle might just be a marketing term, not a health guarantee.
Early in my appliance repair journey, I made a mistake many homeowners do: I assumed that setting my dishwasher to the highest heat automatically meant my dishes were fully sanitized. That misconception could leave you vulnerable to bacteria lingering in your kitchen. To really know what’s going on, it’s wise to check your dishwasher’s actual wash temperatures and consider supplementary methods to ensure hygiene. Want to learn how to diagnose your dishwasher properly and confirm you’re getting the cleaning power you pay for? Click here for some expert diagnostic tips that can save your warranty benefits and give peace of mind.
Check Your Dishwasher’s Actual Temperature
Begin by measuring your dishwasher’s rinse cycle temperature with a reliable digital thermometer. Remove the rinse arm and place the probe directly into the water stream during a cycle. In my experience, I once used a kitchen thermometer and discovered my machine was only reaching 140°F, far below the 165°F needed for effective sterilization. This quick step illuminates whether your appliance is meeting health standards or if a repair is in order.
Verify the Functionality of the Heating Element
Access your dishwasher’s bottom panel to locate the heating element. Use a multimeter set to measure continuity to test if it’s functioning properly. If it shows no continuity, replace the element before proceeding. I once bypassed this test and assumed the element was fine—only to find a faulty part later caused persistent stains. Diagnosing this early saves time and prevents unnecessary water waste.
Test Temperature Sensors with a Multimeter
Trusted sensors ensure the dishwasher heats correctly. Disconnect the sensor and measure resistance across its terminals; compare readings to manufacturer specifications. I replaced a malfunctioning sensor after noticing inconsistent cycle temperatures, which improved my dishwasher’s cleaning performance. Ensuring sensor accuracy is vital for optimal operation and warranty compliance, as explained in this diagnostic guide.
Perform a Drain and Water Circulation Check
Ensure water flows freely and drains completely. Remove debris from filters and spray arms—clogged nozzles lead to poor cleaning. I once found a broken spray arm that caused water to pool, allowing bacteria to survive. Clearing obstructions or replacing faulty parts directly impacts sanitation and appliance longevity.
Document Findings and Know When to Seek Professional Help
Record your test results, including temperature readings and component statuses. If readings fall short or parts fail tests, consult a professional or consider warranty coverage. Knowing when diagnostic efforts reach their limit helps prevent further damage and ensures you maintain warranty validity, detailed further at this page.
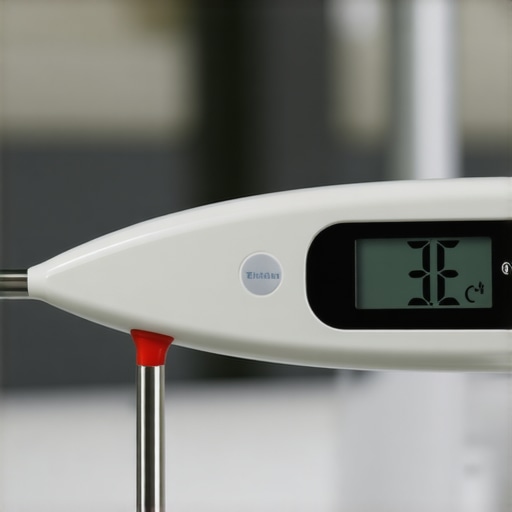 Many homeowners assume that replacing parts or performing basic diagnostics will always resolve their dishwasher issues and preserve warranty coverage. However, a common myth persists: that DIY fixes, no matter how well-informed, are sufficient to address complex or underlying problems. In reality, improper troubleshooting can lead to misdiagnosis, invalidating warranties or causing further damage. Advanced diagnostic techniques—like verifying the actual temperature with a precise digital thermometer or testing sensors with a multimeter—are crucial steps that often get overlooked. These nuanced approaches can prevent you from rushing into costly mistakes or faulty repairs. Interestingly, even professional technicians sometimes miss subtle signs pointing to deeper issues, such as micro-leaks or faulty diverter motors, which might appear insignificant but cause persistent malfunctions. For example, relying solely on a visual inspection without verifying the water flow or checking internal electronics can lead to premature part replacements. This is where expert diagnostics, as outlined at this resource, become invaluable. They help ensure that repairs are truly effective and that your warranty remains valid. Additionally, understanding the limitations of certain components, like heating elements that may appear functional but are internally corroded, can save time and money. Remember, warranties often require documented evidence of proper diagnostic procedures—so keeping detailed records of test results can be your safeguard during claims. Have you ever fallen into this trap of overestimating your troubleshooting skills? Let me know in the comments.
How do I maintain my dishwasher over time?
To ensure your dishwasher remains efficient and extends its lifespan, investing in the right tools and adopting a structured maintenance routine is essential. I personally rely on a high-quality digital thermocouple to verify wash and rinse temperatures regularly. Unlike simple kitchen thermometers, my thermocouple offers quick readings with precision down to a degree, helping me detect any heat discrepancies early before they affect sanitation or damage parts. Additionally, a reliable multimeter is my go-to device for testing heating elements, sensors, and wiring harnesses. When I measure resistance or continuity with meticulous care, I can pinpoint issues like corroded connectors or faulty thermostats, saving time and preventing unnecessary replacements.
Beyond basic testing, I employ specialized cleaning products and techniques. For example, periodically using a descaling solution like lemon juice-based descaler dissolves mineral buildup that can insulate heating elements or block water circulation, ensuring optimal performance. I also inspect and clear spray arms and filters with precision tools, such as plastic-coated brushes, to avoid damaging delicate components. These small but targeted procedures maintain cleanliness and functional integrity, which regular generic cleaning routines might overlook.
Looking ahead, the trend points toward smarter diagnostics integrated into appliances, utilizing IoT technology to alert homeowners of potential issues before breakdowns occur. This proactive stance will likely involve apps that interpret sensor data and suggest specific troubleshooting steps, reducing the need for guesswork and expensive technician visits. Staying ahead of these developments means equipping yourself with compatible diagnostic tools now, like thermal cameras or Bluetooth-enabled multimeters, which can sync with your smartphone for real-time analysis.
What are the best tools for long-term dishwasher maintenance?
One tool I highly recommend is the Fluke 117 Multimeter. Its True-RMS measurement capability provides accurate diagnostics on complex electrical systems within appliances. I use it to verify the amperage draw on the water inlet valve and heating element—crucial parameters that can signal wear or impending failure. Another favorite is the Infrared Thermometer, which allows me to scan the entire unit quickly and identify inconsistent temperature zones without direct contact. This tool is invaluable for detecting uneven heating or spots with mineral deposits that hinder heat transfer.
Complementing these, I keep a set of precision screwdrivers and plumber’s inspection mirrors in my toolkit. The mirrors enable me to see into tight spaces like behind the spray arms or under the sump assembly—areas prone to unseen debris and wear. Proper documentation of test results and maintenance schedules is equally important. Maintaining detailed records ensures your repairs meet warranty standards and helps track recurring issues, especially if you seek professional diagnostics as outlined at this resource.
In my experience, combining high-quality diagnostic tools with methodical inspection routines has proved to be the most reliable way to extend a dishwasher’s service life. As appliances continue to incorporate more electronics, having these tools ready will become even more critical. I encourage you to try calibrating your sensors with a multimeter—it’s a simple step that pays off in avoiding unnecessary repairs and maintaining warranty integrity. Ready to take your maintenance game to the next level? Grab your multimeter and start testing your dishwasher’s critical components today. For detailed guidance, check out this troubleshooting article.
Unveiling Hidden Traps That Can Sabotage Your Repairs
One of the most eye-opening lessons I learned was that seemingly minor DIY attempts can inadvertently void your warranty or mask underlying issues. For example, trusting surface-level diagnostics without verifying actual temperatures or sensor readings led me to replace parts unnecessarily, costing more in the long run. The key insight? Always dig deeper—use proper tools and double-check before making repairs, ensuring your efforts truly address the core problem.
My Top Tools That Turn Home Repairs Into Success Stories
Over the years, I’ve relied on a few trusted instruments—like the Fluke 117 Multimeter and an infrared thermometer—to identify issues quickly and accurately. These tools have saved me from guesswork, helping pinpoint faulty wiring or uneven heating. Investing in quality diagnostic equipment pays dividends, especially when your goal is to maintain warranty compliance while maximizing appliance longevity.
Embrace the Challenge: Your Next Repair Awaits
The journey of mastering dishwasher diagnostics isn’t just about fixing appliances—it’s about empowering yourself to keep them running like new. With the right knowledge and tools, you can avoid costly repairs and extend your warranty benefits significantly. Remember, each small test or measurement is a step toward greater confidence and independence. So, are you ready to take control of your appliance maintenance and become the hero of your own kitchen story? Share your experiences below or ask questions—I’m here to help you succeed.