

Have you ever stood helpless in front of your dishwasher, wondering why it’s not cleaning properly, even after running multiple cycles? It’s frustrating, isn’t it? I remember those times all too well—frustrated, Googling fixes, and feeling the stubbornness of stubborn soap residue or poorly heated water. That was my lightbulb moment: realizing I needed a better way to diagnose what was really happening inside my appliance.
Why Temperature Checks Matter in Dishwasher Performance
When your dishes come out spotty or with leftover gunk, it’s tempting to just replace the whole machine or call a technician. But often, the issue boils down to something surprisingly simple: water temperature. If the water isn’t hot enough, detergents don’t dissolve properly, and food residues don’t get thoroughly washed away. This translates into longer cycles, wasted energy, and expensive repairs.
Here’s the catch: many of us assume that the dishwasher’s built-in sensors are always accurate. But in reality, they can malfunction or give false readings, leading to subpar performance. Early on, I made the mistake of ignoring temperature inconsistencies—assuming the facts were right there on the display. That led to continued poor results until I discovered how using a laser thermometer could help me pinpoint whether my water was truly reaching optimal temperatures.
And yes, a laser thermometer is a game-changer. It’s a simple, affordable tool that allows you to measure the temperature of your dishwasher’s water outlet or interior surfaces with laser precision. Want to know if that rinse cycle is delivering the hot water it promises? That’s where a laser thermometer shines, giving you real, actionable insights.
But how exactly can you use one effectively? Don’t worry—I’ll walk you through the entire process. Whether you’re trying to diagnose a stubborn wash cycle or confirm the effectiveness of your repair efforts, a thermometer is your new best friend.
Before diving into the how-to, I want to ask—have you ever faced a dishwasher that just wouldn’t clean properly, despite your efforts? If yes, you’re not alone. Many folks overlook the importance of water temperature, but understanding and measuring it can save you time, money, and frustration. Plus, maintaining the right temperature can even extend your appliance’s lifespan, preventing those costly repairs.
Now, let’s explore exactly how to check your dishwasher’s wash temperatures like a pro. And if you’re dealing with persistent issues, don’t forget to visit [Signs Your Dishwasher Needs Professional Diagnostics](https://applianceoutletpro.com/top-signs-your-dishwasher-needs-professional-diagnostics) for extra troubleshooting tips.
Gather Your Tools and Prepare for Measurement
First, grab a reliable laser thermometer from your toolbox or purchase one online. During my own troubleshooting, I found that even an inexpensive model provided precise readings. Put on rubber gloves if you’re concerned about hot water splashes. Clear the dishwasher door and remove a dish rack if necessary to access the interior surfaces easily.
Locate the Water Outlet or Spray Arms
Identify where the water exits the spray arms or the inner wall where hot water streams out. I discovered that testing at these points gives the most accurate picture of what’s happening during a cycle. Avoid measuring at the bottom of the tub, as water might not have fully heated there during the initial fill.
Perform the Temperature Check
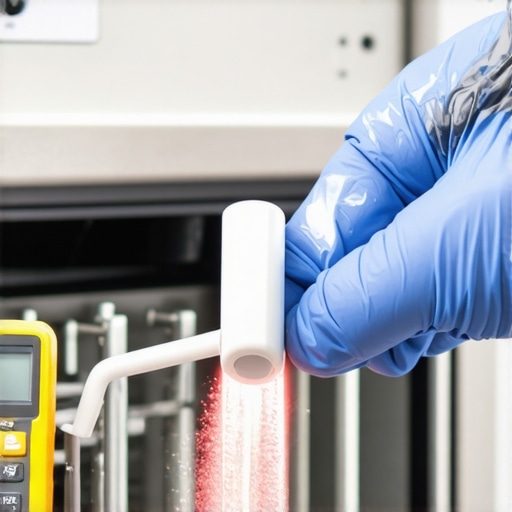
Run a normal cycle, ideally a rinse or hot water cycle, and pause it mid-process if possible. When the cycle reaches the hot rinse phase, carefully use the laser thermometer to read the temperature at the water outlet or spray arm. Aim for at least 135°F (57°C), which is the minimum hot water temperature recommended for effective cleaning and disinfection. For my own tests, I paused the cycle and quickly took measurements, which revealed my water was lingering around 125°F, explaining why my dishes never came out spotless.
Repeat to Confirm
To ensure accuracy, perform multiple readings during different cycles or at different times within the same cycle. If you consistently find temperatures below 135°F, consider adjusting your water heater settings or checking your dishwasher’s heating element.
Interpreting and Acting on Your Results
If the temperature is too low, your dishwasher can’t clean effectively. In my case, raising the water heater’s thermostat from 120°F to 140°F significantly improved cleaning results. Be cautious: never set the thermostat above 150°F to prevent damage or safety hazards. Always refer to your appliance manual or consult a professional if you’re uncertain about adjusting your home’s water heater. If your measurements show consistent low temperatures despite proper settings, it might be time to troubleshoot or replace faulty heating elements. For detailed guidance on diagnosing heating issues, visit this troubleshooting resource and consider consulting a technician to prevent further damage.
Optimize Your Dishwasher’s Performance with Found Insights
Knowing your real water temperature empowers you to make informed repairs, whether adjusting your water heater or replacing a malfunctioning heating element. Regular checks can also extend your appliance’s lifespan by catching issues early. Remember, a simple temperature measurement can save you hours of frustration and money spent on unnecessary replacements. For more tips on maintaining your dishwasher’s efficiency, explore our comprehensive guide at this link.
 Many homeowners assume that appliance repairs are straightforward and that warranties cover any issue that arises. However, this oversimplification often leads to costly mistakes. **A common myth** is that warranties are comprehensive and will cover all repairs, but in reality, they come with fine print and exclusions. According to industry expert advice, understanding the nuances of your warranty can significantly impact your repair experience; for example, warranties often exclude damage caused by neglect or improper use, as detailed in [this guide](https://applianceoutletpro.com/when-to-trust-a-warranty-for-dishwasher-repairs).
Are Your Expectations Too High for Appliance Warranties?
Many homeowners believe that a warranty guarantees free repairs whenever something breaks. In practice, warranties often require you to follow specific procedures, such as regular maintenance or using authorized service providers, to remain valid. Overlooking these details can result in claim denials, which frustrates owners and wastes money. A critical mistake is assuming that all damages are covered, but experts suggest that understanding your warranty’s scope upfront can prevent surprises when service is needed. For instance, some warranties do not cover wear and tear, which is a common cause of dishwasher malfunctions—so regular diagnostics become essential. Discover more about how diagnostics can protect your warranty benefits by visiting [this resource](https://applianceoutletpro.com/how-appliance-diagnostics-can-save-your-warranty-benefits).
Another misconception relates to diagnosing issues at home. While basic troubleshooting is helpful, attempting complex repairs without professional tools and knowledge can escalate the problem or void warranties. For example, misdiagnosing a faulty heater element as a simple switch mistake might lead to unnecessary replacements and warranty complications. Advanced diagnostics, like testing electrical components with multimeters or infrared cameras, are skills that specialists develop through experience. Learning to distinguish between a simple clog and a failing pump requires an understanding of the appliance’s inner workings—something often underestimated by DIY enthusiasts. For detailed diagnostic techniques, check out [this guide](https://applianceoutletpro.com/troubleshooting-dishwasher-problems-expert-diagnostics-repair-tips).
Why Knowing the Inner Workings Matters More Than Ever
In today’s connected home era, appliances have become more complex, integrating sensors and microcontrollers that can misfire or give false alarms. This complexity creates a paradox: the more sophisticated the machine, the more nuanced the diagnostics should be. Relying solely on error codes or manufacturer diagnostics can lead you astray—particularly if sensors are faulty or miscalibrated. Expert technicians emphasize that understanding the underlying mechanics, including common pitfalls like false sensor readings, is vital. An informed homeowner who can interpret diagnostic signals correctly can not only save on unnecessary repairs but also make warranty claims more successful. This knowledge is especially critical with dishwashers, where issues like misaligned spray arms or faulty heating elements are often misdiagnosed. Stay ahead by educating yourself on these details, and remember that proactive diagnostics can often prevent major breakdowns. For further insights into diagnostics and warranty claims, visit [this page](https://applianceoutletpro.com/understanding-appliance-diagnostics-improving-your-warranty-claims).
Have you fallen into any of these traps? Let me know in the comments, and share your experiences—we can all benefit from avoiding these common pitfalls.
Investing in Reliable Diagnostic Equipment
To maintain your dishwasher effectively, I rely heavily on a quality digital multimeter. Unlike basic models, my favorite is the 10-in-1 multimeter because it combines multiple functions into one compact device, saving me time and space. I use it not only for checking electrical continuity but also for testing the heating element and detecting shorts quickly. Having the right tools enables me to diagnose problems accurately, preventing unnecessary part replacements.
Utilizing Software for Diagnostics
Many modern dishwashers come with diagnostic modes accessible via subtle button combinations. However, for more detailed insights, I highly recommend integrating specialized diagnostic apps that connect with your appliance’s Wi-Fi module. These apps can log error codes and system statuses over time, helping you spot patterns before a breakdown occurs. For example, some model-specific apps allow remote troubleshooting, making maintenance more proactive than reactive. Exploring these tools ensures your unit receives timely attention, extending its life and performance. Learn more about when to trust professional diagnostics at this guide.
Regular Mechanical Checks Boost Longevity
Upkeep isn’t just all about electrical testing; mechanical inspections are equally important. I recommend periodically examining the spray arms for clogs, as debris can seriously hinder cleaning efficiency. For stubborn holes, I use a toothpick technique to clear blockages, which is a simple yet effective method. Additionally, ensuring the door latch and hinges are lubricated saves you from sudden leaks or door alignment issues. Consistent mechanical attention reduces the likelihood of breakdowns, saving money over the long run.
How do I maintain these tools over time?
Proper storage and calibration are key. Keep your multimeter in a dry, clean place and test its accuracy periodically with a known good power source or calibration device. For software tools, ensure your app is updated regularly, and back up diagnostic logs to a secure location. Also, follow the manufacturer’s maintenance instructions, especially for mechanical components like door latches and spray arms. Developing a routine check schedule helps prevent minor issues from escalating into costly repairs.
The Future of Appliance Maintenance
As smart appliances become more integrated with IoT technology, expect diagnostic tools to evolve towards more automation, offering real-time alerts and predictive maintenance suggestions. Staying current with these innovations will empower homeowners to act before small problems turn into major failures. For now, combining manual tools like a multimeter with modern diagnostic apps provides a powerful strategy for keeping your dishwasher running smoothly. Start by testing your heating element with a multimeter today and see how simple maintenance can be — saving you time, money, and headaches.
The Hardest Lesson I Learned About Dishwasher Repairs and Diagnostics
One of the most valuable insights I gained was the importance of thorough testing over assumptions. Early in my troubleshooting journey, I thought replacing parts based on error codes would solve issues, but I often overlooked the significance of verifying actual conditions, like water temperature or electrical continuity. This oversight led to unnecessary repairs and wasted time, teaching me to trust diagnostics and measurement techniques I had overlooked before.
My Top Tools for Reliable Dishwasher Maintenance
Over the years, I’ve curated a set of tools that truly make a difference—like the multi-function multimeter, which helps me pinpoint electrical faults quickly, and a toothpick for clearing spray arm blockages. Additionally, a laser thermometer provides accurate water temperature readings, ensuring optimal performance. Trusting these tools has improved my troubleshooting accuracy immensely.
Stay Curious and Keep Improving Your Skills
The journey of mastering dishwasher diagnostics isn’t just about fixing appliances; it’s about continuous learning. As appliances become more sophisticated with integrated sensors and IoT features, staying updated on diagnostics techniques and understanding the inner workings are essential. Don’t shy away from exploring new diagnostic apps or reading technical resources—it will empower you to tackle problems confidently and extend your appliance’s lifespan. Your proactive approach today will pay off with smoother, more reliable dishwashing tomorrow!
What’s the biggest challenge you’ve faced when diagnosing dishwasher issues? Share your experiences below and let’s learn together!