

I remember the first time my dishwasher suddenly stopped mid-cycle, and I had no idea where to start. Frustration crept in as I stared at the blinking lights, feeling completely powerless. That moment was a lightbulb flickering—if only I knew how to test that tiny bi-metal fuse myself, I wouldn’t have to wait for a costly technician or buy a whole new part. It hit me then: being able to diagnose these small, crucial components can save you a lot of time and money.
Why Knowing How to Test a Bi-Metal Fuse Matters
Most folks don’t realize how essential bi-metal fuses are in appliances like dishwashers, washing machines, and dryers. These little safety devices protect your appliance from overheating, preventing fires or further damage. But here’s the kicker: they’re often hidden away, and diagnosing their condition isn’t straightforward without some basic know-how. That’s precisely why I decided to share my experience—because mastering this simple test can be a game-changer for anyone tired of waiting around for professional diagnostics or risking replacing parts blindly.
Early on, I made the mistake of assuming that every malfunction was due to a broken control board or just a dead component. But in reality, these safety little fuses are often the culprits, and testing them yourself is surprisingly manageable once you know the tricks. Plus, it’s a skill that can extend beyond dishwashers—applying to your washer, dryer, or even HVAC systems.
Did you know that approximately 70% of appliance breakdowns could be prevented or delayed if simple diagnostic skills were more widely understood? According to appliance repair experts, understanding basic electrical tests can significantly improve your ability to troubleshoot and maintain your appliances effectively (source).
So, if you’ve ever faced a scenario where your appliance just refuses to cooperate, and traditional fixes don’t seem to work, chances are you might be dealing with a faulty bi-metal fuse. But don’t worry—I’ll guide you step-by-step through how to test this component safely and accurately, empowering you to troubleshoot with confidence. Ready to get your hands dirty (safely, of course)? Let’s dive into how you can identify whether that fuse is the root of the problem, without calling in a pro right away.
Safely Accessing the Fuse
First, unplug your dishwasher to eliminate electrical hazards. Remove the lower front panel by loosening screws with a Phillips screwdriver. Gently pull it out to expose the internal components. Use a flashlight if needed to see clearly. This step is like opening the engine panel of a car to check vital components—your first move in troubleshooting.
Locating the Bi-Metal Fuse
The fuse is usually a small, cylindrical metal piece attached to the control board or near the heating element. Consult your dishwasher’s manual or look for a label inside the panel for guidance. Identifying this part is critical, as it’s the protector against overheating. Think of it as a safety valve—if it’s blown, it needs testing.
Disconnecting and Preparing for Testing
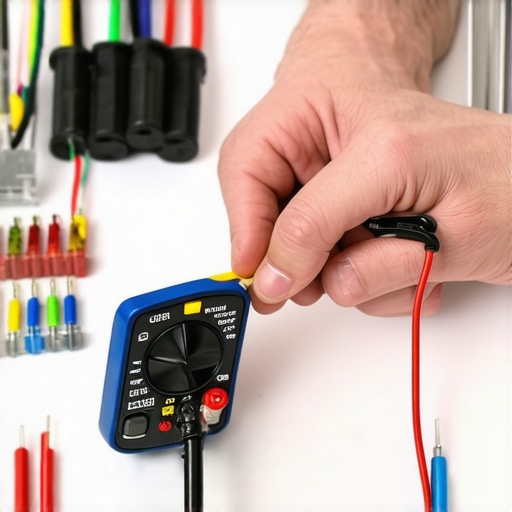
Carefully disconnect the fuse from its socket using insulated tweezers to avoid short circuits. Keep track of how it was connected for reinstallation. Prepare your multimeter by setting it to the resistance (Ω) mode. This is akin to checking if a wire is dead—simple but effective.
Performing the Test
Place the multimeter probes onto each end of the fuse. If the meter shows a reading close to zero, the fuse is good; if it reads infinite or no continuity, it’s blown. This step is like testing a bridge for stability—clear indicators that either confirm safety or necessity for replacement.
Interpreting Results and Next Steps
If the fuse tests bad, replacing it is straightforward. Purchase an exact match—check the amperage and voltage ratings marked on the fuse. Reinstall carefully, ensuring it’s seated properly. If the fuse is good but the dishwasher still malfunctions, further diagnostics are required. It’s similar to replacing a blown fuse in a car—sometimes, the problem lies elsewhere, like a faulty thermostat or control board.
Applying the Test Regularly
Regularly checking the bi-metal fuse can prevent unexpected breakdowns. It’s like giving your car a daily visual inspection to catch issues early. Remember, safety is paramount—always disconnect power before opening or testing any appliance components. Becoming familiar with this process enables you to troubleshoot common issues without immediate professional help, saving time and money.
 Many homeowners operate under the misconception that appliance repairs are straightforward, but the reality is much more nuanced. A prevalent myth is that replacing a faulty component will automatically resolve the issue. However, in my experience, many problems stem from interconnected systems where a single faulty part is just the tip of the iceberg. For example, a dishwasher leaking water might seem like a simple door seal replacement, but without understanding the role of the float switch and drain pump, you risk overlooking underlying cause-and-effect relationships that could lead to recurring issues.
One trap many fall into is assuming warranty periods are infallible safety nets. The truth is, warranties often exclude wear-and-tear items or improper DIY repairs, which can void your coverage entirely. Consulting a professional or understanding the fine print first can save you from unexpected out-of-pocket expenses. Read more about when to trust a warranty and how diagnostics can help preserve your claims.
What about the myth that DIY diagnostics are always reliable? Instead, I recommend treating home tests as preliminary indicators rather than definitive answers. For instance, testing a fuse with a multimeter is simple but can be misleading if you don’t properly identify the component or if the fuse appears intact but has micro-cracks invisible to the eye. Advanced error diagnostics often require more sophisticated tools or professional-grade testing equipment. According to appliance repair experts, misdiagnosing can lead to unnecessary part replacements, increasing costs and downtime. To sharpen your diagnostic skills, explore expert troubleshooting tips.
Investing in the Right Tools for Long-Term Success
Maintaining your dishwasher’s optimal performance hinges on having precise, reliable tools. My personal favorite is the digital multimeter because of its versatility and accuracy when diagnosing electrical components like heating elements and sensors. I prefer a high-quality small flat-head screwdriver for removing panels and components without damaging delicate parts.
Another indispensable tool is a LED flashlight. It helps detect micro-cracks or blockages in spray arms or filters that could compromise cleaning efficiency. Over time, I’ve also adopted a magnetized inspection mirror to access hard-to-see areas, preventing potential failure points before they escalate.
Tools That Are Worth the Investment
While cheap tools might save money upfront, they often lack durability and precision. I recommend investing in a laser thermometer to monitor water and air temperatures, ensuring cycles operate within recommended ranges. Accurate temperature readings help prevent issues like poor sanitation or thermostat failures. Additionally, a diagnostic code reader for smart dishwashers can save hours troubleshooting electronic faults.
Maintaining Your Dishwasher with Regular Checks
Developing a routine inspection plan can extend your appliance’s lifespan significantly. Start by visually examining seals and gaskets—use the paper test to ensure door seals remain snug. Regularly inspecting spray arms for debris with your flashlight prevents water flow issues. Cleaning filters and sump areas with household vinegar (avoiding bleach, which can damage seals) keeps mineral build-up at bay, as detailed in this guide.
Future Trends in Appliance Maintenance
Looking ahead, the integration of smart diagnostics and IoT connectivity promises even easier maintenance routines. Devices that can alert you to issues before failure occurs will become more common, minimizing downtime and costly repairs. Developing proficiency with tools like multimeters and thermal cameras today prepares you for this evolution, making maintenance more precise and less invasive.
How do I keep my dishwasher working like new over time?
The key lies in proactive maintenance, including regular visual inspections, timely replacement of worn seals, and using specialized diagnostic tools for early fault detection. Implementing these practices will save you money and extend your appliance’s lifespan. For more detailed guidance on troubleshooting or DIY repairs, check out this resource. I highly recommend trying the laser thermometer tip—by monitoring cycle temperatures, you can prevent underperformance caused by thermostat issues, which are often overlooked but critical.
Lessons That Changed My Approach to Appliance Troubleshooting
One of the most valuable insights I gained was understanding that simple components like bi-metal fuses have a significant impact on appliance performance. Assuming the control board or electronic modules are always at fault can lead to unnecessary replacements. Instead, I learned to question and verify each part methodically, which saves time and money.
Another revelation was how vital proper tools are. Cheap multimeters or inadequate lighting can make diagnosing issues more guesswork than science. Investing in quality, reliable diagnostic equipment transformed my DIY repairs from guesswork into confident troubleshooting.
Finally, I realized that there’s often a psychological barrier—fear of electrical components—that holds many back. Breaking that fear by learning safe testing techniques opened up new possibilities. It’s empowering to troubleshoot rather than just replace. These lessons are fundamental and applicable beyond dishwashers—think washing machines, dryers, or even HVAC systems.
Your Path Forward with Trusted Tools and Knowledge
To truly excel in appliance diagnostics, I recommend a few tools that became game-changers for me. A digital multimeter is indispensable for electrical testing, providing quick, accurate results. An LED flashlight helps inspect hard-to-see areas, especially micro-cracks or blockages that can cause performance issues. For temperature monitoring, a laser thermometer offers insights into cycle efficiency and potential overheating.
More importantly, these tools aren’t just for dishwashers—they’re universal in diagnosing appliances. Infusing your toolkit with reliable diagnostics enhances your confidence and extends the lifespan of your home appliances.
Take the First Step Towards Confident Repairs
Equipment today is more complex, but the fundamental skills of testing, observing, and diagnosing are timeless. By mastering these, you’re not only saving money but also developing a deeper understanding of how your appliances work. Embark on this learning journey with patience and curiosity, and soon you’ll find troubleshooting becomes second nature. Have you tried testing a fuse or component in your appliance before? Share your experience below—I’d love to hear how it went!