

Ever had that gut-wrenching moment when your dishwasher, heater, or washing machine suddenly stops warm, leaving you puzzled and frustrated? I remember thinking I’d have to call in a pricey technician or, worse, replace the entire appliance. That was until I realized the power of a simple, inexpensive tool: a budget multimeter. My lightbulb moment came when I was cleaning out my laundry room and noticed my water wasn’t heating properly, yet I had no clue where to start. It dawned on me—what if I could test the heating element myself without breaking the bank?
Why Testing Your Heating Element Isn’t Just for Pros
Most people—myself included—think that diagnosing components like heating elements requires professional tools or advanced knowledge. But here’s the truth: with a basic multimeter, you can perform a simple test that will tell you if your heating element is dead or alive. This approach saved me dozens of dollars in service calls, and I want to share it with you because, honestly, why pay more than you need to?
Is This Testing Method Truly Effective?
You might be skeptical—I’ve been there. Early on, I made a mistake by assuming that if the appliance isn’t heating, it’s entirely broken. Turns out, sometimes it’s just a loose connection or a faulty thermostat. But testing the heating element with a multimeter is a reliable starting point. It’s simple: if there’s no continuity, the element is likely burned out. If continuity exists, the problem might be elsewhere.
This straightforward technique has its limits—certainly, more complex issues will require professional diagnostics. But in my experience, this quick check can save you from unnecessary repairs or replacements, especially if your warranty coverage is limited. For more expert tips on appliances diagnostics, you might explore this detailed guide on improving your warranty claims.
Have you ever tested your heating element or tried diagnosing appliance problems on your own? If not, don’t worry—this article will walk you through every step, making DIY diagnostics accessible and affordable. Ready to get your hands dirty and save some cash? Let’s dive into how to test your heating element with a budget multimeter—step by step.
Gather Your Tools and Prepare for Testing
Start by sourcing a reliable digital multimeter, preferably one that can measure resistance and continuity. Ensure the appliance is unplugged and has cooled down to prevent any risk. Remove any panels or covers that give access to the heating element, often located at the bottom or side of the appliance. Think of it as preparing to check the heartbeat of your device: disconnect, cool, and expose. I once tested my dishwasher’s heating element after a cycle went cold, which was messy but rewarding. Remember, safety first—never test electrical components while connected to power.
Locate and Access the Heating Element
Identify the heating element, usually a metal coil or a flat ceramic component, connected with two wires. If unsure, consult the appliance’s manual or a wiring diagram online. Carefully detach the wires or connectors from the element, making sure to note which wire went where. Using a small screwdriver, loosen any mounting screws or clips holding the element in place. This step is like unwiring a delicate bridge—delicate handling prevents further damage and ensures accurate testing. I once struggled with a stuck connector, but applying a bit of penetrating oil and patience did the trick.
Set Up Your Multimeter for Resistance Testing
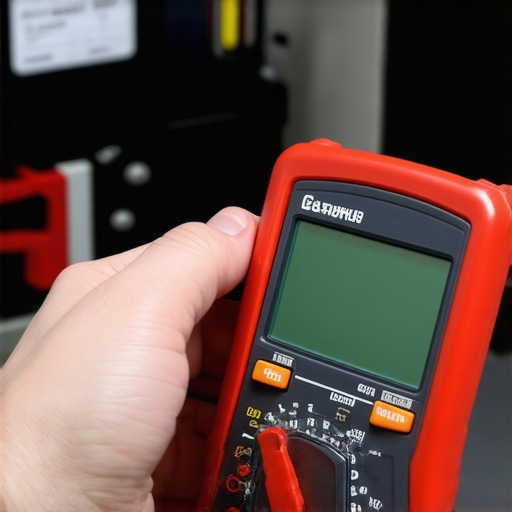
Switch your multimeter to the lowest resistance setting, often marked as ∞ symbol, or select the continuity test mode if available. Place the multimeter probes on each terminal of the heating element. If your multimeter has a beep function for continuity, it will sound if the circuit is complete. Think of it as checking for a closed tunnel; no beep or infinite resistance indicates an open circuit, meaning the element is dead. I learned this on my first try when the multimeter read infinite resistance; replacing the element restored proper heating.
Interpret the Reading and Decide the Next Step
A healthy heating element should show a resistance typically between 10-30 ohms, but check the manual for exact values. A reading close to zero suggests a short circuit, while an infinite or very high resistance indicates a break or burn-out. If the reading indicates a dead element, replacing it is often straightforward and cost-effective, much like swapping out a burned-out lightbulb. If the element tests good, the problem likely lies elsewhere—possibly a faulty thermostat or wiring issue. For more intricate diagnostics, consult this detailed guide on appliance diagnostics to avoid unnecessary replacements.
Double-Check and Reassemble Carefully
Before reassembling, reattach wires securely, ensuring no loose connections. Double-check your work by testing the resistance again to confirm everything is properly sealed. Reinstall panels and restore the appliance’s power. Turn it on and monitor whether the heating function operates correctly. I once realized I had swapped the wires**, leading to no heat; patience and double-checking saved me from a costly service call. Remember, a proper test with a multimeter can save significant diagnostic time and money, especially for DIY enthusiasts.
When it comes to appliance warranties and diagnostics, many homeowners operate under misconceptions that could cost them time and money. A common myth is that warranty coverage applies to all repairs automatically; however, as highlighted in this detailed guide, warranties often have exclusions, especially for issues arising from neglect or improper use. Believing your warranty will cover every repair can lead to disappointment and unanticipated expenses.
Another misconception is that professional diagnostic tests are always necessary before attempting DIY repairs. As I emphasized earlier, basic testing with a multimeter can decisively identify faulty components like heating elements, but many overlook that improper testing techniques can lead to false positives or negatives. For example, testing resistance with multimeters requires a steady hand and proper interpretation of readings—something that less experienced DIYers might mishandle, leading to unnecessary part replacements or missed issues.
Furthermore, a critical oversight is the assumption that newer appliances are less prone to breakdowns or warranty claims. Reality contradicts this belief—modern machines often incorporate complex electronics that can fail in ways not immediately evident. According to industry expert insights, even high-end appliances require diligent diagnostics and understanding of their intricate components, meaning homeowners should not ignore regular maintenance or advanced troubleshooting.
What most people get wrong is underestimating the importance of nuanced diagnostics—the small differences in electrical resistance readings can distinguish a simple malfunction from a more serious defect. For instance, a heating element might show a resistance slightly outside the specified range, but that doesn’t necessarily mean it needs replacement; temperature sensors and controllers could be at fault instead. It’s these subtleties that separate a seasoned technician from the average DIYer.
Avoid falling into common traps by learning to interpret diagnostic results correctly. Misdiagnosis can lead to unwarranted part purchases and extended downtime, diminishing the value of your warranty benefits. For further insights, the comprehensive diagnostic approach can be a game-changer.
Have you ever fallen into this trap? Let me know in the comments! Understanding these nuances ensures you maximize your warranty and perform smarter, cost-effective repairs.
Keeping It Working: Tools and Tricks for Longevity
Maintaining your appliances over time isn’t just about fixing issues as they arise; it’s about adopting a proactive approach with the right tools and habits. One of the most valuable instruments I rely on is a high-quality digital multimeter, specifically the Fluke 117. Unlike cheaper models, this multimeter offers precise resistance and continuity measurements, which are crucial when diagnosing heating elements or electrical faults in dishwashers and other appliances. Its true RMS feature ensures accurate readings even on fluctuating loads, helping me identify problems before they escalate.
Beyond the multimeter, I recommend investing in a infrared heat gun. This tool allows me to check temperature variations on components like thermostats and heating coils during operation, providing real-time insights that a standard thermometer can’t offer. The float switch test becomes straightforward when I verify temperature consistency across the heating elements.
Establishing a regular diagnostic routine with these tools significantly extends appliance lifespan. For example, periodically testing connections and heating elements can alert you to impending failures, often long before the appliance signals a problem. I also keep a detailed maintenance log, recording resistance readings and visual inspections, which helps track wear and predict failures.
Looking ahead, trends point toward smarter diagnostics. Integrating IoT-enabled sensors in appliances could provide real-time health reports directly to your phone, making proactive maintenance easier than ever. Companies are already experimenting with this tech, which could revolutionize appliance maintenance by catching issues early through automated alerts.
How Do I Maintain Appliance Diagnostics Over Time?
To keep your diagnostic approach effective, regularly calibrate your tools and familiarize yourself with each appliance’s typical resistance and temperature ranges. For instance, understanding that a dishwasher’s heating element should register around 15-30 ohms helps you recognize anomalies early. Additionally, staying current with technical bulletins and updates from manufacturers can inform you about common failure modes and recommended testing procedures, as detailed in industry guidelines and expert blogs like this comprehensive reference.
Before performing diagnostics, always ensure appliances are unplugged and cooled down to prevent accidents. Establishing a regular maintenance schedule—say, every six months—allows you to routinely check electrical connections, seals, and heating elements, preventing costly repairs down the line. Remember, the key is consistency: quick monthly checks can reveal subtle signs of wear before they become major failures.
If you’re ready to elevate your DIY diagnostics, start by practicing resistance testing on your appliances’ heating elements using your multimeter. For example, testing your dishwasher’s heater with a multimeter can be as simple as removing the access panel and measuring resistance across the terminals. If the reading exceeds manufacturer specifications, it’s time for a replacement, which you can often handle yourself, saving significant repair costs.
Lessons That Shattered My Appliance Repair Assumptions
One unexpected insight was realizing that many appliance issues are simpler to diagnose than I had believed, provided I approach them with patience and the right tools. For instance, I once assumed a faulty dishwasher control board needed replacing until I learned how to perform resistance tests on the heating element, which saved me hundreds of dollars and hours of frustration. It became clear that understanding basic electrical principles can unlock a confidence I never thought I had before, transforming me from a passive user to a proactive troubleshooter.
Another lesson was recognizing the importance of regular maintenance and early diagnostics. Just a quick resistance check every few months can reveal wear before it turns into a full breakdown, giving you a window to act and preserve your appliance’s lifespan. This proactive approach doesn’t just save money; it fosters a sense of control and satisfaction in caring for your devices.
Finally, I learned that warranties aren’t omnipotent, but they can protect you if you understand their scope and how proper diagnostics play into claims. Misinterpretations can lead to denied reimbursements, so educating yourself on what components are covered and how to substantiate repairs with detailed documentation is vital. For a comprehensive breakdown on protecting your warranty benefits, check out this detailed guide.”}
Tools and Resources That Changed My Diagnostic Game
My essential toolkit includes a reliable digital multimeter like the Fluke 117, which I trust for its precision and durability. It’s invaluable for testing resistance and continuity in heating elements and wiring connections, ultimately helping me avoid unnecessary replacements. Additionally, I rely on an infrared heat gun to quickly spot temperature variations during appliance operation, providing real-time insights that can pinpoint faults before they escalate.
Beyond hardware, I highly recommend books such as "Appliance Repair for Dummies"– a treasure trove of practical knowledge that clarifies complex concepts, making diagnostics approachable for hobbyists and homeowners alike. Online communities and detailed guides, especially this resource, have been lifesavers in understanding the nuances of appliance behavior and warranty claims. Having a curated set of tools and references boosts confidence and ensures you’re equipped for any diagnostic challenge that comes your way.
Your Next Step Is a Small Win
Embarking on DIY diagnostics might seem daunting at first, but the rewards extend beyond savings. It’s about empowering yourself to understand your appliances better, troubleshoot effectively, and make informed decisions about repairs and warranties. Start with simple resistance checks on your dishwasher’s heating element or water inlet valve; these small steps can reveal so much about the health of your appliance and set you on a path of continual learning.
Remember, every expert was once a beginner—so don’t hesitate to roll up your sleeves and give it a try. Your appliance will thank you, and so will your wallet. Are you ready to take that first diagnostic step? Share your experiences or questions below, and let’s troubleshoot together!