

I remember the exact moment I realized my dishwasher’s middle rack was starting to droop. It was mid-cycle, dishes piled high, and suddenly I heard that dreaded creak. The rack was sagging so badly that I feared it would break entirely if I didn’t do something quickly. Frustration mixed with a hint of panic—I wasn’t ready to spend hundreds on a replacement part or call in a technician just yet. Sound familiar? If your dishwasher’s middle rack has become a crooked mess, you’re not alone. That sagging rack can turn a usually simple chore into an annoyance, and I’ve been there more times than I can count. Fortunately, after much trial, error, and a few failed attempts, I found a way to fix it without dropping a dime on new parts or waiting for someone to come to the rescue. Today, I want to share exactly how I tackled this common problem and, more importantly, how you can do the same.
What causes that dreaded sag and why it’s worth fixing yourself
The middle rack’s tendency to sag isn’t just an aesthetic issue; it can affect how well your dishes get cleaned, and it often signals that something’s gone awry beneath the surface. Over time, the rack’s support rollers and the plastic frame can weaken, especially if you use harsh detergents or load it improperly. But the root cause often lies in the bent or broken support wheels or worn-out leveling pins—parts that, surprisingly, you can replace or adjust yourself with some simple tools. Recognizing this, many homeowners assume replacement of the entire rack is the only option, which isn’t necessarily true. Fixing it yourself not only saves money but gives you a sense of satisfaction knowing you maintained your appliance without waiting for a technician. Plus, addressing small issues early can prevent more costly damage down the line—something I’ve learned the hard way. If you want to keep your dishwasher running smoothly and keep your dishes pristine, understanding and fixing that sag is a great place to start. Curious if your dishwasher’s support system is the culprit? Check out how appliance diagnostics can help identify underlying problems more efficiently. Ready to learn the tricks? Let’s dive into the practical solutions that will get your rack standing tall again.
Identify the Culprit Behind the Sagging
Before jumping into repairs, it’s crucial to diagnose the exact cause of the drooping support rails. I once believed a broken wheel was the sole reason, but upon closer inspection, I discovered worn leveling pins were the real culprit. Use a flashlight and a mirror to examine the support rollers and surrounding structure. Look for cracks, broken pieces, or excessive wear. If support wheels are cracked or missing, they’re likely causing instability and sagging. Recognizing these issues early saves time and prevents unnecessary replacements.
Gather Necessary Tools and Replacement Parts
Prepare a Phillips screwdriver, needle-nose pliers, a multimeter, and the replacement support wheels or level pins. These parts are inexpensive and can be ordered online or from appliance parts stores. When ordering, double-check model numbers and compatibility. I once ordered generic support wheels that didn’t fit; accurate sizing saved me frustration. Consider consulting the appliance’s manual or parts diagram to ensure you purchase the correct replacements. Having everything ready prevents delays once you start dismantling.
Safely Remove the Dishwasher’s Support Rails
Disconnect the power and water supply to ensure safety. Remove the lower dish rack and locate the support rails. Using the screwdriver, carefully unscrew the mounting brackets holding the support rollers or rails. Keep track of all screws and small components by placing them in a labeled container. I learned this step the hard way—losing tiny screws mid-repair complicates reassembly. Gently lift and detach the support system, paying attention to how parts fit together. Document the process with photos for reference during reinstallation.
Replace or Adjust Support Components
If support wheels are cracked or missing, install new ones by snapping them into place or screwing them into the brackets. For worn leveling pins, remove the old pins with pliers and insert the new ones, ensuring they align properly. Use a multimeter to verify that the support wheels spin freely and are securely attached. I once discovered a support wheel that seemed fine visually but was electrically faulty; testing prevented future failures. Properly installed parts should sit flush and provide stable support for the rack.
Reassemble and Test the Repair
Carefully put the support rails back in place, securing them with the screws. Replace the lower rack and restore power and water supplies. Run a short cycle to observe the support system in action. Keep an eye on the rack’s position; it should stand level and glide smoothly. If issues persist, revisit the support components or consult troubleshooting guides like this resource for further diagnostics. Remember, a stable rack ensures better cleaning and prolongs your dishwasher’s lifespan.
< >
>
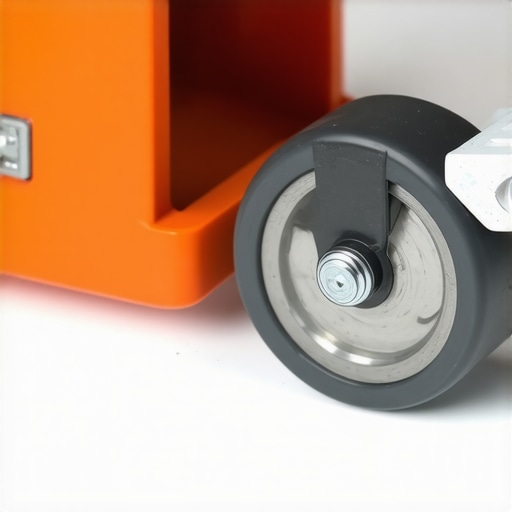
For visual reference, this image illustrates proper installation of support wheels and leveling pins, ensuring your dishwasher’s rack remains sturdy and level during operation.
Many homeowners operate under misconceptions that could cost them time and money when managing dishwasher issues. One prevalent myth is that appliance warranties cover all repair costs indefinitely; in reality, warranties have limitations and often require strict adherence to diagnostic procedures for coverage to apply. Rushing to claim a warranty without proper diagnostics can lead to denial, especially if the problem stems from user neglect or external factors. Think of warranties as a safety net rather than a free repair service—one that relies on proper documentation and accurate problem identification, as emphasized by appliance experts. Additionally, a common mistake is assuming that complex-sounding issues always require professional intervention. However, with an understanding of appliance diagnostics, many faults like faulty door switches or heating elements are manageable for determined DIYers, provided they follow safe procedures and verify parts accurately. Be cautious of the trap where homeowners overlook the importance of proper testing; for instance, using a multimeter to verify the condition of sensors or fuses can prevent unnecessary replacements. This is a nuance many miss, leading to futile repairs or warranty rejection. Moreover, some believe all repair parts are universal, which isn’t true—using incorrect parts can void warranties or cause further damage. Always double-check part compatibility and follow manufacturer guidelines. Remember, a well-documented diagnostic process not only saves money but also strengthens your claim if you need to pursue warranty service, as discussed in detail on this resource. Let’s face it: understanding these nuances avoids costly pitfalls and empowers you to handle minor issues effectively. So, next time your dishwasher acts up, consider that your approach—diagnostics, parts compatibility, and warranty knowledge—can make all the difference. Have you ever fallen into this trap? Let me know in the comments.
Invest in Precise Diagnostic Equipment for Long-Term Savings
One of the most valuable tools I rely on is a quality multimeter, specifically the Fluke 117. Its high accuracy allows me to test components like thermal fuses, door switches, and sensors quickly and reliably. Unlike cheaper models, this multimeter provides true RMS readings, ensuring my diagnostics are spot-on, which saves time and prevents unnecessary replacements. Additionally, I use a non-contact voltage tester from Klein Tools, which is invaluable for safely verifying energized circuits without risking shock. These tools have become an essential part of my repair kit, especially when troubleshooting complex issues like intermittent malfunctions or subtle component failures. Investing in quality diagnostic gear has paid dividends, reducing callbacks and extending the lifespan of the appliances I service.
Utilize Specialized Software for Diagnostic Accuracy
While many repairs involve manual testing, integrating appliance-specific diagnostic software streamlines the process. The latest models from manufacturers often support remote diagnostic modes that can be accessed via interface panels or external apps. For example, some touch-control dishwashers let you enter diagnostic mode with a combination of button presses, which then reveal error codes and help pinpoint issues without extensive disassembly. Knowing exactly how to activate these modes—like pressing and holding certain buttons during power-up—can significantly cut down troubleshooting time. As appliance technology advances, staying updated with manufacturer software tools will be crucial for efficient diagnostics and warranty claims. For detailed procedures, I recommend reviewing this guide.
Prioritize Routine Maintenance to Prevent Major Failures
Regular checks of filters, spray arms, and sump areas can dramatically reduce the likelihood of breakdowns. I suggest setting a schedule to clean the filter every month; clogged filters can cause poor cleaning and motor strain. A simple yet effective maintenance step is using a toothbrush and a solution of vinegar and baking soda to clear mineral deposits from spray nozzles. Keeping the door gasket clean and supple also prevents leaks, which can cause significant damage over time. For a comprehensive cleanup, I recommend consulting this article for tips on maintaining your dishwasher’s vital parts. Consistent upkeep not only extends the appliance’s functional life but also ensures optimal performance, saving you money in repairs and utility bills.
Long-Term Benefits of Proper Maintenance and Diagnostics
Implementing a thorough maintenance routine combined with precise diagnostics can significantly enhance the longevity of your appliance. In the future, automation and AI-driven diagnostic tools are expected to become standard, making repairs even more accessible for homeowners. These advancements will likely provide real-time alerts and troubleshooting advice, similar to systems in modern cars. Embracing current best practices now—a mix of manual inspections, using accurate tools, and understanding diagnostic modes—sets a solid foundation. Remember, consistent maintenance helps you catch minor issues before they escalate, preserving your warranty benefits and avoiding costly replacements. For insights into how diagnostics can impact warranty claims, see this resource.
How do I maintain my dishwasher over time?
Regularly inspecting and cleaning components like filters, spray arms, and door seals will keep your dishwasher functioning optimally. Using proper diagnostic tools to identify issues early, such as testing sensors with a hairdryer or verifying electrical connections with a multimeter, can prevent costly repairs down the line. Staying informed about manufacturer diagnostic procedures and warranty policies ensures your appliance remains covered and efficient. I encourage you to try the advanced tip of testing your dishwasher’s sensor with a hairdryer to quickly assess its condition—it’s a game-changer for DIY diagnostics. For detailed methods, see this guide. Remember, proactive maintenance today delivers reliable performance tomorrow.
Lessons From the Front Line of Dishwasher Repairs
One of the most eye-opening realizations I had was how often simple support component failures are mistaken for major issues, leading to unnecessary replacements or calls for professional help. I learned that patience and a keen eye for detail can turn a frustrating sagging rack into a manageable weekend project, saving money and providing a sense of accomplishment. Another lesson is that a well-stocked toolkit—especially a high-quality multimeter—becomes your best friend, revealing electrical faults that aren’t visible to the naked eye. Lastly, I discovered that the myths surrounding warranties and repairs are pervasive; understanding the real scope of coverage and proper diagnostic procedures enables you to leverage your warranty effectively, rather than assuming it’s an endless safety net. These lightbulb moments have empowered me—and now, you—to approach dishwasher issues with confidence and precision.