

I still remember the night I finally snapped. It was a rainy Tuesday, and my family was trying to watch a movie in our open-concept living room. Every few minutes, a mechanical hum would swell into a harsh, grinding slosh from the kitchen, drowning out the dialogue. I had specifically bought that machine because the glossy showroom sticker proudly boasted a whisper-quiet 44 dB rating. Yet, there we were, raising our voices just to be heard over the popcorn bowl. I felt completely cheated by the marketing department, and that frustration set me on a obsessive path to uncover how appliance manufacturers actually measure sound.
The Great Decibel Deception
Here is the absolute truth: that laboratory-tested decibel rating on your dishwasher packaging is often a fantasy. When manufacturers test these units to slap a low dB number on the box, they do it under absolute pristine conditions. They use perfectly straight, professionally installed drain lines, soft water, and pristine, damp-absorbing surroundings. They certainly do not test them with a nested pile of stainless-steel pots clanging against the spray arms. If your kitchen layout has hard tile floors and bare drywall, that 44 dB rating can easily jump to a grating 52 dB in real-world conditions. Even worse, if you did not perform a precise leveling adjustment during installation, the subtle cabinet vibrations will turn your entire kitchen island into a giant sounding board.
Are ultra-quiet dishwasher ratings actually worth the extra cash?
Many homeowners happily pay a premium of three to four hundred dollars just to shave off three decibels on paper. I made that exact same mistake early in my DIY journey, believing a higher price tag guaranteed immediate peace and quiet. But here is the catch: a machine’s sound profile changes dramatically over its lifespan. As internal components wear down, a once-silent appliance can quickly begin to rattle. According to a consumer study by Consumer Reports, even top-rated quiet models can experience a significant rise in operating noise over just a few years due to motor degradation and hard water buildup. If your unit has suddenly started making an unbearable racket, you might actually be dealing with an underlying mechanical failure. In fact, understanding why your dishwasher is louder than it used to be is often the first step to diagnosing a worn-out wash pump or a failing drain impeller before the whole system shuts down completely.
Why Modern Machines Sound Different
If you are upgrading from a fifteen-year-old chugging beast, you might expect a new smart dishwasher to be completely silent. However, modern eco-friendly appliances run much longer cycles to conserve water and electricity. Instead of a short, high-pressure blast, you get hours of low, rhythmic pulsing. If this sound is accompanied by a violent shaking, you might need to investigate why your dishwasher shakes during the high-speed drain to protect your cabinetry from moisture damage. Have you ever bought an appliance advertised as whisper-quiet only to find it kept you awake at night? Let me know in the comments below, because we need to talk about how to actually fix these noisy realities without voiding our service contracts.
First Steps to Silence Your Kitchen Machine
Before you run to the phone to call an expensive technician, you need to conduct a quick visual and physical sweep. Think of your dishwasher like a car engine; before pulling apart the transmission, you check the oil and look for loose bolts. Most unexpected noises are actually mechanical interference rather than catastrophic component failure. Start by checking the spin paths of both the upper and lower spray arms. I once spent forty-five minutes tracking down a rhythmic, metallic tapping only to find a misplaced metal spatula hanging through the lower rack, acting like a playing card in bicycle spokes. If you confirm the arms rotate freely, inspect the mounting brackets. Over time, the constant vibration can loosen the plastic hardware holding everything together. If you find a wobble, learning the correct way to tighten a loose upper spray arm mount can silence that annoying vibration instantly without costing you a dime.
How to Safely Check the Internal Components
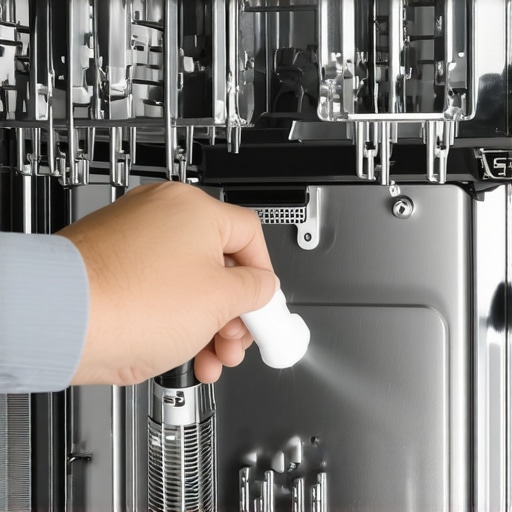
If the spray arms are secure and clear, the noise is likely coming from deeper inside the pump assembly or motor housing. You need to verify if the sound is a grinding hum (usually a motor or pump issue) or a rapid rattle (often debris caught in the impeller). To do this without risking your physical safety, always disconnect the power supply at the breaker first. Pull off the lower spray arm and remove the filter assembly. Reach into the sump area with a small flashlight and feel around for hard objects like cherry pits, broken glass, or tiny pebbles that bypass the coarse filter screen. If the sump is clean, you may need to dig slightly deeper. If you suspect a bad pump, learning how to tell if your wash pump is seized or just clogged will save you from prematurely buying an expensive replacement motor when a simple cleaning would have sufficed.
The Sound Diagnostic Map
Different noises point directly to different culprits. A high-pitched squeal usually indicates a failing bearing in the circulation pump. A loud, aggressive vibration during the initial phase of the cycle suggests a faulty water inlet valve vibrating against your copper plumbing lines under the floorboards. Alternatively, if your machine makes a terrible racket only during the final minutes of a cycle, the drainage pump is struggling. Debris like toothpicks or bone fragments can slip past the filter and wedge directly into the drain impeller blades. I once worked on a unit that sounded like a blender full of marbles; a tiny plastic bread-bag clip had bypassed the screen and lodged itself in the pump housing. For those experiencing these specific, end-of-cycle grinding sounds, studying the simple plumbing fix for a dishwasher that wont drain will help you clear the line and protect the motor from burning out under pressure.
Protecting Your Financial Safety Net
Before you grab your socket wrench set and begin pulling the motor apart, check your paperwork. Taking a screwdriver to the internal electrical connections can easily void any active protection plans. Manufacturers are incredibly strict about unauthorized repairs. Knowing the fine print that voids your appliance service plan is critical to avoiding a denied claim later. If your machine is still under its original first-year coverage, you should always document the problem professionally rather than attempting a complex teardown. Take high-quality audio recordings of the noise from several feet away to present to the technician. This guarantees you can leverage how appliance diagnostics can save your warranty benefits to get the manufacturer to cover both the replacement parts and the specialized labor costs.
I used to believe that having a manufacturer’s warranty meant I was completely insulated from repair bills. That is the ultimate comforting lie we are told at the appliance counter. In my years of dealing with flooded kitchens and grinding motors, I have learned that a warranty is not a safety blanket—it is a legal maze designed to protect the manufacturer’s bottom line. Most homeowners think that as long as they do not physically take a hammer to their appliance, any breakdown is covered. In reality, the fine print of these agreements is heavily stacked against you, and navigating the system requires a more sophisticated approach than simply calling a customer service line to complain.
The Preventive Maintenance Trap Manufacturers Rely On
Here is the contrarian truth about appliance protection plans: manufacturers actually count on you trying to resolve issues yourself before invoking your coverage. Everyone online tells you to try basic DIY hacks to save time, but in my experience, performing even minor repairs without official documentation is the fastest way to void your protection plan entirely. If you replace a part on your own, a certified technician can instantly spot the non-OEM component. The moment they note this on their digital diagnostic ticket, your coverage is dead. Instead of attempting a physical intervention, your first and safest step must be obtaining professional proof of the problem. Knowing the top signs your dishwasher needs professional diagnostics is crucial because it allows you to call for official service at the exact moment a mechanical failure occurs, rather than waiting until the unit is completely destroyed and beyond the scope of your policy.
Why does your dishwasher warranty leave you holding the bill for labor?
This is the shocking detail that catches most consumers off guard. A standard manufacturer’s warranty typically covers replacement parts for twelve months, but the labor required to install those parts is often only covered for a fraction of that time—or not at all. If your circulation pump fails ten months after purchase, the manufacturer might gladly ship you a free hundred-dollar motor, but you will still have to pay a local technician three hundred dollars to install it. Fully understanding why your dishwasher warranty might not cover labor ahead of time prevents this financial sticker shock. To make matters worse, if the diagnostic technician discovers that the failure was caused by external environmental factors—like hard water scaling, a clogged household drain line, or pest damage—the entire claim will be summarily denied, leaving you to pay both the diagnostic fee and the repair costs out of pocket.

How Professional Documentation Beats the Adjuster
When you file a claim, the warranty company is actively looking for a reason to deny it. They will often blame “user error” or “lack of maintenance” for a seized pump or a failed control board. Your only shield in this scenario is a detailed, official diagnostic report. When a certified specialist inspects your machine, their digital log serves as an indisputable record. Leveraging professional diagnostics is the ultimate leverage to force a stubborn insurer to pay up. If you understand understanding appliance diagnostics improving your warranty claims, you can guide the service conversation, ensuring the technician writes down the precise engineering failure rather than a vague description that the warranty adjuster can easily exploit. If you are currently dealing with a faulty unit and want to ensure you get every penny you are owed, you should study troubleshooting dishwasher problems expert diagnostics repair tips to learn how to speak the same language as the repair tech. Have you ever fallen into this warranty denial trap? Let me know in the comments below, and let’s discuss how we can fight back against these sneaky corporate policies.
That hard-earned diagnostic victory is sweet, but it is only half the battle. If you want to keep your kitchen quiet and protect your wallet from future breakdowns, you have to transition from reactive troubleshooting to a disciplined, proactive maintenance routine. Over years of working on high-end dishwashers, I have learned that the difference between a machine that lasts five years and one that purrs for fifteen comes down to the exact tools you use and how frequently you use them. I do not rely on generic grocery-store cleaning tablets that promise a quick fix; instead, I use a systematic approach that addresses the root causes of mechanical wear and tear.
The Diagnostic Toolkit Every Homeowner Needs
You do not need a garage full of heavy machinery to keep your dishwasher running like a dream. In fact, my personal diagnostic kit fits entirely into a small canvas bag. The absolute centerpiece of this kit is a digital multimeter. Many people are intimidated by electrical testers, but mastering the only multimeter settings you need for appliance repair takes less than ten minutes and completely eliminates the guesswork when testing components like heating elements, door switches, or drain pumps. Along with a basic multimeter, I always keep a specialized set of Torx screwdrivers, a flexible inspection mirror, and a simple, long-reach wire brush to clear stubborn debris from hidden spaces.
How do I maintain my dishwasher over time?
To truly extend the lifespan of your appliance, you must establish a strict monthly maintenance calendar. Do not wait for a foul smell or a pooling leak to tell you there is a problem. Start by manually clearing the hidden debris trap behind your bottom spray arm mount to ensure unrestricted water flow. Next, inspect the rubber door gasket for signs of cracking or mold accumulation. While many DIY blogs recommend pouring vinegar directly into the tub, this can degrade internal components; understanding the vinegar mistake that turns your rubber door seals to mush is critical to preserving your unit’s watertight integrity over the long haul. Instead, stick to hot water, mild biodegradable detergents, or a targeted steam cleaner to keep the seals supple.

Where Appliance Tech is Going Next
As we look to the future, the DIY landscape is shifting rapidly. We are moving away from purely mechanical troubleshooting and entering an era of integrated smart diagnostics. According to technical documentation from IEEE, the next generation of smart appliances will utilize advanced vibration sensors and machine-learning algorithms to predict component failures weeks before they actually happen. While this technology will make it easier to pinpoint issues, it also means you must be proactive in managing your appliance’s digital health, such as keeping up with firmware updates. If you want to take control of your kitchen’s noise level and performance today, I highly recommend checking out my guide on the best diy tools for kitchen appliance maintenance. Grab a basic multimeter, inspect your spray arms this weekend, and stop letting minor mechanical vibrations disrupt your peace and quiet.
Securing a quiet, reliable kitchen is not just about choosing the right brand; it is about outsmarting the system and staying ahead of mechanical wear. After years of diagnosing noisy pumps and fighting denied claims, I have realized that navigating appliance ownership requires a blend of physical maintenance and strategic preparation.
The Hardest Lessons I Learned Fighting for Appliance Warranty Coverage
Through trial, error, and several flooded kitchen floors, I discovered that the system is rarely designed with the homeowner’s convenience in mind. Here is the unvarnished truth about keeping your machine covered and quiet:
- The paper trail is your only real shield: A verbal description of a grinding noise means nothing to an insurance adjuster. Always take clear audio recordings and secure a formal diagnostic sheet before the warranty expires.
- DIY repairs can be a trap: While replacing a simple part on your own seems harmless, using unapproved components is a quick way to void your contract. Understanding why third-party parts might kill your service contract is essential before turning a wrench.
- Maintenance is a legal defense: When a manufacturer claims your pump clogged due to “user neglect,” showing a clean, well-maintained filter area is your best rebuttal. Proving you know the difference between standard wear and a factory defect can turn a denied claim into a free replacement.
The Diagnostic Tools I Keep in My Personal Toolkit
You do not need to be a professional technician to troubleshoot your dishwasher like one. Over the years, I have narrowed my diagnostic gear down to a few highly reliable items that save both time and money. First, a high-quality digital multimeter is non-negotiable for identifying electrical failures before buying replacement boards. Additionally, I rely on a flexible inspection mirror to peer beneath the tub and check the motor housing without pulling the whole unit out of the cabinetry. For physical clogs, having a long-reach wire brush and understanding how to access the hidden debris trap behind your bottom spray arm mount will resolve most drainage and spraying issues without a service call. Finally, always keep a copy of the original wiring schematic—usually tucked behind the bottom kickplate—to decode error sequences quickly.
Take Control of Your Kitchen Peace Today
You do not have to live with a roaring, rattling kitchen machine or fear the financial headache of a sudden breakdown. By combining a proactive maintenance routine with an understanding of how to navigate protection policies, you can keep your home peaceful and your budget intact. Take a close look at your unit this weekend, check those spray arms for free movement, and make sure you know exactly when to trust a warranty for dishwasher repairs versus when to handle the fix yourself. Have you ever had a warranty claim denied for a noisy dishwasher, or did you manage to fix the rattle yourself? Let me know your experiences in the comments below!