

The silence was deafening. I had a sink full of lasagna-caked plates and a dishwasher that wouldn’t even give me a courtesy beep. My first thought? ‘Great, there goes five hundred bucks.’ I spent three hours checking the circuit breaker and fruitlessly poking at the touch buttons like a desperate elevator passenger. I almost called a tech right then, but I decided to pull the door panel off instead. That’s when I met the thermal fuse—a tiny, unassuming piece of plastic that acts as your appliance’s last line of defense. If your machine is totally unresponsive, there’s a massive chance this little guy has simply given up its life to protect your home from a fire. I’m going to show you how to find out if that’s the case without spending a dime on a service call. Have you ever stood in your kitchen, staring at a dead appliance, wondering if it’s finally time to give up and buy a new one? Let me know in the comments because I have been there more times than I care to admit.
Your Dishwasher Might Just Be Sleeping
I used to think that when a dishwasher went dark, it meant the motor had exploded or the ‘brain’ had fried. I actually spent nearly two hundred dollars on a new control board once, only to realize the issue was a ten-dollar fuse. Talk about an expensive lesson. This is why learning the specific way to test a thermal fuse for continuity is the very first thing you should do before you even think about ordering parts. The thermal fuse is a safety device; it’s designed to blow if the machine gets too hot. Think of it like a sacrificial lamb for your kitchen’s safety. According to the National Fire Protection Association (NFPA), electrical failures or malfunctions are a leading cause of home fires, which is why these fuses are so sensitive. If yours has tripped, your machine is effectively ‘dead’ until it’s replaced. However, sometimes the fuse fails because of age or a loose wire, not a catastrophic meltdown. You need to know which one it is before you start looking for top signs your dishwasher needs professional diagnostics or throwing the whole unit in the trash.
Can a Regular Person Really Handle Electrical Components?
I get the skepticism. Dealing with wires feels like a recipe for a shock, but testing for continuity is actually a ‘cold’ test—meaning the power is completely off. Early in my DIY journey, I was terrified of anything with a wire until I realized that a multimeter is basically just a high-tech version of a flashlight battery test. I learned the hard way that ignoring the basics leads to disaster; I once had a situation where why your warranty claim was denied due to lack of maintenance became my reality because I hadn’t even checked if the filters were clean before the fuse blew. We’re going to avoid those rookie mistakes today. You don’t need a pro kit or a background in physics. You just need a basic multimeter and the willingness to unscrew a few bolts. If you can change the batteries in a remote, you can test a fuse. Let’s get into how we actually prove this little part is the culprit so you can get back to your life.
Tear Down the Door Without Losing Your Mind
Before you can even see the thermal fuse, you have to get past the outer shell. Most modern dishwashers hide their ‘brain’ behind the inner door panel. I remember the first time I did this; I was so convinced I’d break the plastic clips that I sweat through my t-shirt. I actually ended up dropping a tiny Torx screw right into the door latch mechanism, and I spent the next forty-five minutes fishing it out with a magnetic wand. Don’t be like me—grab a small bowl to hold your hardware. You’ll usually find about six to ten screws around the perimeter of the inner door. Once those are out, the panel pulls away, and you’ll see a mess of wires and the main control board.
Safety First Means No Juice
I cannot stress this enough: unplug the machine or flip the breaker. You might be tempted to keep the power on to see if ‘something lights up,’ but that is a fast track to a nasty shock or a fried board. If you’re unsure if the outlet even has juice, you can try using a voltmeter to check your power cord connection safely before you dive into the guts of the machine. Once the power is dead, you’re looking for a small, usually white or clear plastic cylinder with two wires plugged into it. This is your target. 
The Moment of Truth with a Multimeter
This is where the magic happens. A thermal fuse is binary—it either works or it doesn’t. There is no in-between. To find out, you need to set your multimeter to the continuity setting (the one that looks like a little sound wave). When you touch the two probes together, the meter should beep. That beep is the sound of victory—it means electricity can flow.
The Zero-Sum Game of Continuity
Pull the two wires off the thermal fuse. Don’t worry about which is which; they aren’t polarized. Touch one probe to each metal terminal on the fuse. If the meter beeps, your fuse is perfectly fine, and you need to keep looking at other culprits, perhaps by how to test your dishwashers float switch with a pencil to see if a stuck float is the reason your machine won’t start. If the meter stays silent? That fuse is blown. It’s a clean break in the electrical ‘bridge,’ and no amount of wishing will make it work again. This is the most common reason for a ‘dead’ unit, and testing a thermal fuse for continuity without a pro kit is the only way to be 100% sure before you buy a replacement.
Why Fuses Sacrifice Themselves
I once helped a neighbor who had replaced his fuse three times in a month. He was furious, blaming ‘cheap parts.’ When we finally looked closer, we realized his filters were so clogged with old grease that the heating element was red-lining just to get the water warm, which kept tripping the safety. This is a classic case of why your warranty claim was denied due to lack of maintenance. If your fuse is blown, ask yourself why. Was it just old age, or is your machine struggling to breathe? If you find the fuse is dead, you’ve just saved yourself a $150 service fee for a part that costs less than a fancy sandwich.
While finding that blown thermal fuse feels like a massive win, we need to address the elephant in the kitchen: the assumption that a single part replacement solves the underlying issue. In my years of tinkering, I’ve seen homeowners get trapped in a cycle of ‘part-swapping’ without ever addressing the root cause. Everyone tells you to just check for a beep with your multimeter, but I’ve found that the real experts look at the system, not just the component. A fuse rarely dies of natural causes; it’s usually murdered by a clogged filter or a failing heating element. Have you ever fallen into this trap of fixing the same part twice? Let me know in the comments because it’s a frustrating—and expensive—loop to be stuck in.
Stop Assuming Your Warranty is a Safety Net
The most common mistake I see is the belief that ‘coverage’ equals ‘invincibility.’ Many people dive into a repair thinking they can always fall back on their service plan if things go south. However, modern fine print is brutal. For example, did you know about the clause in your service plan that voids coverage for hard water? If your fuse blew because hard water scale caused your motor to overheat, the manufacturer might deny your claim entirely. This is where understanding appliance diagnostics improving your warranty claims becomes vital. You need to prove the failure was a defect, not a result of your local water table. A study by Consumer Reports once noted that nearly 30% of appliance repairs could have been avoided with basic maintenance, and warranty companies use those statistics to justify rejections. If you aren’t documenting your maintenance, you’re essentially handing them a reason to say no.
Can Software Really Break a Physical Pump?
In the old days, a dishwasher was a series of mechanical switches. Today, it’s a computer that happens to spray water. I’ve seen people tear their entire machine apart looking for a mechanical clog when the real culprit was a glitched sensor or outdated code. This is exactly why firmware updates are essential for new smart dishwashers. A bug in the software can tell the heater to stay on too long, which—you guessed it—blows that thermal fuse you just replaced. Before you start buying more hardware, check if your machine needs a digital tune-up. It’s the hidden nuance of the modern kitchen: sometimes the fix isn’t a screwdriver; it’s a Wi-Fi reset. 
Don’t Make This One Fatal Move During a Claim
Here is the ‘oops’ factor that ruins more DIY saves than anything else: moving the unit. It sounds crazy, but there is often the clause that voids your coverage if you move the appliance. If a tech arrives and sees the unit pulled out of the cabinetry or sitting in the middle of the kitchen floor, they can claim that any subsequent leaks or electrical issues were caused by your ‘unauthorized relocation.’ Always perform your diagnostics with the machine in its designated spot if you plan on eventually calling in the pros. If you do find yourself at odds with a technician’s report, don’t just roll over; learn how to appeal a rejected extended warranty claim to fight back. Knowing how appliance diagnostics can save your warranty benefits is the difference between a ten-dollar fuse and a thousand-dollar headache. Don’t let a lack of strategy turn a simple repair into a total loss.
I’ve realized that the difference between a frustrating Saturday and a quick fix usually comes down to having the right gear in your closet—and I’m not talking about a thousand-dollar toolbox. People often laugh when I pull out a wet/dry vac in the kitchen, but learning how to clear a blocked impeller with a shop vacuum is a genuine life hack for anyone tired of wet socks. It is the most effective way to remove shards of glass, tiny bone fragments, or stubborn popcorn kernels that a standard drain cycle simply cannot move. When you use suction instead of just poking at the pump, you avoid damaging the delicate plastic seals that keep your kitchen floor dry. If you’re serious about moving beyond basic troubleshooting dishwasher problems expert diagnostics repair tips, stop relying on just a screwdriver and start using the tools that actually solve the physical obstructions that plague modern high-efficiency pumps.
Unlock the Hidden Tech Menu Before You Buy Parts
Most modern machines possess a literal ‘cheat sheet’ tucked inside the bottom kickplate or inside the door assembly. This document is a goldmine; it explains how to access the secret diagnostic mode hidden on your touch control panel. In my experience, entering this mode is like giving your dishwasher a truth serum. It will flash codes that pinpoint exactly where the voltage is dropping or which sensor is lying about the water level. As noted in the Service Engineering Manual for Whirlpool-built Dishwashers, these diagnostic routines are the only way to verify sensor integrity without a laboratory-grade multimeter setup. It’s the closest thing we have to a ‘check engine’ light for our dishes, and it can save you from replacing a perfectly good control board. 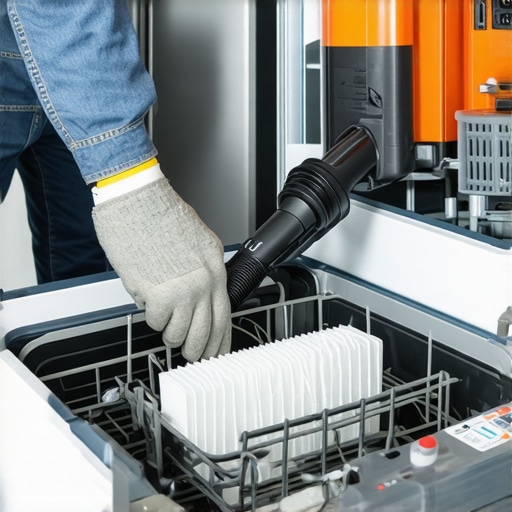
How do I keep my dishwasher alive for another decade?
Long-term results aren’t about massive overhauls; they’re about the ‘little and often’ tasks that prevent the big components from red-lining. I make it a habit to check the drainage setup every few months because external factors are often the hidden killers. I’ve seen countless DIYers fail because they didn’t know the red flag your service tech looks for in your drain line—usually a sagging hose that causes stagnant, dirty water to backflow into the tub. Additionally, taking five minutes for the proper way to clean spray-arm nozzles using a paperclip ensures your motor isn’t straining against backpressure from calcium buildup. Also, always double-check your external plumbing connections; you’d be surprised why your warranty claim got denied because of your garbage disposal connection being slightly clogged, which has nothing to do with the dishwasher’s quality but will burn out the pump regardless. Keeping these small pathways clear is the secret to scaling the lifespan of your appliance.
The Future of Your Kitchen is Self-Healing
Looking ahead, the DIY landscape is shifting rapidly. We are moving away from manual testing and toward integrated software solutions that do the heavy lifting for us. I predict that within five years, your dishwasher won’t just tell you it’s broken—it will autonomously run a high-heat descaling cycle or recalibrate its own sensors based on local water hardness detected in the lines. We are already seeing the beginning of this transition with how smart diagnostic apps are changing home appliance repair, allowing us to beam error logs directly to a technician before they even load their van. The era of ‘guessing’ which part to buy is coming to an end. My advice? Go find your tech sheet tonight—it’s usually tucked behind that metal toe kick panel—and familiarize yourself with those service codes before you actually need them. It turns a potential crisis into a simple thirty-second reset.
Lessons I Learned the Hard Way Under My Sink
After years of wrestling with kitchen appliances, I’ve realized that 90% of the battle is psychological. We often assume these machines are more complex than they actually are, but they are essentially just a series of circuits and seals. First, never ignore the ‘why’ behind a failure; if you don’t check for top signs your dishwasher needs professional diagnostics, you might find yourself replacing the same part repeatedly. Second, your multimeter is your most honest ally—it doesn’t care about your frustration, only whether there is an electrical path. Third, the tech manual is your literal bible. It’s usually hidden behind the kickplate, and it contains the specific error codes that take the guesswork out of repairs. Finally, remember that documentation is your only defense against a rejected claim; knowing how to appeal a rejected extended warranty claim is vital when the manufacturer tries to blame the failure on regular wear and tear.
The Only Gear You Really Need to Skip the Pro Call
You don’t need a van full of specialized tools to be an effective home technician. I recommend starting with a high-quality digital multimeter; it is the only reliable way to perform the specific way to test a thermal fuse for continuity. Next, a set of Torx drivers (specifically T-15 and T-20) is non-negotiable because most modern door panels won’t budge for a standard Phillips head. Finally, I always keep a bag of citric acid in my pantry; learning how to remove cloudiness from glasses using citric acid is a low-cost way to maintain your machine’s performance without using harsh industrial chemicals. These three items have saved me more money on service calls than I’d like to admit. #IMAGE_PLACE_HOLDER_E#
Reclaim Control of Your Modern Kitchen
Fixing your own appliance is about more than just saving a few hundred bucks—it’s about the empowerment that comes from knowing exactly how your home works. The next time your dishwasher refuses to start, don’t reach for your credit card to browse for new units. Instead, reach for your tools and start troubleshooting dishwasher problems expert diagnostics repair tips to see if it’s a simple fix. You have the skills to keep your kitchen running efficiently. Have you ever found the ‘secret’ tech sheet tucked inside your machine? Let me know where yours was hidden in the comments below!