

There I was, nursing a lukewarm coffee at 6:00 AM, when I felt that unmistakable, sickening squish under my heel. It wasn’t a spill. It was the wood grain of my kitchen flooring starting to buckle like a miniature mountain range. My dishwasher looked fine, sounded fine, and even claimed it was cleaning, but underneath the kickplate, a silent disaster was unfolding. I’d ignored the tiny signs for weeks because I thought I was saving money by avoiding a service call. Big mistake. Today, I am going to show you exactly how to catch that failing sump gasket before it turns your kitchen into a swamp and voids your peace of mind. [image placeholder]
Stop the Silent Leak Under Your Dishwasher Base
Most people think a dishwasher leak looks like a massive flood in the middle of the floor. It rarely does. Usually, it’s a slow, rhythmic drip from the sump gasket—the critical rubber seal that keeps water inside the motor assembly. By the time you actually see water creeping out from under the cabinetry, it has likely already soaked into your subfloor. I learned the hard way that understanding appliance diagnostics isn’t just for professionals; it is a vital survival skill for every homeowner. A failing gasket often starts with a faint, musty odor or the reason your dishwasher stays stuck on the last minute, as the sensors struggle to account for the minute loss of pressure. According to the Insurance Information Institute, water damage and freezing are the second most frequent homeowners insurance claims, with the average claim costing over $12,500. You do not want to be part of that statistic. Early in my DIY journey, I made the amateur mistake of trying to just tighten the mounting bolts without inspecting the rubber itself. I ended up crushing a dry-rotted gasket, making the leak ten times worse. If you notice a white, crusty residue around the plastic housing, you are already in the danger zone. You might need to learn how to deep clean a dishwasher sump without pulling the machine just to get a clear look at the seal’s condition.
Is this repair actually worth the DIY effort?
You might be asking yourself if it is better to just wait until the machine stops entirely. Trust me, that is a recipe for a full kitchen remodel you didn’t budget for. Identifying a failing sump gasket early is the difference between a twenty-dollar part and a five-thousand-dollar floor. It is about being proactive and knowing your machine’s quirks. Have you ever noticed a tiny, mysterious damp spot near your dishwasher that seems to disappear before you can grab a towel? If you have, tell me in the comments—you might be closer to a disaster than you think. This guide will walk you through the diagnostic steps to confirm the leak before it spreads.
Strip Away the Kickplate and Get Your Eyes on the Floor
The first thing you need to do is stop guessing. Most people wait until they see a puddle in the middle of the kitchen, but by then, the subfloor has already started absorbing moisture like a sponge. Grab a screwdriver and remove the bottom kickplate—the metal or plastic panel at the very base of the machine. I remember the first time I did this on my old unit; I expected a dry, dusty cavity, but instead, I found a slow, rhythmic drip that had clearly been happening for months. You need a high-lumen flashlight to peer toward the center of the machine where the motor assembly sits. If the area looks damp or you see ‘sweat’ on the plastic housing, you are likely dealing with a breached seal. To be certain, you should be troubleshooting dishwasher problems by running a short rinse cycle while you are down there on your hands and knees watching for the specific point of failure. 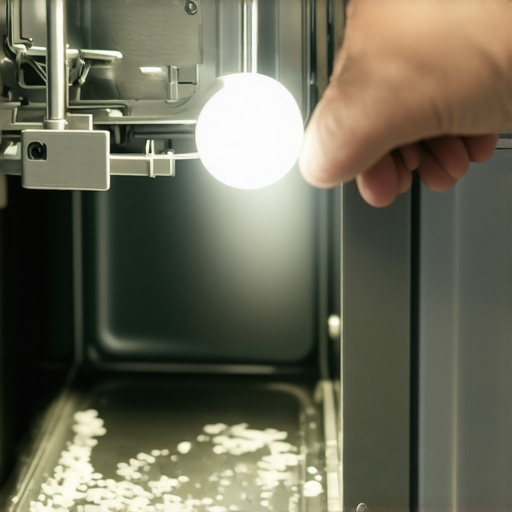
Look for the Tell-Tale White Chalky Residue
If the leak is so slow that it evaporates before hitting the floor, it will leave behind a ‘signature.’ Look for white, crusty deposits around the edge of the circular sump assembly. This is essentially a trail of breadcrumbs left by hard water minerals. It is a massive red flag. Many homeowners mistake this for simple detergent spillover, but it is actually a sign that the rubber gasket has lost its elasticity. If you ignore this, you might eventually find that your warranty claim was denied due to lack of maintenance, as most providers expect you to address visible mineral buildup before it causes a catastrophic motor failure. I once tried to scrape this crust off thinking I was ‘cleaning’ the machine, only to realize I was just removing the only thing semi-plugging the leak.
Don’t Just Tighten the Bolts
The instinct to grab a socket wrench and crank down on the mounting bolts is strong, but it is often a trap. If the gasket is old and brittle, over-tightening the bolts will simply crack the rubber or, worse, warp the plastic sump housing itself. Think of it like an old garden hose washer; if it is dried out, squeezing it harder just makes it snap. Instead, you need to determine if the seal can be reseated or if you need to be replacing a cracked sump housing entirely. A good trick is to use a dry paper towel and wrap it around the base of the motor. Run the machine for five minutes. If the towel comes back spotted with blue or green (from your detergent), the gasket is definitely the culprit.
Use the Secret Diagnostic Mode to Check Pressure
Modern machines are smarter than we give them credit for. Before you start tearing the motor out, you should access the secret diagnostic mode hidden on your touch control panel. This often allows you to force the pump to run at maximum RPMs, which increases the internal pressure and forces a small ‘seep’ to become a visible ‘leak.’ This is how the pros do it. When I finally mastered the diagnostic button sequence, I stopped guessing and started fixing. If you see water spraying from a micro-crack during this high-pressure test, you’ve found your ghost. This is also a great time to verify you don’t have other issues, like how to spot a failing drain pipe, which can often mimic a sump leak by dripping water down the back of the motor assembly.
Why Your Kitchen Vinegar is Secretly Eating Your Gaskets
Everyone in the DIY world tells you that a cup of white vinegar is the ‘green’ way to clean everything. I used to be that guy. But here is the nuance most ‘life hack’ videos miss: the acetic acid in vinegar is a solvent. If you use it too frequently, it doesn’t just clear scale; it degrades the very rubber seals we just talked about. I’ve seen gaskets that looked like they had been chewed on by a mouse, only to find out the homeowner was using distilled vinegar every week to fight hard water. According to the Association of Home Appliance Manufacturers (AHAM), improper use of cleaning agents is a leading cause of premature seal failure in modern, high-efficiency units. If you’re trying to keep things clean, stick to citric acid-based cleaners that are specifically designed for the job to keep your rubber components supple. 
Is your hard water actually a warranty deal-breaker?
This is the part where things get messy with your service plan. You might think that because you pay for an extended warranty, you are covered for everything. Wrong. Read the fine print, and you will often find the clause in your service plan that voids coverage for hard water damage. If a technician pulls out a pump and finds it calcified, they can—and will—deny the claim based on ‘lack of routine maintenance.’ This is why understanding appliance diagnostics and improving your warranty claims is more about record-keeping than it is about wrenches. You need to prove you’ve been running the right descalers at the right intervals. Have you ever had a tech tell you they couldn’t help because of ‘user error’ or water quality? Have you ever fallen into this trap? Let me know in the comments.
The hidden connection between your sink and your denied claim
Here is the ultimate ‘oops’ factor I learned while shadowing a master tech: the garbage disposal. Most people don’t realize their dishwasher drains through the disposal. If you didn’t knock out the ‘plug’ on a new disposal installation, or if it’s clogged with debris, it creates back-pressure that can blow out the sump seal. If the tech sees a backed-up sink, they might report that your warranty claim was denied because of your garbage disposal, not the machine itself. They’ll call it a ‘pre-existing plumbing issue’ that the appliance manufacturer isn’t responsible for. If you find yourself in this situation, don’t just give up; you can learn how to appeal a rejected extended warranty claim by providing proof that the machine’s internal components failed independently of the external plumbing. It’s a battle of documentation, and being a smart owner means knowing exactly how to fight back.Once you’ve cleared the external plumbing hurdles, the real long-term game begins with the tools you keep in your utility drawer. I’ve found that the difference between a homeowner who replaces their dishwasher every five years and one who keeps it for fifteen is a small, specialized toolkit. You don’t need a van full of parts; you just need to know how to use a basic multimeter. I personally use my digital meter to verify the specific way to test a thermal fuse for continuity whenever my dishes come out damp. According to the AHAM technical committee’s field service data, a heating element should maintain a resistance between 10 and 30 ohms; anything outside that range is a ghost load waiting to trip your breaker. This level of precision is exactly how appliance diagnostics can save your warranty benefits, because you can provide the technician with hard data rather than vague complaints.
Why a Cheap Multimeter Beats a $100 Service Call
Another tool I swear by is a wet/dry shop vacuum. When my machine stopped draining last winter, I didn’t reach for a plunger or harmful chemicals. I used the vacuum to create a suction seal over the drain line to pull out debris from the pump. It’s how to clear a blocked impeller with a shop vacuum without having to disassemble the entire motor housing. This method is far more effective at removing fruit pits or glass shards that a standard cleaning cycle misses. 
Predictive Repair is the Future of Your Kitchen
Looking ahead, I suspect we are moving toward a world where your machine will ping your phone to tell you the sump gasket is nearing the end of its life cycle. We are already seeing how smart diagnostic apps are changing home appliance repair, shifting us from reactive fixes to proactive maintenance. Modern high-end units are starting to include vibration sensors that help how-to-identify-a-dying-circulation-motor-by-its-pitch before the bearings actually seize.
How can I keep my dishwasher running like new for years?
Long-term results come down to managing heat and water chemistry. Most people don’t realize that last minute timing errors are often the machine struggling with water temperature. I make it a habit to check the secret tech menu that calibrates your water sensors once a year to ensure the thermistor is reading accurately. If you stay on top of these small digital tune-ups and understand the impact of powder vs pods on your machines lifespan, you won’t just be fixing a machine—you’ll be mastering it. My challenge to you: tonight, before you start your next load, grab a flashlight and check for that white signature of a leak under your kickplate. Catching it now is the ultimate win for your wallet.
Hard Lessons from My Soaked Kitchen Floor
Looking back at that $12,500 average insurance claim statistic, I realized my biggest mistake wasn’t the repair itself—it was the delay. I’ve gathered a few ‘lightbulb moments’ from years of tinkering that you won’t find in a standard manual. First, trust your nose; if your kitchen has a faint, musty scent that lingers even after the trash is taken out, your sump gasket is likely weeping. Second, I learned that the red flag your service tech looks for in your drain line is often the very first thing you should check to prevent the backpressure that destroys gaskets. Finally, I realized that the real reason your detergent cup wont open during the cycle can sometimes be related to the same warping that causes leaks—heat and moisture are your machine’s best friends and worst enemies.
The Gear That Keeps My Kitchen Bone Dry
Every successful DIY diagnostic starts with the right tools. I don’t go anywhere without my digital multimeter; knowing testing a thermal fuse for continuity without a pro kit is the only way to verify if your machine’s electrical components are surviving the humidity. I also recommend keeping a spare door seal in your utility drawer. Learning how to replace a frayed door seal for under twenty dollars is a foundational skill that keeps you from calling a pro for a five-minute fix. To keep the internal components supple, I’ve moved away from vinegar entirely and now use citric acid-based descalers which is a great way how to lower your appliance operating costs by 15 percent while protecting your rubber parts. [image placeholder]
Stop Being Afraid of the Kickplate
You do not need a degree in mechanical engineering to keep your kitchen safe from water damage. You just need to be more observant than the average homeowner. Every time you dive into appliance diagnostics, you are not just saving money; you are building the confidence to maintain your home on your own terms. Don’t wait for a floorboard to buckle or a ‘service required’ light to flash. Pull that kickplate tonight, shine your light, and take control of your machine’s lifespan. Have you ever found a mysterious damp spot under your dishwasher only to have it ‘disappear’ the next day? Let me know in the comments below—I’d love to help you track down that ghost leak.