

The first time I noticed those chalky white spots on my favorite wine glasses, I did what most people do: I blamed the detergent. I bought the expensive pods, the fancy rinse aids, and I even ran a deep clean cycle twice. Nothing worked. It felt like my dishwasher was gasping for air, or in this case, gasping for soft water. I was about five minutes away from browsing for a new machine when I finally decided to dig into the guts of the appliance. That’s when I found it—the internal water softener valve was completely choked with mineral scale. It turns out, the real reason your glasses come out cloudy usually isn’t the soap at all. It’s a mechanical failure hidden right under your nose.
Stop Ignoring the White Film on Your Glasses
If you live in an area with hard water, your dishwasher is fighting a losing battle every single day. Most modern European-style dishwashers and some high-end North American models have a built-in water softening system. It uses salt to neutralize minerals. But here is the kicker: the very valve designed to manage that softening process can get clogged by the same minerals it is supposed to fight. When that happens, your dishes look terrible, and your internal components start to degrade. Today, I am going to show you how to identify this specific clog and clear it without calling a pro or accidentally voiding your warranty. We are going to get that water moving again so your machine can actually do the job you paid it for.
Is This Really Something I Can Fix Myself?
I get it. The idea of opening up the internal components of an appliance feels like a recipe for disaster. I used to feel the same way until I realized troubleshooting dishwasher problems is mostly about patience and having the right sequence of steps. Early in my DIY journey, I made the classic mistake of using too much force. I tried to pry a stuck valve open with a metal pick and ended up cracking the housing. I learned the hard way that chemical breakdown and gentle flushing are your best friends here. You do not need a degree in mechanical engineering; you just need to know which part is sticking. According to the U.S. Geological Survey, hard water is found in more than 85% of American homes, meaning this isn’t a personal failure—it is a geographic reality. If you ignore it, you will face the real cost of skipping your monthly descaling cycle, which usually ends in a dead pump or a useless softener unit. Have you ever noticed your dishwasher salt reservoir staying full for months on end even though you are running cycles? That is a huge red flag that your valve has stopped working entirely. Let’s dive into the tools you will need to get this sorted.
Think of your dishwasher’s internal water softener as the machine’s kidneys. It filters out the harsh minerals—calcium and magnesium—before they ever reach your plates. When the valve that controls this flow gets stuck, it is usually because those same minerals have calcified into a stubborn, rock-hard barrier. I remember my first attempt at fixing this; I was so convinced it was a software glitch that I spent an hour resetting the control board. In reality, the fix was mechanical, and I could have saved that hour if I had just looked at the salt reservoir first.
Find the Blockage Without Breaking a Sweat
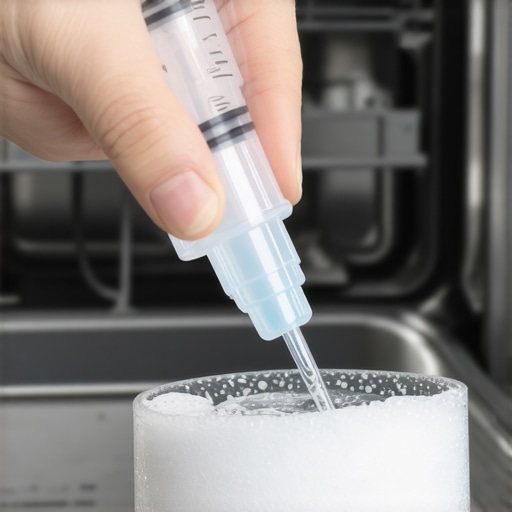
The easiest way to confirm a valve issue is to watch your salt levels. If you haven’t added salt in three months but the reservoir is still full, your valve is likely seized. To get started, you do not need a toolbox full of heavy equipment. Most of the time, you can perform how to deep clean a dishwasher sump without pulling the machine to gain better visibility. Open the salt cap, and if the water inside looks murky or like a thick brine slushy, it is time to flush it out. I once tried to clear a stubborn clog by blowing into the intake tube—big mistake. I ended up with a mouth full of stagnant, salty water. Now, I use a large plastic syringe or a turkey baster to force clean, warm water through the opening. It is cleaner, safer, and far more effective.
Flush the Scale Before it Hardens
If the manual flush doesn’t work, you need to introduce a mild acid to break down the calcium. While some people reach for industrial cleaners, I’ve found that the secret to de-scaling your machine using lemon juice can be a lifesaver for these sensitive internal components. Pour a concentrated mixture of citric acid or lemon juice directly into the softener unit and let it sit for at least four hours. This chemical breakdown is your best friend. It softens the scale enough so that the next time the valve tries to actuate, it can actually move. If you are worried about your coverage, remember that how appliance diagnostics can save your warranty benefits is all about using approved methods like these rather than taking a hammer to the unit.
Verify the Repair Before Your Next Load
Once you have flushed the system, you need to ensure the water is actually flowing again. This is where troubleshooting dishwasher problems becomes a bit of a waiting game. Run a short rinse cycle and check the water level in the salt reservoir afterward. If the level has dropped or shifted, the valve has opened. If you’re dealing with a high-end model, how smart diagnostic apps are changing home appliance repair allows you to see real-time flow sensor data on your phone. If you still see no movement, you might need to check the solenoid itself. You can do this by how to test your inlet valve with a simple voltmeter to ensure the part is receiving electrical power. If the power is there but the valve won’t budge, the part is dead and needs a swap. Skipping this check is one of the real cost of skipping your monthly descaling cycle, as a seized valve can eventually lead to pump burnout.
Don’t Fall for the Digital Reset Myth
The most common advice you’ll find on forums is to ‘power cycle’ the machine. While this clears software glitches, it’s a temporary band-aid for a mechanical mineral clog. In my years of tinkering, I’ve found that homeowners often mistake a temporary fix for a permanent cure. They reset the board, the machine runs one cycle without an error code, and they think they’re in the clear. But if you aren’t understanding appliance diagnostics at a deeper level, that mineral buildup is still there, quietly eating away at your seals. I once spent three weeks resetting my own unit every few days before the motor finally burned out from the strain of pumping through a partially blocked valve. Don’t be that guy.
What if the salt light stays on despite a full tank?
This is where things get technical. Most people assume the sensor is broken. In reality, the ‘float’ inside the reservoir—the little piece of plastic that tells the machine the salt level—is often stuck due to crystallization. It’s not a sensor failure; it’s a physical obstruction. This is a prime example of why you should look for the top signs your dishwasher needs professional diagnostics versus a simple cleaning. If you just start replacing sensors, you’re treating the symptom, not the disease. The Water Quality Association notes that even minor scale buildup can reduce appliance efficiency by up to 30%, which is why ‘guessing’ with parts is such a costly mistake.

The Trap of the Cheap Replacement Part
When you finally identify a dead valve, the temptation to buy a $15 knock-off from an overseas warehouse is huge. Here is the nuance: the truth about non-manufacturer repair parts is that they rarely have the same solenoid resistance as the original. If the resistance is off by even a few ohms, your control board might ‘see’ the part as a short circuit and shut down the whole system to protect itself. This leads to a nightmare where you think the board is dead when the part was just wrong. I always recommend that before you pull the trigger on a purchase, you spend five minutes how to test your inlet valve with a simple voltmeter. If you get an infinite reading, the coil is physically broken, and no amount of lemon juice will save it.
Keep Your Coverage Intact While You Tinker
The biggest ‘Oops’ factor in DIY repair isn’t the repair itself—it’s the paperwork. Many people don’t realize that how appliance diagnostics can save your warranty benefits involves documenting what you found before you started. If you break a clip while opening the housing and then later try to claim a motor failure, the technician will spot that damage and deny the claim instantly. There is even a specific clause that voids your coverage if you move the appliance incorrectly. If you must pull the machine out to reach the softener unit, do it slowly and check for leaks immediately after. Have you ever fallen into this trap of fixing one thing only to break another? Let me know in the comments below, because we’ve all been there.
While we are all sharing our DIY battle stories in the comments, I want to make sure you have the right gear to win those fights. I have spent a lot of time talking about the why behind mineral clogs, but let us talk about the specific how of long-term maintenance. If you are serious about avoiding top signs your dishwasher needs professional diagnostics, you need a decent digital multimeter. I personally use the Fluke 117 because it features a low-impedance mode that filters out ghost voltages. When you are how to test your inlet valve with a simple voltmeter, a cheap, unshielded meter can give you a fluctuating reading that makes a healthy component look dead. Spending the extra money on a tool that provides a rock-solid continuity beep is the best insurance policy for your kitchen. 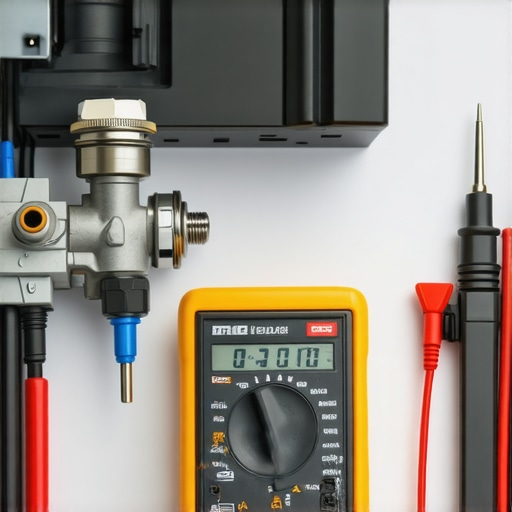
How can I keep my water softener from clogging again?
The secret is not a one-time heroic effort; it is a monthly ritual. I have found that the real cost of skipping your monthly descaling cycle is often the slow death of the rubber seals inside the softener unit. Every thirty days, I run a Sanitize cycle with food-grade citric acid. Why citric acid? As specifically noted in the Bosch Service Manual for the SHX Dishwasher Series, white vinegar is often too dilute to tackle heavy scale and can prematurely dry out certain internal gaskets with frequent use. Citric acid is a powerhouse against calcium but is remarkably kind to the machine internal chemistry. If you are already saving water without sacrificing clean plates every night, this simple five-minute prep ensures your efficiency stays high.
The Future of Self-Fixing Kitchens
Looking forward, the way we handle troubleshooting dishwasher problems is about to shift. We are already seeing how smart diagnostic apps are changing home appliance repair by providing real-time data on flow rates and sensor health. Within a few years, I predict machines will use internal AI to adjust salt levels automatically based on live water hardness sensors, basically descaling themselves before you ever see a spot on a glass. Until that tech hits your kitchen, though, you are the primary defense. Understanding appliance diagnostics at this level is not just about saving a buck; it is about taking control of your home longevity.
Protect Your Paperwork While You Work
My final tip for the long haul is to keep a repair diary on your phone. Snap a photo of the serial tag and the specific components you cleaned. This is crucial when figuring out when to trust a warranty for dishwasher repairs. If a different part fails later, having proof of your diligent maintenance can help you successfully appeal a denied claim. I strongly suggest you try testing your heating element for continuity next; it is the logical next step in mastering your machine health.
The Hard Lessons That Saved My Kitchen Floor
I have spent hundreds of hours elbow-deep in dishwasher sumps, and the most important thing I have learned is that force is almost never the answer. When I first started, I thought a stubborn mineral clog needed a heavy hand, but I quickly realized that chemical patience wins every time. Scaling is not just a surface-level annoyance; it is a mechanical threat. I discovered that the real cost of skipping your monthly descaling cycle is the slow, silent death of the valve solenoids that you cannot see without a teardown. Another major lightbulb moment was realizing that data is your best tool. Instead of guessing which part failed, understanding appliance diagnostics allowed me to identify a seized motor before it even threw an error code. Finally, never underestimate the power of documentation. Keeping a log of when you cleaned the sensors or replaced a seal is the best way to handle when to trust a warranty for dishwasher repairs if a major component finally gives out.
The Only Gear You Actually Need in Your Kitchen Arsenal
If you are serious about keeping your machine alive, you need more than just a screwdriver. I personally rely on a few specific items to keep my kitchen running. First, a high-quality digital multimeter is non-negotiable. Knowing how to test your inlet valve with a simple voltmeter can save you from buying a $100 part you do not actually need. Second, I always keep a bag of food-grade citric acid on hand; it is far more effective at breaking down calcium than standard store-bought pods. Third, I highly recommend a large 60ml plastic syringe for precision flushing of the salt reservoir. Lastly, always seek out the specific Service Manual (not just the user guide) for your model. This is where you find the secret button combinations for diagnostic modes that top signs your dishwasher needs professional diagnostics specialists use to find hidden faults.
Ready to Hear That Satisfying Rinse?
Taking the first step into DIY appliance repair can be intimidating, but there is nothing quite like the sound of a perfectly functioning dishwasher after you have cleared a major blockage yourself. You do not have to be a professional to succeed at troubleshooting dishwasher problems. It just takes a little bit of curiosity and the willingness to look past the surface of the machine. By mastering these internal components, you are not just saving money; you are extending the life of one of the most hardworking appliances in your home. Have you ever found a surprising clog inside your machine that the manual didn’t mention? Let me know in the comments!