

I remember standing in my kitchen, water pooling around my socks, staring at a stack of supposedly clean plates that still looked like they had been through a mud bath. The dishwasher was making this rhythmic, soul-crushing thump-thump-thump that sounded like a drum kit caught in a dryer. My first instinct was to panic and call a repairman, already dreading the massive bill for a new motor. But I learned my lesson the hard way years ago: I once paid a technician a $150 service fee just for him to reach in and tighten a plastic nut by hand. It was one of those moments where you just want to sink into the floor. Today, I am going to save you from that same embarrassment and show you how a wobbly spray arm is often the secret culprit behind poor cleaning and scary noises. We are going to get your machine back to peak performance before your coffee even finishes brewing.
The Rhythmic Thumping That Means You Are Wasting Money
If you hear a steady knocking every time the wash cycle starts, stop what you are doing. It is rarely a mechanical failure and usually just physics catching up with your hardware. Over time, the vibration of hundreds of cycles can cause the mounting nut to back off its threads. When that happens, the spray arm does not just spin; it wobbles, occasionally striking the dish rack or the heating element. I used to ignore these sounds, thinking a spoon had just fallen through the rack, but ignoring a loose or cracked spray arm can lead to catastrophic leaks if the arm detaches entirely. According to Consumer Reports, simple maintenance issues like obstructed or loose spray arms account for nearly 20% of reported dishwasher performance problems. Have you noticed your bottom rack dishes coming out grimy while the top is perfectly clean?
Wait, Can a Loose Nut Really Ruin My Whole Wash?
It sounds too simple to be true, but it is all about water pressure. When that nut is loose, water escapes from the base of the arm rather than being forced through the nozzles. It is like trying to water your garden with a hose that is barely screwed onto the spigot—you get a sad dribble instead of a powerful stream. Before you start digging for professional-grade diagnostic codes or assuming the worst, we need to check the physical hardware. I have made the mistake of over-diagnosing before, even once considering using plumbing snake tools on my appliance when all I really needed was a quick turn of a plastic fastener. Let us dive into the simple troubleshooting dishwasher problems you can handle yourself right now.Start by pulling out the bottom rack completely. You need full access to the floor of the machine. Most people try to work around the tines, but that is a recipe for a scraped knuckle and a lot of swearing. Once the rack is out of the way, grab the spray arm and give it a gentle tug upward. It should have a tiny bit of play—maybe a millimeter—but it should not feel like a loose tooth. If it wobbles side-to-side more than a fraction, that mounting nut is the prime suspect. I recall one Tuesday night where I was convinced my circulation pump was dying because of a high-pitched whistle. I had already started looking at how to get professional-grade diagnostic codes from your interface, thinking the electronics were fried. I pulled the arm off and found a single, tiny cherry pit wedged right in the threads. It was just enough to prevent the arm from sitting flush, creating a gap where water whistled through like a teakettle. It taught me that troubleshooting dishwasher problems usually starts with the smallest, most annoying physical obstructions.
The Two Minute Tightening Technique
To fix this, rotate the mounting nut clockwise. In most modern machines, this is a hand-tighten situation. Do not reach for the channel locks yet! These parts are almost always high-density plastic, and if you crank down on them with a metal wrench, you will strip the threads instantly. If the nut keeps spinning without tightening, you might be dealing with a stripped hub. This is often where identifying counterfeit replacement parts online becomes crucial, as cheap knock-off arms often use inferior plastics that warp under the heat of a heavy cycle. While you have the arm in your hand, turn it over and look at the tiny exit holes. Even a perfectly tightened arm will not clean your plates if the water cannot get out. This is where how a toothpick can save your spray arm from clogs becomes your best friend. I use a flashlight to peer into the center hub. If you see seeds or calcium deposits, use the toothpick method for unclogging spray nozzles to flick them out. It is oddly satisfying to see a chunk of lime scale pop out, knowing you just saved a service call fee. 
Run the Paper Plate Test for Guaranteed Coverage
Once you have tightened everything back down, you need to verify the fix. You could run a full hour-long cycle, but who has time for that? Instead, use the paper plate test for spray arm coverage. Place a few cheap paper plates in the corners of the rack and run a quick rinse. If they come out soaked, your arm is oscillating perfectly and hitting all the right angles. If they are bone dry, you still have a pressure issue, likely related to how to clean the tiny holes in your spray arms more thoroughly. This simple diagnostic prevents you from loading a full set of dirty dishes only to find out the repair did not take. It is about working smarter, not harder, especially when your appliance diagnostics can save your warranty benefits by proving you have maintained the unit properly. If you find the arm is still loose even after tightening, check the mounting bracket for cracks. Sometimes the heat from the drying cycle makes these parts brittle, and a hairline fracture can mimic a loose nut. This is a common physical failure that no software update can fix.While tightening that spray arm nut is a great start, there is a deeper level to this that most DIY guides completely ignore. Everyone tells you to trust the little digital screen on your door, but I have learned that understanding appliance diagnostics requires a healthy dose of skepticism. The industry secret? Those error codes are often just best guesses from a sensor that might be caked in grease. I once had a client who almost replaced a $300 control board because of a drain error code. In reality, she was just using too much detergent, creating a suds lock that tricked the sensor into thinking the pump had failed. Before you yank out the electronics, try a soft reset by cutting the power for ten minutes. It forces the logic board to re-evaluate the physical environment without the bias of previous errors.
Can You Actually Void Your Warranty by Fixing It Yourself?
The oops factor here is huge. People assume that opening the door or tightening a part automatically kills their coverage. This is not strictly true, but why service techs deny warranty claims often comes down to the evidence you leave behind. If you use the wrong tools and chew up those plastic fasteners we talked about earlier, you have just handed the manufacturer a get out of jail free card. According to a study by the Association of Home Appliance Manufacturers (AHAM), improper maintenance and the use of non-certified detergents are among the leading causes of premature part failure, and technicians are trained to spot these signs instantly. 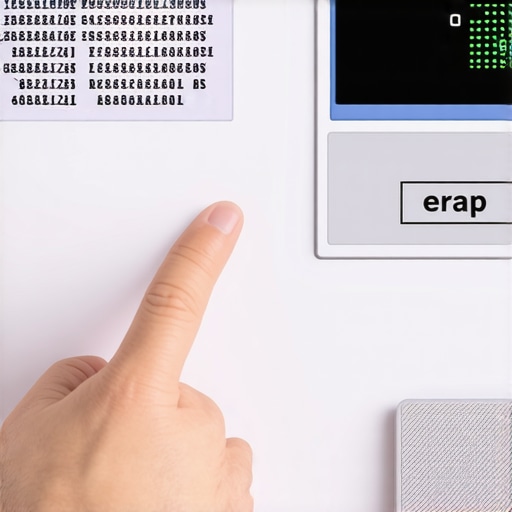
Why Eco-Mode is the Silent Killer of Plastic Parts
Another common myth is that Eco Mode is always better for your machine. It is better for your electric bill, sure, but why your dishwasher doesn’t get hot enough on eco mode is a real problem for the spray arms. Low-heat cycles do not fully dissolve fats, which then solidify inside the tiny holes of your spray arm. You think you are being green, but you are actually building up a gunk-clog that will eventually burn out your motor. I always recommend running a heavy-duty, high-heat cycle at least once a week to flush the system. It is the difference between a machine that lasts five years and one that lasts fifteen. When it comes to the legal side, you need to be smart. Knowing how appliance diagnostics can save your warranty benefits is about documenting everything. If you find a loose part, take a photo before you touch it. If you are facing a major bill just after the one-year mark, look into how to get a manufacturer to pay for an out-of-warranty repair. Sometimes, a persistent but polite goodwill request works better than any wrench. You might even find the hidden loophole that gets your denied claim reversed if you can prove the failure was a known manufacturing defect rather than user error. Have you ever fallen into this trap where a simple fix led to a bigger headache? Let me know in the comments.
I don’t just guess with a screwdriver and a prayer anymore. After years of trial and error, I have learned that the right data is worth more than ten hours of manual labor. If you are serious about DIY appliance care, you need to move beyond just tightening plastic nuts. I personally keep a digital multimeter in my kitchen junk drawer right next to the spatulas. Knowing how to test your inlet valve with a simple voltmeter or testing a solenoid valve for continuity in 3 steps can tell you instantly if a part is electrically dead or just stuck. It is the difference between a five-minute fix and a week-long headache waiting for the wrong part to arrive in the mail.
How do I maintain these components over the long haul?
Consistency beats intensity every single time when it comes to appliance longevity. I treat my dishwasher like a car; you wouldn’t drive 50,000 miles without an oil change, so don’t expect your machine to handle 500 loads without a deep clean. I have seen firsthand the real cost of skipping your monthly descaling cycle: it leads to calcified pumps that eventually burn out. Beyond just cleaning, I make it a habit to inspect the rubber. Replacing a brittle door seal before it floods your floor is a $30 proactive move that saves $3,000 in hardwood repairs. I also check the float switch regularly; you can actually learn how to test your float switch with a simple magnet to ensure your machine doesn’t overfill and cause a disaster while you are at work.
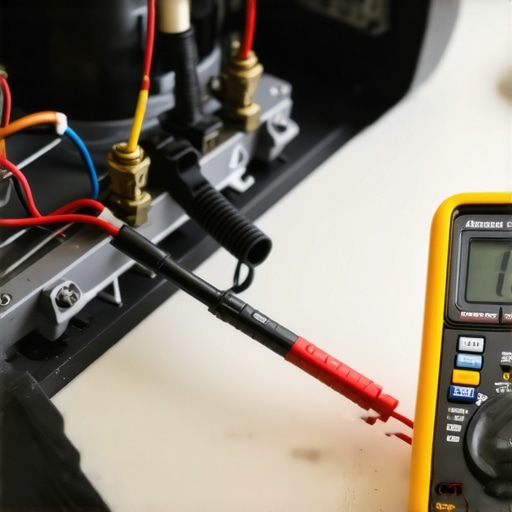
If you really want to get technical, I highly recommend looking for the technical sheet that manufacturers hide. According to the Whirlpool Technical Training manual (W10322495), most modern units include a hidden diagnostic mode that performs a component-by-component check. You can usually find how to find a service manual hidden inside the unit by removing the bottom kickplate—it is often tucked into a plastic sleeve there. This is my secret weapon. Instead of guessing why the water isn’t getting hot, I let the machine’s own logic board tell me. If the board is silent but the symptoms persist, those are the top signs your dishwasher needs professional diagnostics before you start throwing expensive parts at a ghost in the machine.
Looking ahead, I see a major shift in how we handle these repairs. We are moving toward a world of ‘predictive maintenance’ where your dishwasher will likely send a notification to your phone before the spray arm even starts to wobble. Smart sensors are already getting better at detecting the energy drain of keeping your rinse aid reservoir empty or noticing a slight drop in water pressure from a developing clog. While we wait for that tech to become standard, your best defense is still a sharp eye and a few basic tools. I want you to try one advanced move this weekend: grab a small magnet and verify your float switch is moving freely. It is a thirty-second check that guarantees your kitchen stays dry. If you encounter any weirdness during the test, remember that understanding appliance diagnostics is your best path to a stress-free kitchen.
The Expensive Mistake I’ll Never Make Twice
If I could go back to that day I paid $150 for a five-second fix, I would tell myself that the most complex problems often have the simplest physical roots. One of the biggest ‘lightbulb moments’ for me was realizing that modern machines are incredibly communicative if you know where to look. I used to think a blinking light meant a total system failure, but usually, it is just the machine’s way of asking for a little maintenance. I also learned that you must keep the photo evidence you need for every warranty claim because, without it, it is your word against the technician’s. Finally, I stopped buying the cheapest bulk detergent I could find. It sounds like a marketing ploy, but why service techs deny warranty claims for soap choice is actually based on how much gunk those bargain pods leave behind in your internal hoses.
The Only Troubleshooting Tools You Actually Need
You do not need a professional-grade workshop to keep your dishes sparkling. My emergency kit consists of just three things. First, a reliable multimeter—this is non-negotiable for checking the electrical health of your components. Second, always keep the manufacturer’s technical sheet; if you followed my advice on how to find a service manual hidden inside the unit, you already have the holy grail of repair data. Lastly, I recommend a simple magnet for testing the float switch. These tools help you decide when to trust a warranty for dishwasher repairs versus when a five-minute DIY fix will do the trick. I trust these methods because they move the needle from guessing to knowing exactly what is wrong.
Take Control of Your Kitchen Again
There is a specific kind of pride that comes with hearing your dishwasher hum perfectly after you have spent twenty minutes under the sink. You do not have to be a master plumber to master your own domain. By taking the lead on troubleshooting dishwasher problems, you are not just saving money—you are extending the life of your home’s most hardworking assistant. Do not let a little thumping sound or a strange error code intimidate you; you have the tools, the data, and the technique to fix it. If the problem seems bigger than a loose arm, do not sweat it—you might just need to learn how to fix a dishwasher that won’t drain in five minutes before you call for backup. Have you ever successfully fixed a major appliance issue with a simple twist or a cleaning trick? Let me know in the comments below!