

I remember the exact moment I realized my eco-friendly habits were backfiring. I was pulling a stack of supposedly clean porcelain bowls from the top rack, only to find they were covered in a fine, gritty texture that looked like beach sand. My dishwasher was barely two years old. I had been religiously hitting that Eco button, thinking I was a hero for the planet and my monthly utility bill. Instead, I was just serving my guests appetizers on plates with a side of yesterday’s dried lasagna residue. It was embarrassing. It was frustrating. And honestly, it was a little gross. I spent a week hand-washing everything before I realized I didn’t need a new machine; I just needed to understand how the one I had actually functioned. Today, I am going to show you exactly how to keep your eco-friendly settings without having to re-wash your cereal bowls by hand.
Stop Letting Your Eco Mode Ruin Your Cereal Bowls
The reality of modern dishwashing is a bit of a trade-off. We want to save water, but your machine needs three things to work correctly: heat, time, and chemistry. When you select the eco-cycle, you are almost always sacrificing the heat part of that equation. I learned the hard way that the impact of cold water on detergent breakdown is a real problem; most enzymes in modern pods need at least 120°F to actually dissolve and eat through food proteins. According to the Natural Resources Defense Council, while high-efficiency dishwashers can save up to 5,000 gallons of water per year, those longer cycle times are a mandatory trade-off for the lower water pressure and temperatures. If the water isn’t hot enough to suspend the food particles, they just circulate and land right back on your glassware. This is called redeposition. If you are trying to find ways of saving water without sacrificing clean plates, you have to be a bit more strategic about how you load that top rack.
Is the Eco-Cycle actually a total scam?
You might be thinking about giving up on the green settings entirely and just going back to the Heavy Duty mode for every load. I almost did. Early on, I made the common mistake of thinking I just needed more detergent to get things clean. That was a disaster. I ended up with a sudsy mess on my kitchen floor and still had gritty bowls. I eventually realized why your dishwasher doesn’t get hot enough on eco-mode and how to compensate for it with a simple hot water purge at the kitchen sink. Often, the grit is simply a sign that the water pressure in the upper levels isn’t sufficient to clear the debris. Sometimes, the problem is as simple as cleaning the tiny holes in your spray arms to ensure the water is actually reaching the top rack. I once spent an hour diagnosing a potential motor issue only to find a single lemon seed was blocking the top sprayer. [image_placeholder] Believe me, the toothpick method for unclogging spray nozzles is a lifesaver every homeowner should have in their back pocket. Have you ever opened your dishwasher only to find that your clean bowls are more textured than when they went in? I would love to hear if you have faced this specific grit struggle too!
Flush the Lines Before You Start the Cycle
One of the biggest reasons eco-mode fails is that the first few gallons of water entering the machine are actually cold. Think about your shower; you don’t jump in immediately. You wait for the hot water to travel from the heater. Your dishwasher is no different. If you don’t run the kitchen tap until it’s steaming hot, your machine starts the pre-wash with lukewarm water. This is exactly why your dishwasher doesn’t get hot enough on eco-mode to melt the fats off your plates. I started doing a thirty-second “hot water purge” at the sink before hitting start, and the difference in grease removal was night and day.
The Quick Trick to Prime the System
By clearing the cold water out of the pipes, you ensure that the very first spray hitting those cereal bowls is at the optimal temperature for the detergent’s enzymes. Remember, the impact of cold water on detergent breakdown is the primary cause of that gritty residue. Without heat, the soap just clumps and sticks to the porcelain. If you are still seeing film, you might need to look at the truth about dishwasher cleaning tablets and whether they are actually dissolving in your specific water hardness.
Find the Gunk Hiding in the Debris Trap
I used to think the “self-cleaning” label on my dishwasher meant I never had to touch the guts of the machine. I was wrong. Last summer, my machine started smelling like a swamp and leaving “sand” on everything. I pulled out the bottom rack and discovered the debris trap most owners miss during monthly cleaning. Inside, I found a decomposed sticker from a peach and a tiny plastic bread tag that had been dancing around in the pump for months. It was preventing the water from draining fully, meaning the machine was rinsing my “clean” dishes with old, dirty water.
Clean Your Filter Like a Professional
Twist out the cylindrical filter at the bottom and rinse it under hot water with a soft brush. If you see white buildup, it’s calcium. A quick soak in vinegar can clear those pores. While you are down there, check the sump area for any shards of glass or pits. If the water isn’t flowing, the pressure drops, and that’s when your top rack suffers most. This lack of flow is a primary reason why high-efficiency dishwashers take longer to finish; they are struggling to move water through a restricted system.
Rescue Your Spray Arms from Mineral Clogs
If the grit is only on the top rack, your upper spray arm is likely the culprit. Hard water minerals and tiny food particles—like strawberry seeds—love to lodge themselves in the exit holes. When this happens, the arm loses its “jet” power and stops spinning. I’ve found that how to clean the tiny holes in your spray arms is the most underrated maintenance task. 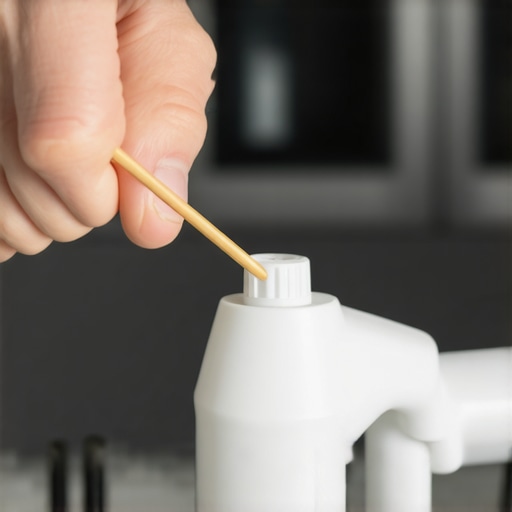 I once spent forty dollars on a “specialty” cleaner only to realize a single toothpick could have solved the problem in two minutes. Knowing how a toothpick can save your spray arm from clogs will save you a massive headache and potentially a service call.
Manual Recalibration for Smarter Cleaning
Modern machines use a turbidity sensor to “see” how dirty the water is. If this sensor is covered in a film of grease, it thinks the water is clean and cuts the cycle short. You can actually perform a reset by learning how to recalibrate your turbosity sensor manually. This ensures the computer is getting an accurate reading of the soil levels, preventing it from switching to “eco” mode prematurely when your dishes are still covered in lasagna.
Beyond just cleaning the sensors, we need to talk about the ‘chemistry’ of the machine that most people ignore. Most homeowners assume that if they buy the most expensive ‘platinum’ pods, they’re doing their machine a favor. In reality, I’ve seen more service technicians roll their eyes at a box of pods than almost anything else. If you have soft water, those highly concentrated pods create an over-sudsing nightmare that can actually pit your stainless steel interior and cause long-term pump damage. In my experience, the industry’s push for convenience has blinded us to the fact that why service techs deny warranty claims for soap choice is a very real danger. They look for that tell-tale film or ‘etching’ on your glasses as proof you’ve been using too much detergent for your specific water type, which can be used to void a repair coverage claim. Furthermore, while we all want to be green, I’ve found that running a heavy cycle once a week is a necessary ‘maintenance’ move. I often explain why the heavy cycle is actually better for your machines health because the sustained high heat is the only thing that can fully melt the fatty deposits building up in your drain lines.
Can you actually bypass a technician by reading your own error codes?
Absolutely. Most people wait for a complete breakdown before looking at the top signs your dishwasher needs professional diagnostics. But here is the secret: your dishwasher has a hidden ‘service mode’ that provides a much deeper look than just a blinking light on the front panel. Learning how to get professional-grade diagnostic codes from your interface can tell you if the problem is a failing motor or just a simple sensor communication error before you spend $150 on a service call. 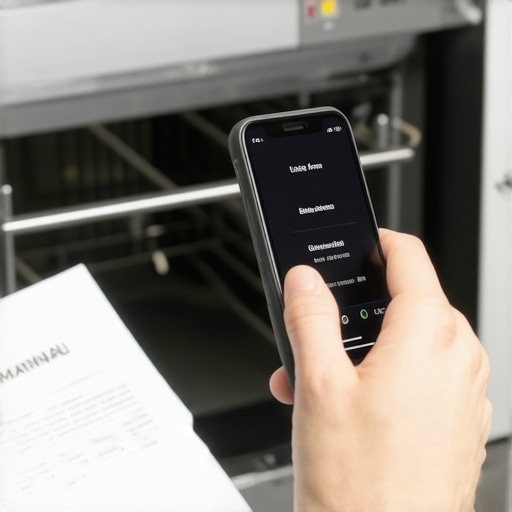 According to the Association of Home Appliance Manufacturers (AHAM), modern sensors are calibrated to incredibly specific tolerances; even a microscopic film of grease on a sensor can trigger a false ‘leak’ or ‘water-level’ error. This is why I always suggest you learn how to recalibrate your turbosity sensor manually before assuming you need a new control board. Often, the machine just needs a baseline reset to understand what ‘clean water’ looks like again.
Shield Your Wallet from the Warranty Trap
The biggest mistake I see is homeowners not documenting their own troubleshooting steps. If you want to ensure a smooth repair process, you need to be proactive about understanding appliance diagnostics improving your warranty claims. A technician might try to blame ‘user error’ or ‘environmental factors’ (like hard water) to avoid a manufacturer payout. If you can show them you’ve already checked the fundamentals—like how to test the continuity of a heating element with a basic multimeter—they realize they are dealing with an informed owner. This often leads to a more honest diagnostic and a higher chance of your claim being approved. It turns a defensive conversation into a collaborative one. Have you ever fallen into the ‘user error’ trap during a warranty claim? Let me know in the comments.
Build Your Own Kitchen Diagnostic Kit
I keep a small ’emergency’ kit tucked behind my cleaning supplies. It’s not just for show; it’s saved me thousands of dollars in labor fees over the years. The centerpiece is a simple digital multimeter. Most people think these are for aerospace engineers, but if you can read a digital clock, you can learn how to use a multimeter to find a shorted wire. I personally use it to verify components before I even think about ordering a replacement part. For instance, knowing how to test the continuity of a heating element allows me to confirm if the heater is actually dead or if the control board is just failing to send power. This level of troubleshooting dishwasher problems expert diagnostics repair tips keeps you from being a ‘part-swapper’ who throws money at a problem until it disappears.
How do I keep my dishwasher running like new for a decade?
Consistency is the secret sauce. You don’t need to be a mechanic to perform the simple move that doubles the life of your dishwasher racks, which is basically just checking for exposed metal and sealing it before rust spreads. Every six months, I also perform a deep system flush. Beyond just cleaning the filter, I take the time to learn how to find a service manual hidden inside the unit. These manuals, often tucked in a plastic sleeve behind the bottom kickplate, contain the specific resistance values for your motor and valves. According to the Repair Association, a leading advocate for the Right to Repair movement, having access to this manufacturer-specific technical data is the single most critical factor in successful DIY appliance longevity.

Predict Your Next Breakdown Before It Happens
The next level of maintenance involves using technology to see what your eyes can’t. This is why your service technician carries a thermal camera; it can spot a hot spot on a wire or a slow leak from a pump before a flood happens. While you might not need a professional-grade FLIR camera, being aware of heat signatures near your control board can prevent a fire. I predict that within the next five years, we will see dishwashers with built-in vibration analysis that alerts your phone when a bearing is starting to wear out. Until then, we rely on manual checks like testing a solenoid valve for continuity in 3 steps to ensure the water intake is crisp and controlled. If you notice your cycle times creeping up, don’t just ignore it; learn how to recalibrate your turbosity sensor manually to ensure your machine isn’t working harder than it needs to. I challenge you to go under your machine’s kickplate this weekend, find that hidden manual, and see what your machine is trying to tell you!
What Service Techs Whisper Behind Your Back
I spent years thinking I was a model dishwasher owner until a local repairman finally told me the truth over a cup of coffee. First, that Eco button is fantastic for your utility bill but a nightmare for your machine’s internals if used exclusively. You have to balance the savings with mechanical reality. I have learned that why the heavy cycle is actually better for your machines health isn’t just a theory; it is the only way to melt the fatty sludge that eco-mode leaves behind in the drain lines. Also, pay attention to the subtle warnings. I used to ignore minor rattles until I realized the fine print about normal wear and tear on appliances can often be used by manufacturers to deny your claims later. Being proactive and documenting your maintenance is the only way to win the long game.
My Go-To Kit for Kitchen Sanity
You do not need a van full of expensive tools to keep your machine running like a pro. I rely on three simple things. First, a standard toothpick—it is the world’s cheapest and most effective repair tool for those clogged spray arms. Second, a digital multimeter. It is the difference between guessing and knowing exactly which part is broken. If you are stuck staring at a dead interface, knowing how to identify a faulty control board without a technician will save you hundreds in labor fees. Finally, I always suggest homeowners read up on how appliance diagnostics can save your warranty benefits. Keeping your own log of error codes and basic tests makes you the authority in the room when the professional eventually arrives.
Stop Fearing the Beep
It is incredibly empowering to hear your dishwasher beep and not feel a sudden wave of financial dread. Once you understand the rhythm and the common failure points of your machine, the mystery disappears. Whether you are dealing with a minor grit issue on your cereal bowls or deciding when to trust a warranty for dishwasher repairs, you are now in the driver’s seat. Your dishwasher is a tool designed to serve you, not a source of constant stress. Go ahead, pop that kickplate off this weekend, find your hidden manual, and see what your machine is trying to tell you. Have you ever successfully fixed a dishwasher issue with just a simple cleaning or a toothpick? I would love to hear your victory stories in the comments below!