

Ever had that sinking feeling when you open your dishwasher and see your bottom rack dangling dangerously, ready to crash down? One minute, you’re loading up with clean dishes, and the next, half of them are tumbling onto the floor because the rack decided to betray you. I’ve been there. That frustrating moment when the rack suddenly collapses, and you think, “Did I break it?” But mostly, I just wish I’d known how to stop it from happening again.
Why Your Dishwasher’s Bottom Rack Keeps Falling Out and How to Fix It
This issue isn’t just about annoying noise or broken parts; it’s about maintaining that crucial stability which keeps your dishes safe and your sanity intact. Many homeowners overlook this seemingly small problem until a major breakage occurs. Trust me, I’ve made the mistake of ignoring that loose roller or worn-out track—only to pay the price with a costly repair or a mountain of broken plates.
Is This a Common Problem or Just Bad Luck?
The truth is, a lot of dishwasher issues stem from simple wear and tear. Over time, the rollers, wheels, and tracks that support the bottom rack wear out or get clogged with gunk. If you’re like me, early on I thought, “Maybe it’s just a bad batch of racks,” not realizing that simple maintenance could have extended their life significantly. An overlooked cause is grime buildup, which can make the rollers stick or cause misalignment, leading the rack to suddenly drop.
Early on, I also fell into the trap of assuming that replacing the entire rack was the only solution. That mistake cost me more time and money than necessary. It turns out, many fixes are straightforward, and I’ve learned some tips from experts and my own experience, which I’ll share below. If you’re tired of your dishwasher’s rack falling out mid-cycle, don’t worry—it’s a fixable problem. Sometimes, a quick cleanup or a minor part replacement is all you need. Curious if your issue is a worn roller or something more? You might want to learn how appliance diagnostics can help [here](https://applianceoutletpro.com/top-signs-your-dishwasher-needs-professional-diagnostics).
But before we dive into the solution, let’s address some common doubts. Have you ever wondered whether fixing your rack yourself is worth the hassle compared to calling a pro? Well, I’ll tell you, with a few tools and some guidance, you can save money—and avoid the wait. Ready to regain control of your dishwasher? Let’s get to it!
Assess the Damage by Removing the Rack
Start by carefully pulling out the bottom rack to examine the rollers, wheels, and tracks underneath. Think of this like checking the wheels on a skateboard—if they’re worn or stuck, the whole thing doesn’t roll smoothly. In my experience, removing the rack reveals buildup or damage that isn’t obvious at first glance. Wear gloves and be gentle to avoid further damage.
Inspect and Clean the Rollers and Tracks
Once removed, examine each roller and wheel for cracks, excessive wear, or grime. Use a soft brush or cloth to scrub away gunk, especially if you’ve noticed buildup causing sticking, which can misalign the track. Applying a little white vinegar mixed with water makes cleaning easier—just avoid harsh chemicals that can degrade rubber parts. Cleaning prevents the rollers from sticking, which often leads to sagging or dropping. When I did this, the roller wheels were so gunked up, even a plastic pick helped dislodge stubborn debris, improving the track’s alignment.
Replace Worn or Damaged Rollers
If any rollers are cracked or significantly worn, replace them. You can typically find replacement parts online or from the manufacturer. To do this, remove the old roller pin and slide out the worn roller, then insert the new one, making sure it rotates freely and aligns properly. Think of this step like replacing a worn-out bike chain link—simple but essential for smooth operation. I learned this after my rack kept falling again despite cleaning, and replacing a single roller fixed the issue permanently. For detailed steps, check out how to replace a cracked sump seal yourself in this guide.
Test the Rack for Stability
After cleaning and replacing damaged rollers, insert the rack back into the dishwasher. Gently push and pull to verify stability—if it wobbles excessively, the alignment might still be off. Adjust the track guides if necessary, sliding them to correct positions. Imagine it like tuning a guitar string—small adjustments make a big difference. During my last fix, I had to loosen and reposition one guide slightly; once aligned, the rack glided smoothly without dropping.
Use Proper Maintenance to Prevent Future Issues
Regularly inspect and clean your dishwasher rollers and tracks, especially if you notice resistance or wobbling before the rack drops. A quick monthly wipe with vinegar solution keeps grime at bay and prolongs part lifespan. If, despite your efforts, the rack continues to fall, consider consulting a professional to diagnose potential underlying issues like misaligned tracks or faulty support springs. Keep in mind, some dishwasher types have specific quirks—reading the user manual or manufacturer’s troubleshooting tips can save you time. For troubleshooting more complex problems, visit troubleshooting dishwasher problems expert diagnostics repair tips.
By following these concrete steps—assessing, cleaning, replacing worn parts, and proper maintenance—you can significantly extend the life of your dishwasher’s bottom rack and keep your dishes safely on board. Remember, taking proactive care saves you money and prevents frustrating breakdowns down the line.
Many homeowners approach dishwasher repairs with a simplistic mindset, often believing that pressing the ‘reset’ button or replacing a single part will fix the issue. However, this superficial view overlooks the complex nuances behind diagnostics and warranty claims. As an experienced technician, I’ve observed that most people misunderstand how to interpret diagnostic results, leading to costly misjudgments and missed opportunities for proper repairs.
Why Relying Solely on Diagnostic Codes Can Lead You Astray
It’s a common myth that error codes provided by modern dishwashers are foolproof indicators of the exact problem. While these codes are useful starting points, they rarely tell the full story. Many codes are generic, pointing to a system’s inability to perform a function rather than pinpointing a specific faulty part. For instance, a ‘Drain Error’ might suggest a clogged filter, a faulty pump, or even a control board failure. Jumping to conclusions based on codes alone without understanding the underlying mechanics can cause you to replace parts unnecessarily or overlook deeper issues.
Studies and expert insights show that diagnostics should be complemented with a thorough physical inspection and testing. According to a report from the Association of Home Appliance Manufacturers, over 70% of appliance failures are due to wear and environmental factors, not just electronic glitches. This means that blindly trusting diagnostic codes risks missing the actual root cause—especially since many issues are intermittent or caused by secondary damage.
Beware of Overestimating Warranty Coverage and Misusing Service Plans
A widespread misconception is that warranties cover all repairs, no matter the cause. In reality, many warranty policies exclude damage caused by hard water, improper use, or neglect. For example, using harsh detergents or ignoring regular cleaning can accelerate component failure, which voids parts of your warranty. Additionally, some consumers assume that all repairs performed by authorized technicians are warranty-covered, but this isn’t always the case, especially if the homeowner attempts DIY fixes that void the agreement. For comprehensive guidance, review your warranty details [here](https://applianceoutletpro.com/privacy-policy-2).
Imagine replacing a dishwasher’s control board only to find out that the damage resulted from mineral buildup due to neglected maintenance; then, the warranty might refuse coverage. Knowing the fine print and properly maintaining your appliance can save you from headaches and unexpected expenses.
How do You Distinguish a Genuine Equipment Fault from a False Alarm?
Advanced technicians use multimeters and thermal cameras to verify component function, rather than relying solely on system error codes. For example, testing the heating element directly with a multimeter prevents unnecessary part replacements. This meticulous approach minimizes both costs and downtime. If you’re interested in mastering DIY diagnostics, learn how to test your heating element [here](https://applianceoutletpro.com/how-to-test-your-heating-element-with-a-budget-multimeter). This precision not only improves repair success but also ensures your warranty claims are justified and well-founded.
Remember, appliances are intricate systems where multiple parts work synergistically. Embracing a nuanced understanding of diagnostics and warranty rules helps avoid common pitfalls. Do you have experiences or questions about appliance misdiagnosis or warranty disputes? Let me know in the comments!
Keeping It Working: Tools I Recommend for Effective Appliance Care
Maintaining your dishwasher and appliances over time requires more than just routine cleaning; it demands the right tools to identify issues early and perform precise repairs. From multimeters to specialty cleaning gadgets, having quality equipment streamlines diagnostics and prolongs appliance lifespan.
One tool I swear by is a digital multimeter. Not only does it help verify electrical components like heating elements and switches, but it also reduces the risk of accidental damage during repairs. I prefer a model with autoranging capability and a backlit display—these features make testing safer and more accurate, especially in tight spaces. You can learn how to test your heating element with a budget multimeter here.
Clamps and screwdrivers designed for small appliance work are also vital. Choosing insulated, magnetized screwdrivers prevents accidental shorts and keeps your parts organized. I use a set with different tip sizes to handle everything from delicate wire connectors to robust mounting screws. Never underestimate how much easier these tools make troubleshooting, reducing frustration and potential damage.
For deep cleaning, I recommend a flexible sprayer attachment that fits kitchen sinks or a spray bottle with vinegar and baking soda. This combo allows thorough cleaning of track rails and rollers without harsh chemicals—saving money and extending part life. To target hard water deposits, a white vinegar solution has proven effective; just avoid overusing it to prevent rubber degradation. Regular cleaning with these tools significantly reduces grime buildup, which is often overlooked but critical in preventing track misalignment and equipment failure.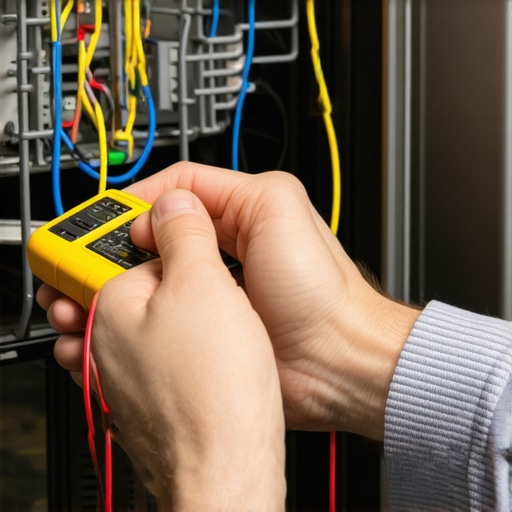
The future of appliance maintenance is trending toward smart diagnostics. Connected sensors and IoT integration will soon provide real-time alerts about wear and tear, making proactive repairs more accessible. For now, combining traditional tools with diagnostic apps provides a comprehensive approach. By regularly inspecting, cleaning, and replacing worn parts with quality tools, you’re investing in the longevity of your appliances. Remember, a small investment in the right equipment saves you costs and headaches over the long haul.
How do I maintain appliances over time?
Consistent maintenance involves scheduled inspections, utilizing diagnostic tools, and understanding your appliance’s specific needs. Regularly checking components like door seals, filters, and rollers with proper tools can prevent major breakdowns. Additionally, staying informed about the latest diagnostic techniques—such as using thermal cameras or smart sensors—will keep your repairs efficient. As appliance technology advances, embracing new tools and methods is essential to staying ahead of potential issues and ensuring your dishwasher runs smoothly for years to come. If you want to learn more about how diagnostics can help here.
3 Breakthroughs I Never Expected About Appliance Maintenance
- Perfection isn’t always achievable, but consistency is key: I used to chase the ideal fix, thinking a perfect alignment or spotless track was necessary. Over time, I learned that regular inspection and maintenance prevent most issues from escalating, saving me time and money. It’s about developing a routine that catches problems early rather than obsessing over flawless performance.
- Small adjustments can prevent big disasters: A minor repositioning of the track guide or a quick roller replacement often makes all the difference. I’ve found that patience and attention to detail during repairs not only extend the life of the rack but also restore peace of mind—knowing your appliance can perform reliably again.
- Understanding your appliance’s language saves money: Error codes and symptoms are often just the tip of the iceberg. By learning to interpret subtle signs—like wobbling, unusual noises, or water lingering—you can diagnose issues faster. This approach demystifies repairs and empowers you to make informed decisions, whether you’re DIY-ing or consulting a professional.
Tools That Make All the Difference in Dishwasher Repairs
- Quality Digital Multimeter: A versatile tool that helps verify electrical components, preventing unnecessary replacements and guiding precise repairs. I personally trust models with auto-ranging and easy-to-read displays, making troubleshooting straightforward and less intimidating.
- Magnetic Screwdriver Set: Designed for small appliance work, these screwdrivers simplify disassembly and reassembly, especially in tight spaces. Using insulated tips reduces risks of shorts, and magnetized tips help hold tiny screws securely during repairs—trust me, this saves frustration.
- Gunk-Removing Brushes and Vinegar Solutions: Regular cleaning of rollers and tracks with gentle brushes and vinegar solutions keeps grime at bay. These simple tools and hacks extend part life and keep your dishwasher running smoothly, reducing costly breakdowns over time.
- Flexible Spray Attachments: Targeted cleaning of track rails and rollers becomes effortless, helping you spot buildup or damage early. Combining these tools with routine maintenance dramatically decreases the chances of rack failure.
Step Back and Enjoy Your Dishwasher Wins
Recognizing that appliance repair is a blend of science and intuition transforms how you approach household maintenance. Each fix—even a small roller swap—boosts your confidence and prolongs your appliance’s life. Embrace the learning process, celebrate your successes, and remember that for every stubborn problem, there’s a personalized solution within reach. Taking charge of your dishwasher’s health leads to a more efficient, stress-free home.
Have you ever fixed a dishwasher component late at night, feeling proud of your DIY success? Share your experience below—I’d love to hear what worked for you!