

It was a morning like any other, except this time I noticed my once spotless dishes emerging from the dishwasher with a dull white film and stubborn spots. I had recently switched to a newer, eco-friendly soap, believing I was making a healthier, greener choice. But instead of sparkling clean plates, I was greeted by a frustrating haze—something I hadn’t experienced before. That lightbulb moment made me realize: my new soap might be causing more harm than good.
The Hidden Culprit Behind Cloudy Glasses and Streaked Plates
Switching soaps seems innocuous, right? But trust me, it’s more complicated than swapping brands. The wrong detergent can leave mineral deposits, hard water stains, or soap scum that pit the surface of your dishes and even damage your dishwasher over time. Early on, I made the mistake of assuming all dish soaps are created equal. I didn’t consider that the ingredients in some eco-friendly options could react with mineral deposits in our water supply, leading to that dreaded film.
So today, I promise to share practical insights on how your soap choices might be sabotaging your cleaning efforts and what steps you can take to fix it. We’ll walk through diagnostics you can perform yourself and when to seek professional help, ensuring your dishes come out spotless every time.
Is Your Soap Actually Worth the Hype?
I’ve seen many friends and readers fall for the same trap—believing that switching to “green” soaps automatically means better cleaning. But there’s a common mistake I made early on: ignoring the compatibility of the soap with your water type and detergent additives. Not all products are formulated to handle mineral-rich water, which can lead to residue and damage.
Research shows that improper detergent use can even void warranty coverage in some cases. For instance, hard water can cause mineral buildup that looks like soap scum but actually indicates a mismatch between your water, soap, and dishwasher settings. If you’re facing similar issues, it’s worth considering diagnostics to identify what’s really going on.
For more guidance, check out [how appliance diagnostics can improve your warranty claims](https://applianceoutletpro.com/how-appliance-diagnostics-can-save-your-warranty-benefits). That way, you’ll know when to call in a pro or perform a simple test yourself.
As we move forward, I’ll outline straightforward diagnostics you can do at home, plus signs indicating your dishwasher needs professional attention. Let’s ensure your plates get the shine they deserve—without risking damage from unsuitable soap choices or overlooked issues.
Inspect the Water Supply and Check for Blockages
Start by ensuring your water inlet valve is fully open and free of debris. A simple way is to disconnect the hose and observe water flow; if it’s weak or absent, the valve or supply line might be clogged. Remember, a restricted water flow can cause poor cleaning and build-up, similar to trying to wash clothes with a clogged faucet. Use a multimeter to test the solenoid if you suspect electrical issues—a process covered in detail here.
Test the Drain Pump and Hoses
Next, examine the drain pump for signs of failure. A grinding or humming noise can point to a worn bearing or impeller obstructions. To test, disconnect power, remove the bottom panel, and manually turn the pump’s drum; if it doesn’t rotate freely, replacement might be needed. Check for clogged or kinked drain hoses—like a squeezed straw, they restrict water flow. Clear blockages and ensure hoses are high enough to prevent backflow, mimicking the high-loop method to safeguard your warranty here.
Evaluate the Spray Arms and Nozzles
Clogged spray arms hinder water distribution, leaving dishes dirty. Remove the arms and check for debris blocking holes—use a toothpick or a small wire to clear them. Consider a spray arm cleaning routine with household vinegar to dissolve mineral deposits, but note this isn’t a magic fix and won’t replace proper diagnostics here. Keep a close eye on whether water sprays evenly after reassembly. Blockages here are akin to clogged pipes, reducing efficiency and risking damage over time.
Examine Heating and Temperature Sensors
Low temperatures can cause poor drying and cleaning. Use a budget multimeter to verify the thermal fuse and heating element continuity—details found here. Ensure the thermostat is functioning correctly; a faulty sensor may not trigger heating at all. These issues are comparable to a thermostat in a home, which controls comfort and safety. Addressing faulty sensors promptly keeps your warranty valid and prevents further damage.
Listen and Observe for Unusual Noises
Unusual sounds during operation often indicate mechanical issues, like worn bearings or misaligned motors. Record any grinding, squealing, or clicking noises—these clues help technicians diagnose more complex problems here. Silencing these noises early, similar to fixing squeaky hinges, prolongs appliance life and maintains warranty coverage. Regularly cleaning and inspecting components reduces the risk of unexpected breakdowns.
Many homeowners believe they have a clear grasp of appliance diagnostics, but in reality, missteps and misconceptions abound—especially when it comes to diagnosing dishwasher issues and securing warranty coverage. One common myth is that DIY diagnostics alone can always identify the problem accurately. While basic inspections can guide you, relying solely on them without a professional assessment might leave you misdiagnosing a complex fault, potentially voiding your warranty. As highlighted in expert guidance, comprehensive diagnostics often require specialized equipment and experience that’s hard to replicate at home.
Another pitfall is the assumption that all warranty claims are straightforward and automatically approved once a fault is identified. However, many overlook the fine print—warranty terms often exclude damages caused by hard water or improper maintenance. For instance, repeatedly using incompatible detergents can lead to mineral buildup, which many mistakenly think is a warranty-covered defect. According to industry research, such misuse not only damages the appliance but also often voids warranty claims, emphasizing the need to understand your policy thoroughly.
An advanced nuance that many miss: the signal of underlying electrical issues, such as faulty heating elements or worn-out sensors, are sometimes dismissed as minor glitches. But subtle signs like inconsistent drying or unusual noises can indicate deeper problems. For example, recording abnormal motor sounds using a smartphone decibel meter can reveal motor wear before complete failure. For detailed diagnostics, consider using specialized tools and professional techniques to prevent costly repairs.
One critical trap to avoid is neglecting the importance of proper preventative maintenance. Skipping routine checks—like inspecting spray arms or cleaning filters—can cause issues that mimic electrical failures but are actually clogged nozzles or buildup. These problems often get misdiagnosed, leading to unnecessary part replacements. Regular maintenance and professional diagnostics, as explained here, can extend the lifespan of your dishwasher and safeguard your warranty.
In my experience, many homeowners undervalue the subtler signs of malfunction—like slight increases in cycle duration or minor leaks—which, if ignored, can evolve into major repairs. That’s why my recommendation is to combine attentive monitoring with professional diagnostics when in doubt. For example, getting a pre-emptive assessment can prevent warranty denial due to improper troubleshooting or misinterpretation of fault codes. To learn more about how diagnostics can protect your investment, visit here.
Have you ever fallen into this trap? Let me know in the comments about your experiences or questions on appliance diagnostics and warranty protection.Maintaining your dishwasher’s performance over the long term requires more than just a casual glance; it demands precise tools and systematic methods that can diagnose issues early and prevent costly repairs. One of my top recommendations is investing in a high-quality digital multimeter. I personally favor models like the Fluke 117 because of their reliability and accuracy in testing electrical components such as thermostats, heating elements, and sensors. For example, testing the continuity of the heating element with a multimeter is straightforward and can save you from unnecessary part replacements—learn how to do this here. Beyond basic testing, incorporating an infrared camera into your toolkit has become a game changer. I utilize my FLIR ONE Pro to locate hidden steam leaks or hot spots that compromise your appliance’s integrity, which often go unnoticed until they cause significant damage.
How do I maintain my diagnostic tools over time?
Regular calibration of your multimeter ensures consistent readings, and storing your infrared camera in a dry, dust-free environment prolongs its lifespan. Predicting where appliance diagnostics are headed, I believe smart diagnostic devices embedded into appliances will become more prevalent. These systems will communicate directly with your smartphone, alerting you to issues before they become apparent—imagine an app that flags a sluggish drain pump or rising temperatures automatically. Until then, manually checking components remains vital, and having the right tools bolsters your confidence and effectiveness.
Creating a maintenance routine with these tools is simple. For example, set weekly checks for accessible components like the drain pump or spray arms. If you notice irregularities, utilizing your multimeter or infrared camera can provide immediate insight into whether a professional diagnosis is needed. Remember, early detection not only extends the life of your appliance but also helps preserve your warranty. If you’re unsure about the condition of critical parts, consider scheduling a professional diagnostics session. More details on how diagnostics can safeguard your warranty are available here.”}}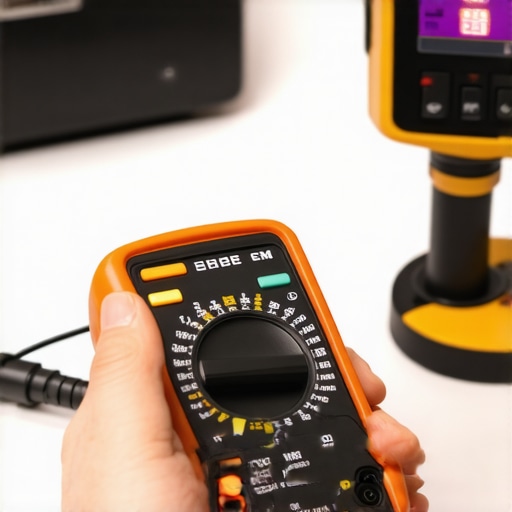 ,
,
The Hardest Lesson I Learned About diagnostics,warranty,appliance repair
One of the most eye-opening realizations I had was that even small overlooked details in dishwasher maintenance could void warranties and lead to costly repairs. For example, ignoring manufacturer guidelines on detergent compatibility or skipping routine inspections often came back to bite me. It taught me that thorough diagnostics, combined with proactive care, is the key to a long-lasting appliance and peace of mind.
My Essential Toolkit for Appliance Troubleshooting
Over time, I’ve curated a set of tools that make diagnosing dishwasher issues more manageable. A reliable digital multimeter helps me quickly verify electrical components like heating elements and sensors, preventing unnecessary part replacements. An infrared thermometer uncovers hidden hot spots affecting drying performance. And an inspection mirror allows me to peek into tight spaces without disassembling everything. Trust me, investing in these tools has transformed how confidently I approach appliance repairs.
The Future of Appliance Care Is Within Your Reach
Imagine a world where your dishwasher senses trouble before you notice it and alerts you via your smartphone. While smart diagnostics are still evolving, I believe proactive care is the best step you can take today. Regular maintenance routines, combined with diagnostic tools, empower you to catch issues early and preserve your warranty. Don’t wait for a breakdown—start practicing these habits now to enjoy a trouble-free experience in the years to come.