

I remember the moment clearly. I had just finished loading my dishwasher, dishwasher humming softly, when I noticed my service invoice was marked ‘Warranty VOID’ due to my choice of detergent. My stomach sank. It felt unfair, especially since I had followed what I thought were standard instructions. It wasn’t until later that I realized I was caught in a common trap—believing that all detergents are created equal and that using a popular brand wouldn’t jeopardize my warranty.
The Hidden Power of Choosing the Right Detergent
If you’ve ever been told that your detergent voids the warranty on your dishwasher or other appliances, you’re not alone. This claim is surprisingly prevalent among service professionals and manufacturers who want to avoid liability for damages they might blame on improper cleaning agents. But is it really the detergent’s fault? Or is there more to the story?
Early in my troubleshooting journey, I made the mistake of dismissing the importance of manufacturers’ guidelines, thinking I could save a few bucks with generic brands. That was a costly error. According to appliance diagnostics experts, understanding the specific requirements for your appliance is crucial in preserving your warranty and ensuring optimal performance. Ignoring these guidelines can lead to unnecessary denials of warranty claims, leaving you out of pocket for repairs.
Is the Detergent Debate Really Worth the Hassle?
Many homeowners worry about the cost of manufacturer-approved detergents versus generic alternatives. The truth is, some detergents contain additives that can damage parts or clog vents—issues that service technicians might blame on improper use, leading to warranty denials. The question is—how can you confidently choose the right cleaning agents without risking your warranty?
If you’re tired of facing the same argument about detergent choices, perhaps it’s time to revisit the proper diagnostic procedures. Knowing exactly what’s causing issues and communicating effectively with your technician can make all the difference. For practical tips on diagnosing appliance problems accurately, check out these expert troubleshooting guides. Ready to learn what my biggest mistake was early on—and how you can avoid it? Let’s get started.
Use Visual Clues to Pinpoint Issues
Start by inspecting your dishwasher for obvious signs like leaks, corrosion, or damaged seals. For example, I once spotted a small crack in my door gasket that was causing water to seep during cycles. Recognizing these visual signs early can save you from costly repairs and warranty denials. When in doubt, use a flashlight or even an infrared camera to reveal hidden leaks or overheating components.
Employ Multimeter Tests for Accurate Diagnosis
Equip yourself with a multimeter to test key electrical parts such as heating elements, control boards, and sensors. For instance, I tested my dishwasher’s heating element using a budget multimeter and discovered it was dead, which explained the cycle failures. Knowing how to perform these tests prevents misdiagnosis and unnecessary part replacements. Resources like this guide can walk you through the process step-by-step.
Check the Thermal Fuse for Continuity
The thermal fuse acts as a safety device preventing overheating. To verify its condition, disconnect power and set your multimeter to continuity mode. If there’s no beep, the fuse has blown, and replacing it might be your fix. Remember, a blown fuse can mimic other sensor failures, so thorough testing is essential.
Test Mechanical Components Like Solenoids and Valves
Mechanical parts, such as solenoids controlling water flow, can be tested by listening for clicks or using a screwdriver handle to check for movement. For example, I applied the screwdriver handle test to my inlet valve and confirmed it wasn’t opening, which was causing my dishwasher not to fill. Mechanical failures often escape visual inspection but are critical diagnosis points. Resources like this detailed guide can aid in testing.
Monitor Error Codes and User Interface Feedback
Modern dishwashers display error codes that hint at specific problems. If your appliance shows a code, consult your manual or this troubleshooting resource to interpret it accurately. Remember, these codes are just clues—use them alongside visual and electrical tests for conclusive diagnostics.
Document Every Step to Support Warranty Claims
Keep detailed notes and take photos or videos of your tests, signs, and replacements. When it becomes time to file a warranty claim, this documentation proves your troubleshooting efforts and adherence to guidelines. Submitting clear evidence can significantly improve your chances of dispute resolution, especially if the manufacturer’s technician questions your diagnosis.
Many homeowners operate under the misconception that troubleshooting appliances is straightforward—simply identify the problem, replace a part, and claim warranty. However, this simplistic view often leads to costly mistakes. In reality, appliance diagnostics involve nuanced interpretation of error signs, electrical testing, and understanding the manufacturer’s specific guidelines. For instance, assuming that a flashing error code is always due to a faulty sensor can mislead you; sometimes, physical inspections or multimeter tests reveal overlooked mechanical or electrical failures.
Another common myth is that warranty claims are automatically approved if an issue occurs within the coverage period. In truth, warranties often come with fine print, requiring evidence that the problem isn’t due to user error or unauthorized repairs. Misinterpreting warranty conditions can result in denials, leaving you to pay out-of-pocket despite coverage.
One hidden nuance is demonstrating proper troubleshooting efforts. Many forget that detailed documentation, such as photos of tests, serial numbers, and repair steps, significantly supports your claim. External sources emphasize that well-documented troubleshooting can enhance dispute resolution and warranty acceptance. According to appliance diagnostics experts, understanding the specific diagnostic procedures for your model—like testing thermal fuses or solenoids—is crucial to avoid unnecessary replacements and warranty issues.
Are you aware of the advanced diagnostic steps that distinguish a minor glitch from a component failure? 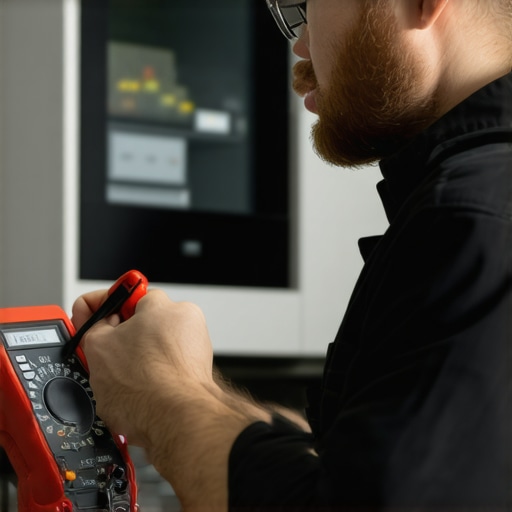 An infrared or multimeter testing tool can reveal issues hidden to the naked eye, preventing premature part replacements. Recognizing the difference between anecdotal advice and expert diagnostics is key to preserving your warranty benefits.
Avoid falling into the trap of over-relying on generic troubleshooting tips from online forums. Instead, consult manufacturer guidelines or professional diagnostics services when in doubt. This approach ensures that you address the root cause properly and avoid warranty pitfalls. For detailed insights on proper diagnostics, check out this comprehensive guide.
Have you ever fallen into this trap? Let me know in the comments.
Essential Equipment for Reliable Diagnostics
Staying on top of appliance health requires the right tools. I rely heavily on a high-quality digital multimeter, like the Fluke 117, because it provides precise readings for testing elements like resistances and continuity in wiring. This accuracy helps me quickly identify faulty control boards or sensors without guesswork. Additionally, an infrared thermometer enables me to measure the temperature of dishwashers’ heating elements accurately, which is critical for diagnosing issues related to heating cycles, as outlined in this guide.
Another essential piece of equipment is a vibration or sound sensor. I use a stethoscope or a contact microphone to listen and pinpoint irregular noises indicating mechanical problems, such as worn-out motors or clogged pumps. Coupled with a good flashlight and mirror, I can visually inspect hard-to-reach components like spray arms or seals for cracks or debris that can impair performance.
Why Regular Maintenance is a Game Changer
Routine checks and cleaning prolong your appliance’s lifespan and prevent unexpected breakdowns. I recommend cleaning the filters and spray arms monthly and inspecting door seals for damage. Using a combination of vinegar and baking soda periodically helps dissolve mineral buildup and mold, keeping components like door gaskets in top shape. For thorough cleaning, I advise avoiding harsh chemicals which can damage modern seals—see this article.
Maintaining proper water pressure is also vital. Low pressure can cause poor wash cycles or leaks. Consider installing a pressure gauge to monitor this or calling in a professional if readings are inconsistent. Consistent maintenance prevents small issues from spiraling into costly repairs, thus safeguarding your warranty and ensuring long-term appliance health.
How do I keep my dishwasher working over time?
Staying ahead of problems involves a combination of scheduled inspections, professional diagnostics when needed, and using specialized tools for accurate testing. Keep a log of maintenance activities, error codes, and repairs; this documentation supports warranty claims and helps identify recurring issues. Remember, the future of appliance maintenance points toward smart diagnostics—integrating IoT-enabled sensors that alert you to issues before they escalate. These innovations will make troubleshooting more proactive and less reliant on manual inspections.
How can I troubleshoot my dishwasher without guessing?
One powerful tip is to use a multimeter not just for electrical testing but also to verify the thermal fuse’s integrity, as detailed in this resource. Testing the fuse for continuity can prevent unnecessary replacements of control boards and save you money. I highly recommend trying this method next time your dishwasher exhibits cycle failures or erratic behavior; it’s an easy, cost-effective way to diagnose potential issues accurately. Don’t forget to reference manufacturer diagrams for wiring specifics, ensuring safe and correct testing.
Lessons That Changed My Diagnostics Game
One of the most illuminating lessons I learned was that quick fixes often mask underlying issues. Jumping to replace parts without thorough testing can void warranties and waste money, so patience and detailed diagnostics are key.
I also realized that manufacturer-specific troubleshooting steps are deeply valuable. Relying solely on generic advice can lead you astray, emphasizing the importance of consulting official manuals and guides like this resource to ensure accuracy.
Moreover, I discovered that meticulous documentation of tests and findings not only clarifies the troubleshooting process but also strengthens warranty claims. Photos, videos, and detailed notes have saved me from repair disputes and unnecessary expenses.
Lastly, I learned that investing in the right diagnostic tools, such as a quality multimeter or infrared thermometer, can make complex electrical and thermal tests manageable for amateurs, turning guesswork into certainty.
Tools and Resources That Elevated My Repairs
My go-to multimeter, the Fluke 117, has been indispensable for accurate electrical testing. Its reliability ensures I can quickly pinpoint issues like dead control boards or faulty sensors with confidence. To handle thermal diagnostics, an infrared thermometer from Seek Thermal allows me to assess heating element performance swiftly, helping identify overheating or failure points early. For mechanical assessments, a good stethoscope and a flashlight have revealed hidden motor faults and leaks that visual inspection alone might overlook.
Complementing these tools are expert guides like this troubleshooting resource. They provide step-by-step procedures that are invaluable, especially when diagnosing tricky issues like solenoid failures and drain pump problems. Additionally, manufacturer manuals and diagnostic codes databases help me interpret error signals accurately, ensuring my diagnostics are precise and trustworthy.
For documentation, I keep a dedicated troubleshooting journal, capturing test results, error codes, and observed symptoms. This habit has proven vital when submitting warranty claims or discussing issues with technicians, as it proves my proactive approach and understanding.
Believe in Your Diagnostic Journey
Embarking on appliance diagnostics might seem daunting at first, but remember, every challenge is an opportunity to learn something new. With the right tools, resources, and mindset, you can uncover issues confidently and protect your warranty benefits. Think of diagnostics as a puzzle—each test and observation brings you closer to the full picture.
Don’t shy away from experimenting with electrical and thermal tests; these skills empower you to avoid unnecessary part replacements and insurance claims denials. In the end, mastering diagnostics isn’t just about fixing appliances; it’s about becoming your own troubleshooting hero.
What has been your biggest breakthrough in diagnosing appliance issues? Share your story below—I’d love to hear how you’ve tackled tricky repairs!