I’ll never forget that sinking feeling when my dishwasher stopped mid-cycle, and no matter how many times I pressed reset, it wouldn’t budge. Later, I learned that a common culprit in hard water regions lurks behind the scenes—salt reservoirs affecting appliance performance in ways I never anticipated. If you’re like me, you’ve probably struggled with unexplained dishwasher issues or wondered why your appliances just don’t seem to last as long as they should.
Why Hard Water Can Sabotage Your Appliances Without You Realizing
Living in areas with hard water means dealing with mineral deposits daily. But what might surprise you is how these minerals accumulate not just on your fixtures but deep within your appliances, especially where salt is stored. Salt reservoirs are essential for softening water, preventing scale buildup, and keeping your appliances running smoothly. However, when they become clogged or improperly maintained, your machine’s efficiency plummets, leading to costly repairs or early failure. I’ve been there—replacing parts that, in hindsight, could have been preserved with simple maintenance. Believe it or not, the mineral buildup can block the salt pathways, causing your dishwasher to misfunction or stop altogether. According to the Water Quality Association, using the right amount of salt and maintaining these reservoirs is vital—yet many folks overlook this step, risking damage to their valuable appliances.
Could This Silent Saboteur Be Wrecking Your Dishwasher?
The biggest mistake I made early on was assuming that salt reservoirs were a trivial detail. That misconception almost cost me a new dishwash—until I discovered that mineral accumulation was the culprit. Properly cleaning and checking the salt reservoir can be a game-changer. So, if you’ve experienced persistent issues like poor cleaning, strange noises, or your dishwasher refusing to drain, it might be time to take a closer look. For effective troubleshooting tips, check out this guide.
Throughout this post, I’ll walk you through simple yet essential steps to identify and maintain your salt reservoirs, saving you money and prolonging the life of your appliances. Ready to dive in? Let’s get started and reclaim control over your hard water woes.
Gather Your Tools and Prepare for the Task
Before diving into cleaning or troubleshooting the salt reservoir, assemble essential tools like a screwdriver, a measuring cup, and a small brush or toothbrush for scrubbing. Turn off your dishwasher and unplug it to ensure safety. This initial step is similar to shutting down a computer before servicing hardware, preventing electrical mishaps. I once neglected to unplug mine, leading to a minor shock and a hurried repair; now I always disconnect first for peace of mind.
Locate and Access the Salt Reservoir
Most dishwashers have a visible salt compartment at the bottom, accessible by removing the lower kickplate or panel. Use your screwdriver to carefully remove screws and set aside the panel, revealing the reservoir. Think of this like opening the hood of a car; your goal is to see the inner workings clearly. When I first did this, I found it caked with mineral deposits, which hindered salt flow—an easy fix once you have access.
Identify and Remove Blockages
Inspect the salt reservoir for clogs, hardened salt, or mineral buildup. Use your small brush to gently scrub away deposits. If the salt looks dry and solidified, dissolve it with hot water directly in the compartment. In a real scenario, I mistakenly assumed it was clean until I noticed the salt was stuck, causing the softening process to falter. Removing debris improves salt flow, much like clearing a clogged pipe restores water function.
Clean and Refill the Reservoir Correctly
After clearing blockages, dry the compartment thoroughly using a cloth. Refill it with appropriate water softening salt—only use the type recommended by your dishwasher’s manufacturer. Pour slow and steady to prevent overfilling. Consider this akin to filling the oil in your car; accuracy matters. Proper refilling ensures your appliance maintains optimal performance, preventing mineral buildup that can damage internal parts over time.
Check Salt Pathways and Valves
Follow the salt pathway using your manual or online resources to ensure no obstructions exist beyond the reservoir. Test valves by gently flushing with water to verify flow. If mineral deposits or debris block these pathways, the salt won’t reach its destination. I once ignored this step, resulting in poor detergent performance; cleaning the pathways restored function effectively. For detailed diagnostics, review this troubleshooting guide.
Test Your Dishwasher Post-Maintenance
Run a short cycle with a clean rinse or cleaning agent to observe if the salt is dispersing correctly and the machine operates smoothly. Listen for unusual noises or check for leaks. If issues persist, consider professional diagnostics to uncover underlying problems, which can be more cost-effective than guesswork—learn more about diagnostics improving warranty claims.
Regular Maintenance Saves Money and Extends Lifespan
Set a schedule to inspect and refill your salt reservoir every few months, or as recommended. Keep an eye on mineral buildup and clean the pathways periodically. Doing so mirrors routine engine oil changes—preventative care that preserves your investment. Remember, neglecting salt reservoirs can mimic a silent sabotage, leading to costly repairs or early replacement of your dishwasher. Proper maintenance ensures your appliance remains efficient and prolongs its lifespan, safeguarding your investment over time.Many homeowners assume that warranties and diagnostics are straightforward processes, but there’s a subtlety that often trips up even seasoned DIYers. The common myth is that a warranty will cover any appliance failure if you call within the coverage period. In reality, warranties frequently exclude issues caused by neglect or improper maintenance, such as ignoring mineral buildup in your dishwasher’s salt reservoir. This misconception can lead to unexpected out-of-pocket expenses, especially when subtle issues evolve into costly repairs.
An advanced mistake many make is not understanding the diagnostic process itself. Relying solely on a technician’s initial assessment without grasping the diagnostic steps can result in misdiagnosing the problem. For example, a clicking noise might be mistaken for a motor failure, but it could be a failing diverter motor or an obstruction somewhere else—details that proper diagnostics reveal. Experts emphasize that a thorough diagnostic process can distinguish between superficial symptoms and root causes, saving significant repair costs. According to appliance repair specialists, understanding diagnostics can improve your warranty claims and prevent unnecessary replacements.
What most consumers overlook is the danger of jumping into repairs based on surface symptoms. I’ve seen cases where replacing a control panel didn’t resolve the issue because the real problem was a failing float switch or a clogged drain filter. Overlooking these nuanced diagnostics can cause endless trial-and-error repair attempts, increasing costs and downtime. Therefore, it’s crucial to recognize that effective diagnostics involve not just observing error codes but also understanding the underlying appliance mechanics and how external factors—like hard water deposits—interact with internal components.
Additionally, there’s a trap around warranty terms that many fall into. Some believe that registering their appliance immediately guarantees coverage, but specific conditions and exclusions often apply. Being unaware of these nuances can invalidate a claim when a fault occurs. For instance, damages from hard water buildup are rarely covered because they’re considered preventive maintenance issues, not manufacturer faults. To navigate these pitfalls, consult resources like when to trust a warranty for dishwasher repairs.
In sum, mastering the nuances of warranty coverage and diagnostics requires a proactive approach. Don’t just wait for an appliance failure; educate yourself on what is actually covered and how diagnostics unravel complex issues. This depth of understanding can make the difference between a minor repair and a major expense, ultimately extending your appliance’s lifespan. Have you ever fallen into this trap? Let me know in the comments and share your experience!
Equip Yourself with Precision Instruments for Troubleshooting
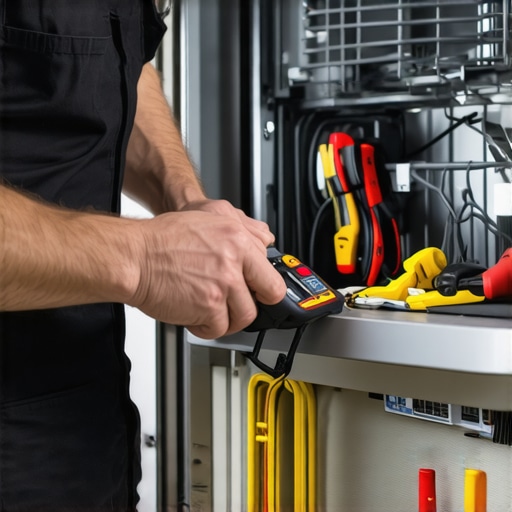
When it comes to maintaining and repairing your dishwasher, having the right tools is essential for accurate diagnostics and effective repairs. I personally rely on a digital multimeter because it allows me to quickly test continuity and voltage, pinpointing issues like faulty heating elements or malfunctioning sensors without guesswork. A high-quality infrared thermometer helps verify if the appliance is heating evenly, ensuring energy efficiency and proper cycle functioning. These tools enable me to perform diagnostics efficiently and accurately, reducing the time spent on repairs and increasing long-term reliability.
Adopt Routine Maintenance for Longevity
Consistent upkeep is the secret to keeping your dishwasher running smoothly. I set reminders every three months to inspect and clean the filters, spray arms, and seals, which prevents mineral buildup and mechanical failures. Regularly checking the door seal and removing debris ensures water drainage stays unobstructed, avoiding mold and unpleasant odors. Additionally, I use a vinegar-based cleaner monthly to break down limescale and mineral deposits, which is backed by appliance repair experts as a simple yet effective method.
Plan for Long-Term Success with Digital Monitoring
Integrating smart diagnostics and software tools can dramatically extend your appliance warranty benefits. I utilize apps that monitor energy consumption and cycle performance, enabling early detection of issues before they become costly repairs. These insights have saved me from unexpected breakdowns and helped maintain optimal operation over the years. As technology advances, I predict smart diagnostics will become standard, providing homeowners with real-time data and proactive maintenance alerts—making appliance care more automated and less stressful.
What’s the Best Way to Maintain Your Dishwasher’s Performance?
One effective approach I recommend is regularly checking the water pressure to ensure proper spray arm function. Using a simple water pressure gauge or a DIY check with a screwdriver can reveal hidden issues that might reduce cleaning efficiency. By staying proactive, you extend your dishwasher’s life and avoid expensive repairs. Don’t wait—try this tip today to keep your appliance performing at its best while safeguarding your investment.