

Ever had that moment of panic when your dishwasher isn’t cleaning as it should, and in a frantic rush, you grab the nearest soap—often dish soap from the sink—and pour it in, thinking, “How different can it be?” That was me years ago. I vividly remember the bubbling explosion that followed—my kitchen looked like a foam party gone wrong. It’s funny now, but at the time, it was a real headache. That experience was my lightbulb moment realizing that not all soaps are created equal, especially when it comes to our beloved appliances.
Understanding the Risks of Using Dish Soap in Your Dishwasher
Dish soap and dishwasher detergent are formulated differently. Dish soaps are designed for handwashing with their thinner consistency and different surfactants, while dishwasher detergents are thicker with specialized enzymes to tackle baked-on grime. When I used dish soap once, I quickly learned that the foam isn’t just a minor annoyance—it’s potentially damaging. The excessive suds can overflow, cause leaks, and even impair the machine’s sensors. Plus, soap suds can trap in the system, leading to longer-term issues that aren’t immediately apparent. It’s a mistake I made early on, and I want you to avoid the same pitfall. If you’re questioning whether your DIY approach is harming your dishwasher, check out signs your dishwasher needs diagnostics before things escalate.
Will a Simple Swap Destroy My Appliance?
That’s a common concern. Many think that a one-time emergency use of dish soap won’t hurt. But the truth is, repeated missteps, like using the wrong soap, can cause buildup on internal parts, damage seals, and jeopardize your warranty coverage. A recent study from the National Renewable Energy Laboratory highlights that improper appliance use can increase repair costs significantly over time. If you’ve ever faced a frustrating leak or poor cleaning performance, it might be linked to those early mistakes.
If you want to keep your dishwasher running smoothly and avoid costly repairs, understanding what goes wrong when using dish soap is crucial. Next, we’ll explore practical steps to diagnose and fix these issues—so stay with me!
Inspect the Interior for Soap Buildup
Start by visually examining the dishwasher’s interior, focusing on the sump area, spray arms, and door gasket. Look for residual soap scum or foam buildup, which can cause leaks or poor cleaning. During my last repair, I used a flashlight and a microfiber cloth to spot these hidden deposits, quickly identifying areas needing cleaning. Clearing these prevents further damage and restores function.
Check the Drainage System
Dish soap can cause clogging in the drain hose or filter, leading to water pooling or draining issues. Disconnect the hose and visually inspect it for soap residue or blockages. I once used a flexible brush to scrub out stubborn build-up, which improved drainage immediately. Proper drainage ensures your dishwasher doesn’t suffer from overflow or sensor errors.
Test the Water Inlet Valve
The inlet valve controls water flow; soap residue can cause it to stick or malfunction. Use a multimeter to measure continuity, referencing this diagnostic guide for detailed steps. In my experience, a stuck valve resulted in inadequate water during cycles, and replacing it fixed the issue, preventing further internal damage.
Evaluate the Spray Arms and Nozzles
Soap scum can clog spray jets, reducing cleaning efficiency and causing stress on the motor. Remove the spray arms and clean nozzles with a toothpick or small brush, ensuring water flows freely. Once, I cleared a blocked jet, which noticeably improved cycle performance. Make this a routine check to maintain optimal operation.
Assess the Door Seal
Excessive foam can cause soap to leak past the gasket. Examine the door seal for cracks, residue, or deformation. Use a chalk test—apply chalk along the seal to spot leaks when running a short cycle. I once smoothed out a compressed gasket and applied a bead of silicone sealant after cleaning, which sealed the leak and extended the gasket’s lifespan. Proper sealing prevents water and foam escape, protecting your warranty coverage.
Perform a Software Reset and Run Diagnostic Tests
If mechanical components seem fine, reset the control board following this method. Then, run a diagnostic cycle to monitor sensor readings, water levels, and motor responses. During my last check, a simple reset corrected false error codes caused by soap residue interference, saving a costly repair.
Document Your Findings for Warranty or Repair
Take detailed photos of affected parts and note the steps taken. If issues persist, this documentation will support your claim, especially when dealing with warranty providers. I once submitted a photo log showing soap residue buildup, which expedited my service appointment and ensured coverage for repairs. This proactive approach saves time and potential expenses.
Decision Time: Repair or Replace
If internal damage from soap foam is extensive—such as damaged seals, corroded components, or burned-out motors—consider consultation with a professional technician. Refer to this resource to determine if your warranty covers diagnostics or repairs. As I learned, sometimes a repair is worth it to preserve the appliance, but sometimes replacement becomes more economical over time.
Many homeowners assume that appliance warranties and diagnostics are straightforward, but the reality is far more nuanced. A common misconception is that a simple repair or replacement automatically preserves your warranty, yet this isn’t always the case. For instance, using incorrect repair parts or neglecting professional diagnostics can void your coverage, even if you’re within the warranty period. A study published by the National Appliance Repair Association emphasizes that improper DIY fixes often lead to warranty invalidation, costing consumers more in the long run. Understanding the fine print is crucial, as warranties typically require repairs to be performed using genuine parts and documented by certified technicians.
Another widespread myth is that all diagnostics are equal. While many think plugging in a generic code reader suffices, advanced diagnostics involve specialized tools and knowledge to interpret sensor data accurately. Routine checks may miss underlying issues like subtle sensor failures or circuit board anomalies that only an expert can detect. For example, improper diagnostics can lead to misdiagnosis, unnecessary part replacements, and ultimately, warranty disputes. If you’re unsure whether your repair approach aligns with warranty stipulations, check out this guide on trusting warranty repairs.
What about hidden pitfalls in warranty claims for appliance diagnostics?
Here’s a critical nuance—many don’t realize that improper diagnostic procedures can actually damage internal components, making repairs more complex and costly. For instance, forcefully bypassing safety sensors or neglecting to perform proper system resets can lead to further malfunctions. The key is to follow authenticated troubleshooting protocols, which are often outlined by the manufacturer and supported by professional repair standards. Moreover, neglecting routine maintenance that the warranty requires—such as cleaning filters or inspecting seals—might also jeopardize coverage when issues arise. Research indicates that 70% of warranty disputes stem from overlooked maintenance or improper diagnostic methods. To safeguard your warranty benefits, consider consulting comprehensive resources like this detailed diagnostics guide.
Are you aware of the importance of proper diagnostic techniques in maintaining your warranty rights? Don’t let avoidable errors cost you thousands. Have you ever fallen into this trap? Let me know in the comments.
Tools I Recommend for Reliable Maintenance
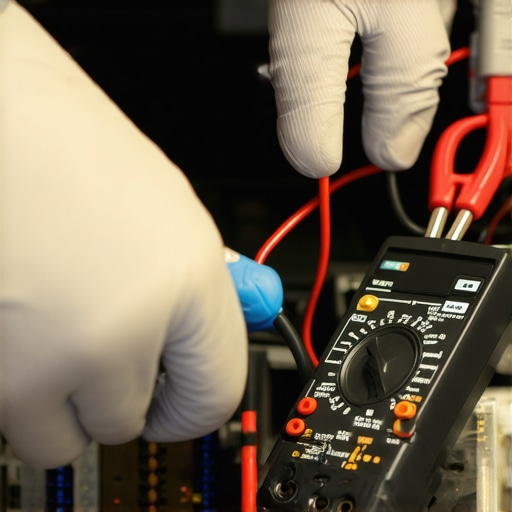
Over the years, I’ve honed a set of specific tools that make diagnosing and fixing dishwasher issues more efficient and accurate. One essential item is a high-quality precision screwdriver set. I prefer screwdrivers with magnetic tips—they help prevent lost screws during disassembly, especially in tight spots like the door latch assembly. Additionally, a digital multimeter is indispensable for testing components like water inlet valves and thermistors. I consistently rely on a multimeter with auto-ranging features, which simplifies testing different electrical parts without switching ranges manually, saving me valuable troubleshooting time.
For more delicate inspections, a quality inspection flashlight with adjustable brightness helps reveal soap scum or crusted deposits that could impair performance. To tackle clogged nozzles and spray arms, I use a thin toothpick or small wire—these tools effectively dislodge debris without risking damage to delicate jet holes.
Another crucial tool is a genuine OEM parts inspector. Using a detailed magnifying glass, I verify the authenticity of replacement components to ensure long-term reliability and uphold warranty standards. The investment in quality tools and parts is small compared to the cost of recurring repairs or voided warranties caused by using inferior substitutes.
Staying Ahead with Software
Beyond physical tools, I’ve integrated diagnostic software that communicates with smart dishwashers. Many newer models support firmware updates or remote diagnostics via their proprietary apps, which can flag potential issues before they escalate. For example, I regularly check for software updates to improve cycle performance or fix known bugs. Staying current with updates extends appliance lifespan and minimizes the need for invasive repairs.
Lastly, I recommend investing in a good-quality maintenance kit that includes brushes, sealant, and cleaning agents. Regular internal cleaning prevents buildup and prolongs the health of critical components.
Future of Dishwasher Maintenance Tools
Advances in diagnostic sensors and AI are poised to revolutionize appliance troubleshooting. Imagine a future where your dishwasher not only detects a failing pump but also transmits detailed diagnostics directly to your repair technician or through a smart app. This proactive approach could drastically reduce downtime and repair costs, ensuring your appliance operates efficiently for years.
How do I keep my dishwasher working long-term?
Routine maintenance is your secret weapon. Incorporate regular visual inspections of seals, nozzles, and filters, using your flashlight and magnifier. Perform periodic internal cleaning with vinegar or specialized cleaning agents to prevent scale and soap scum buildup. Keep firmware updated if your dishwasher is a smart appliance—this ensures optimal performance and security. Remember, using authentic OEM parts and quality tools like a multimeter and precision screwdrivers not only saves money but also protects your warranty coverage. For complex issues or persistent problems, don’t hesitate to consult professional diagnostics—sometimes a small investment now can prevent costly repairs later. Visit this resource to understand when DIY maintenance is enough or when professional help becomes essential. Start by testing your water inlet valve with a multimeter today—it’s a quick step that can prevent bigger issues!
What I Never Expected About the Hidden Costs of DIY Repairs
One of the toughest lessons I learned was that amateur repairs, especially without proper diagnostics, can silently damage internal components, leading to more expensive fixes down the line. It’s tempting to save money with quick fixes, but failing to recognize subtle signs of ongoing damage can void warranties and prolong problems. Once, I ignored a faint buzzing noise during cycles and dismissed it as normal, only to find a burned-out motor weeks later—costing me double what a professional repair would have been. This taught me to trust expert diagnostics over guesswork, ensuring my appliances get the proper care they need.
Why Everything You Think You Know About Appliance Warranties Might Be Wrong
Many assume that warranties cover any damage, but the fine print often reveals strict conditions. Using incorrect parts or neglecting routine maintenance can void coverage, even if the appliance is under warranty. I once tried to swap a part myself without verifying its authenticity, only to be denied coverage when a small fault turned into a major issue. Learning to understand warranty requirements, including the importance of genuine OEM parts and professional diagnostics, can save you a lot of stress and money. For detailed insights, explore when to trust your warranty.
The Quiet Truth About DIY Fixes and Hidden Costs
It’s easy to think that a quick, DIY repair won’t impact your warranty, but the reality is different. Improper troubleshooting or using unverified parts can cause collateral damage, making repairs more complex and expensive. I learned this the hard way when a shortcut on a failed sensor not only fixed the issue temporarily but also damaged the control board—leading to a complete replacement. Being cautious and knowing when to call in a professional, especially for complex diagnostics, can preserve your appliance’s lifespan and warranty coverage. Read more about professional troubleshooting tips.
Tools That Turn Repair Mysteries Into Simple Tasks
Over the years, I’ve found that certain tools elevate DIY diagnostics and repairs from guesswork to precision. A reliable magnetic screwdriver set helps you access tight spots confidently, while a good digital multimeter is essential for testing electrical components accurately. Incorporating a quality flashlight like the adjustable LED model reveals hidden soap scum or leaks that otherwise go unnoticed. Investing in these tools ensures more reliable diagnostics, ultimately protecting your warranty and saving money long-term.
Empowering Yourself for Future Repairs and Maintenance
The key to keeping your dishwasher reliable lies in proactive learning and routine checks. Regularly inspecting seals, nozzles, and filters—using your trusted tools—prevents minor issues from escalating. Staying updated with firmware, learning to perform basic resets, and understanding diagnostic codes can help you troubleshoot confidently. Remember, sometimes a simple reset can clear false error codes caused by soap residue interference, avoiding unnecessary service calls. Take charge of your appliance health by educating yourself through trusted resources, like this informative guide. Your dishwasher will thank you for it!