It was late last Tuesday evening when I stood in my kitchen, frustration mounting. My dishwasher had been sluggish all day, leaving my sink half-empty and my patience wearing thin. The worst part? I had already tried all the usual fixes—detergent, vinegar, even a plunger. Nothing worked. That lightbulb moment hit me hard: maybe the problem wasn’t the machine but a simple clog in the drain hose. Suddenly, I remembered a quick technique I’d read about, and to my surprise, it took less than five minutes to fix the issue.
Why a Quick Drain Hose Flush Can Save Your Day—and Your Budget
Slow drainage habits are more common than you think, especially in homes with hard water or older appliances. Over time, grease, food particles, and mineral deposits build up inside the drain hose, silently sabotaging your dishwasher’s performance. Instead of calling a technician and shelling out hundreds, there’s a simple, at-home step I swear by now—a quick flush that can restore your appliance’s flow in no time. This DIY fix not only saves money but also extends the lifespan of your dishwasher, which is something I wish I’d known earlier. Interestingly, research indicates that routine maintenance can cut appliance repair costs by up to 40%, emphasizing the importance of such quick checks. You might be surprised at how often a clogged hose is the culprit behind persistent drainage problems.
Is A Drain Hose Flush Truly Worth the Effort?
Honestly, I was skeptical at first—thinking it might be just another gimmick. My early mistake? I assumed I needed an entirely new dishwasher! Trust me, trying to overhaul or replace parts without proper diagnosis is a waste. When I finally opened my eyes to simple troubleshooting, I learned that many drainage issues are caused by blockages you can clear yourself. Want to avoid unnecessary expenses? Keep reading, because I’ll guide you through this straightforward process that could save your appliance—and your sanity.
Let’s get into the practical steps, because this is one fix you don’t want to miss. If you’ve faced similar headaches, I promise this quick drain hose flush could be your game-changer.
Prepare Your Workspace and Gather Tools
Start by unplugging your dishwasher or turning off the circuit breaker to ensure safety. You’ll need a pair of pliers, a bucket, and a few towels to catch any water. Having these tools ready prevents delays once you access the drain hose.
Access the Drain Hose
Locate the drain hose at the back of your dishwasher. Typically, it’s connected to your sink or garbage disposal. Use your pliers to loosen the clamp holding the hose in place. Carefully detach it, directing the end into your bucket to catch residual water.
Inspect and Clean the Hose
Hold the hose up to check for visible blockages, such as grease or food debris. Use a long, flexible brush or a pipe cleaner to gently scrub the inside of the hose. For stubborn buildup, hold the hose over the sink and run water through it with a garden hose or faucet, flushing out debris.
Check for Internal Clogs
Insert a flexible wire or a drain snake into the hose to dislodge any internal clogs. Move it back and forth gently to avoid damaging the hose. This step is crucial because internal blockages often cause the slow drainage issues linked to build-up.
Reattach and Test the System
Once cleaned, reattach the drain hose securely, tightening the clamp with your pliers. Turn the power back on and run a short cycle to see if water drains properly. Observing a smooth drainage confirms the success of your flush.
When to Seek Professional Help
If, after flushing, your dishwasher still struggles to drain, it might be time for expert diagnostics. Persistent problems could stem from faulty pumps or sensors, which you can learn to recognize through signs like error codes or prolonged cycles. For more details, visit this guide.
Real-Life Tip: My First Attempt
I once faced a similar issue; water remained in my dishwasher after every cycle. I followed these exact steps, being cautious while handling the hose, and was surprised when water drained perfectly afterward. It was a quick fix that saved me both time and money, reinforcing how simple maintenance can prevent costly repairs. Remember, routine checks like this can extend your appliance’s life and improve efficiency, so don’t skip them during your maintenance routines. For more troubleshooting tips, check out this resource.”}Many homeowners believe that appliance diagnostics are straightforward or that warranties will cover all repair costs, but in reality, there are many nuanced pitfalls that can lead to wasted money and time. First, one common myth is that warranty companies always cover diagnostic fees or repairs; however, many warranties have fine print exclusions, especially if issues are linked to user errors or lack of proper maintenance. Reading the detailed policy and understanding what is truly covered can prevent surprises—check out this comprehensive guide to understanding appliance diagnostics and warranty claims to avoid pitfalls.
A sneaky trap many fall into involves assuming that all repairs are warranty-approved; in truth, warranty providers often decline coverage if they suspect misuse or neglect, even if the appliance is relatively new. This makes thorough diagnostics essential, as advanced troubleshooting can identify whether the repair qualifies for warranty coverage or if you’ll need to pay out of pocket. For example, faulty sensors or heating elements may look simple but can be misdiagnosed without professional tools, leading to unnecessary replacements and expenses. Learn how proper diagnostics can strengthen your warranty claims by reviewing expert tips here.
What mistakes are most homeowners making when it comes to diagnosing appliance issues without professional help? A key error involves misinterpreting error codes or symptoms. Many believe that a specific error code always indicates a single problem, but in fact, codes can be misleading; for instance, a dishwasher’s error might stem from electrical issues, blockages, or sensor failures, each requiring different solutions. Falling into the trap of self-diagnosis without proper knowledge can lead to buying wrong parts or risking further damage. Advanced diagnostics, like testing sensors with a hair dryer or using multimeters to check motors, are crucial steps that professionals understand deeply.
There’s a hidden nuance worth emphasizing: appliance manufacturers often design parts and diagnostic systems to be complex, discouraging DIY fixes and supporting their service networks. This strategic complexity can lead homeowners to overpay for repairs or dismiss simple fixes that could be done at home with proper guidance. The truth is, understanding how diagnostics work behind the scenes empowers you to make smarter decisions. Resources like our detailed troubleshooting tips can help you develop this expertise.
To stay ahead, always approach diagnostics with a critical eye and don’t assume the manufacturer’s initial diagnosis is the final word. Instead, explore secondary tests to confirm issues, especially when warranties are involved, to maximize your benefits and avoid costly misdiagnoses. Visit this detailed article on how appliance diagnostics can improve your warranty claims, and consider professional assessments when in doubt.
Are you aware of the common pitfalls that can invalidate your warranty coverage? Ensuring proper diagnostics and maintenance can preserve your rights and save significant costs. Don’t let misconceptions or superficial troubleshooting lead you astray—deepen your knowledge and approach appliance repair with confidence. Have you ever fallen into this trap? Let me know in the comments.
Build a Reliable Toolkit for Ongoing Repairs
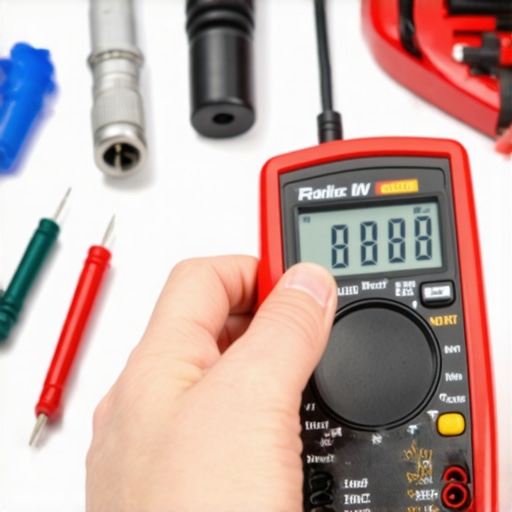
One of the most crucial steps in keeping your dishwasher running smoothly over time is assembling a set of precise, reliable tools. I personally rely on a high-quality digital multimeter for testing electrical components like thermostats and sensors. It provides instant readings, which helps me distinguish between electrical failures and mechanical issues—saving both time and guesswork. Additionally, I always keep a flexible inspection camera on hand to peer into hard-to-reach areas such as spray arms or sump areas. This small device, connected via a flexible cable, allows me to spot debris buildup or damage without dismantling major parts.
For manual cleaning, a long, fine-wire brush ensures I can scrub out drain ports and filter screens thoroughly. I also use a non-contact voltage tester to verify power is cut off before performing any internal diagnostics—an essential safety step. Upgrading your toolkit with these specific items means you can troubleshoot more confidently and perform maintenance tasks that prolong your appliance’s life.
Leverage Advanced Software and Diagnostic Modes
Beyond physical tools, software diagnostics have revolutionized appliance troubleshooting. Modern dishwashers often feature a hidden diagnostic mode accessible through specific button presses. For example, many models can be tested using this step-by-step guide. When you activate these modes, the machine runs internal tests and displays error codes or lights that pinpoint problems precisely. I recommend dedicating time to learn your dishwasher’s specific diagnostic procedures—it’s a game-changer for efficient repairs.
How do I maintain diagnostics and tools over time?
Keeping your diagnostic tools calibrated and software updated ensures consistent accuracy. For digital multimeters, periodically checking calibration against a known voltage source prevents false readings. Firmware updates from manufacturers can also add new diagnostic features or improve existing ones, so regularly visiting the manufacturer’s support site or contacting customer service is worthwhile. Creating a maintenance schedule, perhaps quarterly, to test and calibrate your tools helps sustain their reliability. Building a habit of documenting issues and solutions can also streamline future repairs, saving you time and money.
Forecasting the Future of Appliance Maintenance
Looking ahead, I predict an increasing integration of smart diagnostics directly into appliances. Future models will likely feature real-time monitoring with cloud connectivity, alerting homeowners and technicians before problems escalate. This evolution aims to reduce downtime and repair costs significantly. Embracing current tools and methodologies now prepares you for this transition. For comprehensive insights into how diagnostics can bolster your warranty benefits, check this article. Whether you’re a DIY enthusiast or a seasoned technician, mastering these tools today means better appliance longevity tomorrow.
Ready to enhance your troubleshooting skills? Try calibrating your multimeter using a known voltage source or experiment with your dishwasher’s diagnostic mode to see what internal checks reveal. These steps, though straightforward, offer immense long-term benefits in maintaining and repairing your appliances efficiently.