

Have you ever stood in front of your dishwasher, loaded with dishes and those shiny little soap pods, only to find a stubborn, unmelted chunk clinging to your plates? That frustrating moment when your sparkling clean dreams are dashed because the soap pods refused to dissolve? I’ve been there too, and let me tell you, it’s each time a little wake-up call about how tricky appliance quirks can get.
Navigating the Soap Pod Dilemma
That lightbulb moment hit me after a weekend marathon of cleaning up—again—only to discover that my trusty dishwasher had decided to spit out half my detergent in a stubborn blob. It made me realize how often we overlook simple issues that cause these frustrations, especially since most of us expect a soap pod to dissolve seamlessly on its own. But here’s the truth: there’s a lot more beneath the surface that can hinder its magic performance. Today, I promise we’ll sift through the common causes and find practical solutions to get your soap pods working like new. No more wasted detergent or half-clean dishes. And trust me, once you understand what’s happening, troubleshooting becomes a breeze.
Is Your Dishwasher the Culprit or Just Faulty Pods?
Early in my journey, I made the mistake of blaming the pods themselves—thinking they were inferior or faulty. Turns out, I was missing simple but crucial details like water temperature, cycle selection, or even a clogged spray arm. Skipping these checks and blindly trying different pods only left me more confused. But don’t worry—I’ll guide you through a step-by-step process so your dishes come out spotless and your detergent does its job every time. If you’re tired of playing detective, check out this [helpful troubleshooting guide](https://applianceoutletpro.com/troubleshooting-dishwasher-problems-expert-diagnostics-repair-tips) which helped me pinpoint a sneaky clog that was blocking water flow and preventing pod dissolution.
Test Water Temperature for Optimal Dissolving
Start by ensuring your dishwasher heats water adequately—ideally between 120°F to 160°F. I once used a kitchen thermometer to check my wash water; I found it was only reaching 110°F, which was too low for the soap pellets to dissolve properly. Adjust your water heater settings if needed.
Check and Adjust Heating Elements
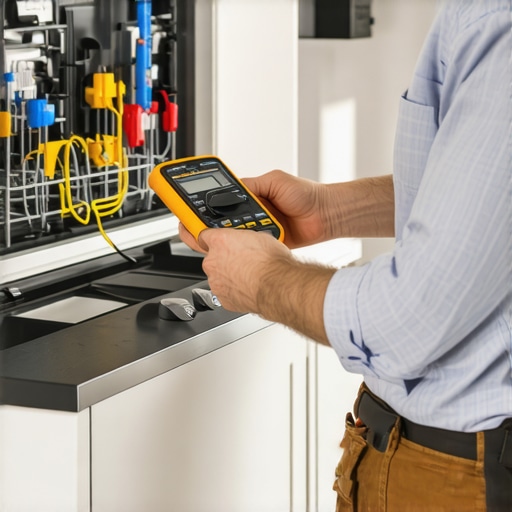
If your dishwasher’s heating element is faulty, it won’t raise water temperature properly. Use a multimeter to test the element’s continuity—disconnected and safe. Replacing a defective heating element can resolve insufficient hot water issues, similar to how testing heating elements saves money.
Inspect Soap Dispenser and Its Mechanism
Sometimes, the problem isn’t water temperature but a jammed or worn dispenser door. I had a jammed latch that prevented the pod from releasing at the right time. Clean the dispenser thoroughly—remove any residue—and lubricate the latch if necessary. Use a small brush or compressed air to clear debris.
Avoid Soap Residue Build-up
Residue can clog the release mechanism, causing pods to stay intact. Regularly clean the dispenser with a mixture of vinegar and water—see this guide. This prevents clogs that block the pod’s release.
Check Water Flow and Spray Arms
Low water pressure or clogged spray arms can impede circulation, affecting soap dissolution. Remove spray arms and use a toothpick to clear nozzles—don’t forget to inspect the dirt trap. Proper spray ensures water reaches the pod and dishes equally.
Examine Water Inlet Valve and Filters
The inlet valve controls water flow into the dishwasher. Use a jumper wire to test if it opens correctly—more on this in this tutorial. Also, clean or replace filters to avoid partial blockages that reduce water delivery, similar to troubleshooting water flow issues.
Assess Cycle and Load Settings
Using the wrong cycle—like a cold rinse—can prevent the pod from dissolving. Always select a hot or sanitize cycle for optimal results. Additionally, avoid overloading—crowded dishes block water jets, reducing temperature and flow. Read more about cycle selection to optimize cleaning.
Evaluate the Soap Pods Themselves
If you suspect defective pods, try different brands or bulk packs to rule out poor quality. Sometimes, packaging can be compromised or soaps expire. Check the expiration date and buy from reliable sources. For warranty purposes, document your scans with a camera to assist in claims, as outlined here.
Seek Professional Diagnostics When Necessary
Persistent problems might require expert help. Professional diagnostics can identify hidden issues like control board failures or internal leaks. If your dishwasher qualifies for warranty repair, understanding diagnostics improves your chances, see this resource.

Essential Tools for Reliable Diagnostics
Investing in the right tools transforms your ability to troubleshoot and maintain your dishwasher effectively. A high-quality multimeter is indispensable for testing electrical components like heating elements and water inlet valves, allowing you to identify faults without guessing. I personally prefer a digital multimeter with auto-ranging features—it simplifies troubleshooting by providing accurate readings quickly, especially when testing control boards or sensors. Additionally, a 1/4 inch nut driver set is excellent for removing panels or components safely, saving time and preventing damage. A toothbrush or small brush helps keep spray nozzles and filters clear of debris, which is crucial for consistent performance.
Why I recommend a digital multimeter
Using a digital multimeter aids in diagnosing issues like faulty heating elements—by checking their resistance—or verifying control board outputs. This prevents unnecessary replacements and ensures accuracy. Testing components yourself also helps build confidence and knowledge about your appliance’s inner workings, making future repairs less intimidating. Here’s a guide on essential tools for homeowners, including how to use a multimeter effectively for dishwasher diagnostics.
How do I maintain my dishwasher over time?
Regular maintenance extends the lifespan of your appliance and reduces unexpected breakdowns. Schedule deep cleanings of filters and spray arms every few months—using vinegar solutions to break down mineral buildup—and inspect the door gasket for cracks or signs of wear. Keep an eye on water inlet filters by removing and cleaning them periodically to ensure unobstructed flow. Also, run diagnostic cycles with your tools periodically to catch issues early. For complex problems, professional diagnostics can save you time and money, especially when warranty claims are involved.
Predicting the Future of Appliance Maintenance
Advancements in smart technology suggest that future appliances will offer integrated diagnostic systems, alerting homeowners to issues before breakdowns occur. Remote monitoring and AI-driven diagnostics will likely become standard, making maintenance more proactive and efficient—saving time, money, and frustration.
The Hidden Lessons I Learned About Diagnostics and Appliance Care
- Sometimes, the most stubborn issues stem from the simplest overlooked causes—like a clogged filter or a worn-out latch—that prevent your dishwasher from doing its job properly. Recognizing this early saved me costly repairs and frustration.
- Rushing to replace parts without thorough testing can lead to unnecessary expenses. Investing time in learning how to use a multimeter or inspecting the water inlet valve turned out to be game-changers for accurate diagnostics.
- Patience and a systematic approach are vital. I found that documenting error codes and behaviors helped me communicate more effectively with technicians and understand my appliance better, ultimately empowering me as a homeowner.
Tools and Resources That Changed My Approach
- Digital Multimeter: An affordable yet powerful tool that helps test heating elements, control boards, and sensors—saving money and preventing guesswork. Check out guides on DIY troubleshooting tools.
- Professional Diagnostics Guides: Reliable online resources, like the articles on appliance troubleshooting, provide detailed step-by-step methods that have helped me distinguish between minor fixes and Serious problems.
- Inspection Cameras: Small, handheld cameras can peek into tight spaces, revealing hidden clogs or broken parts—saving time and money down the line.
Embrace Your Troubleshooting Journey Today
Understanding the root causes of dishwasher issues and confidently performing diagnostics can transform how you care for your appliances. Each fix you master not only extends the life of your dishwasher but also builds your confidence as a DIY detective—ready to face future challenges head-on. Remember, the more you learn, the less you depend on costly repairs, and the more satisfaction you’ll get from maintaining your home. Ready to take the next step in appliance mastery? Dive into the resources, ask questions, and keep experimenting. Your dishwasher, and your wallet, will thank you.